Migrating WordPress website from InMotion Hosting to DigitalOcean
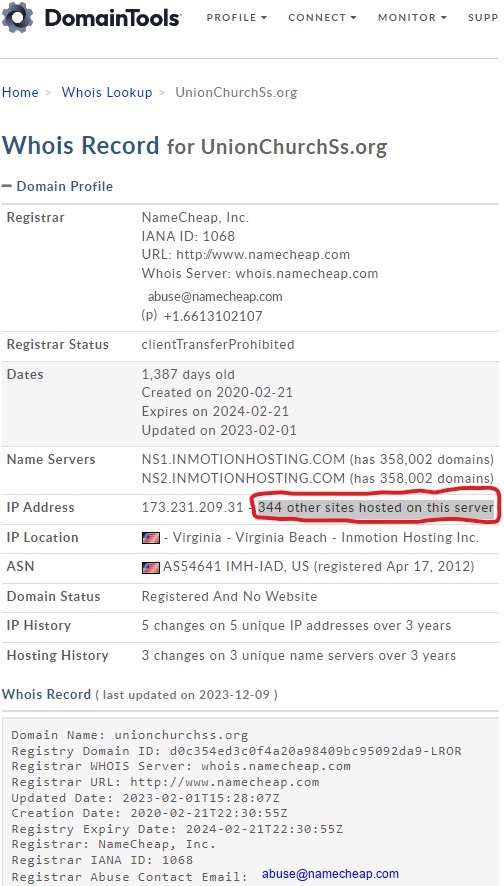
The website unionchurchss.org was hosted on InMotion Hosting. According to https://whois.domaintools.com/unionchurchss.org, there were "344 other sites hosted on this server":
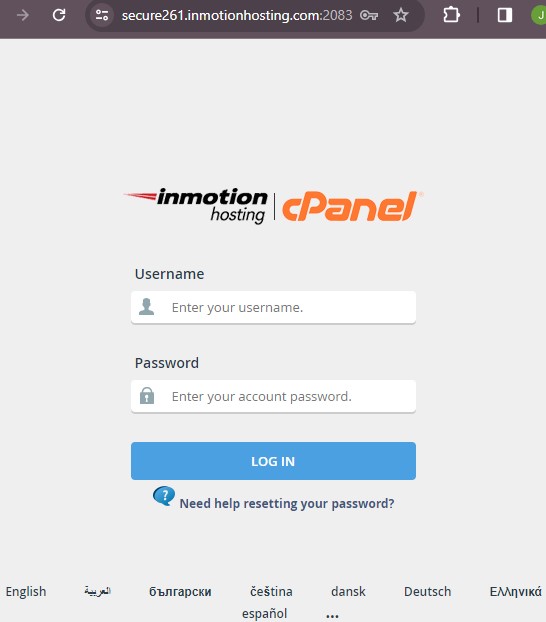
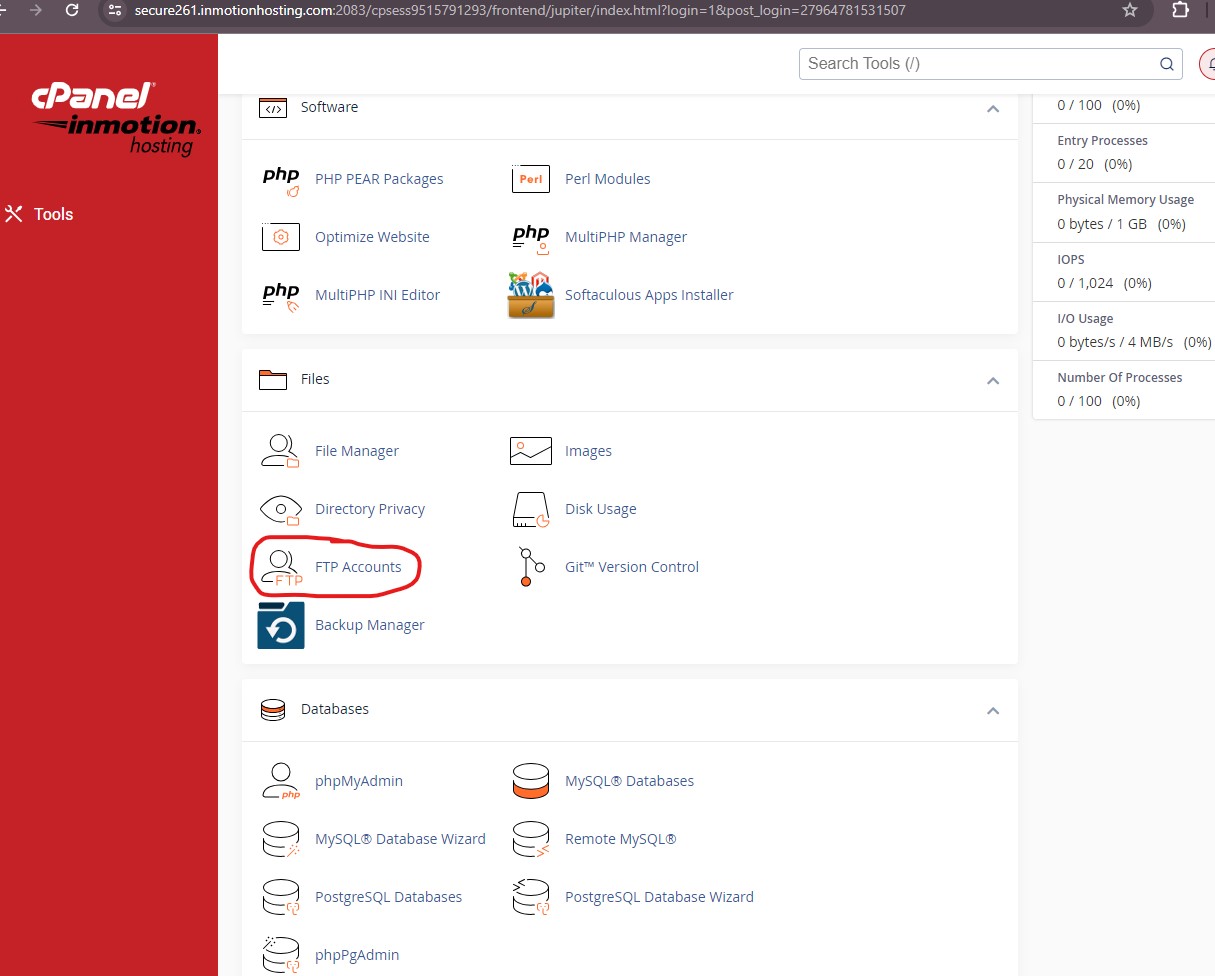
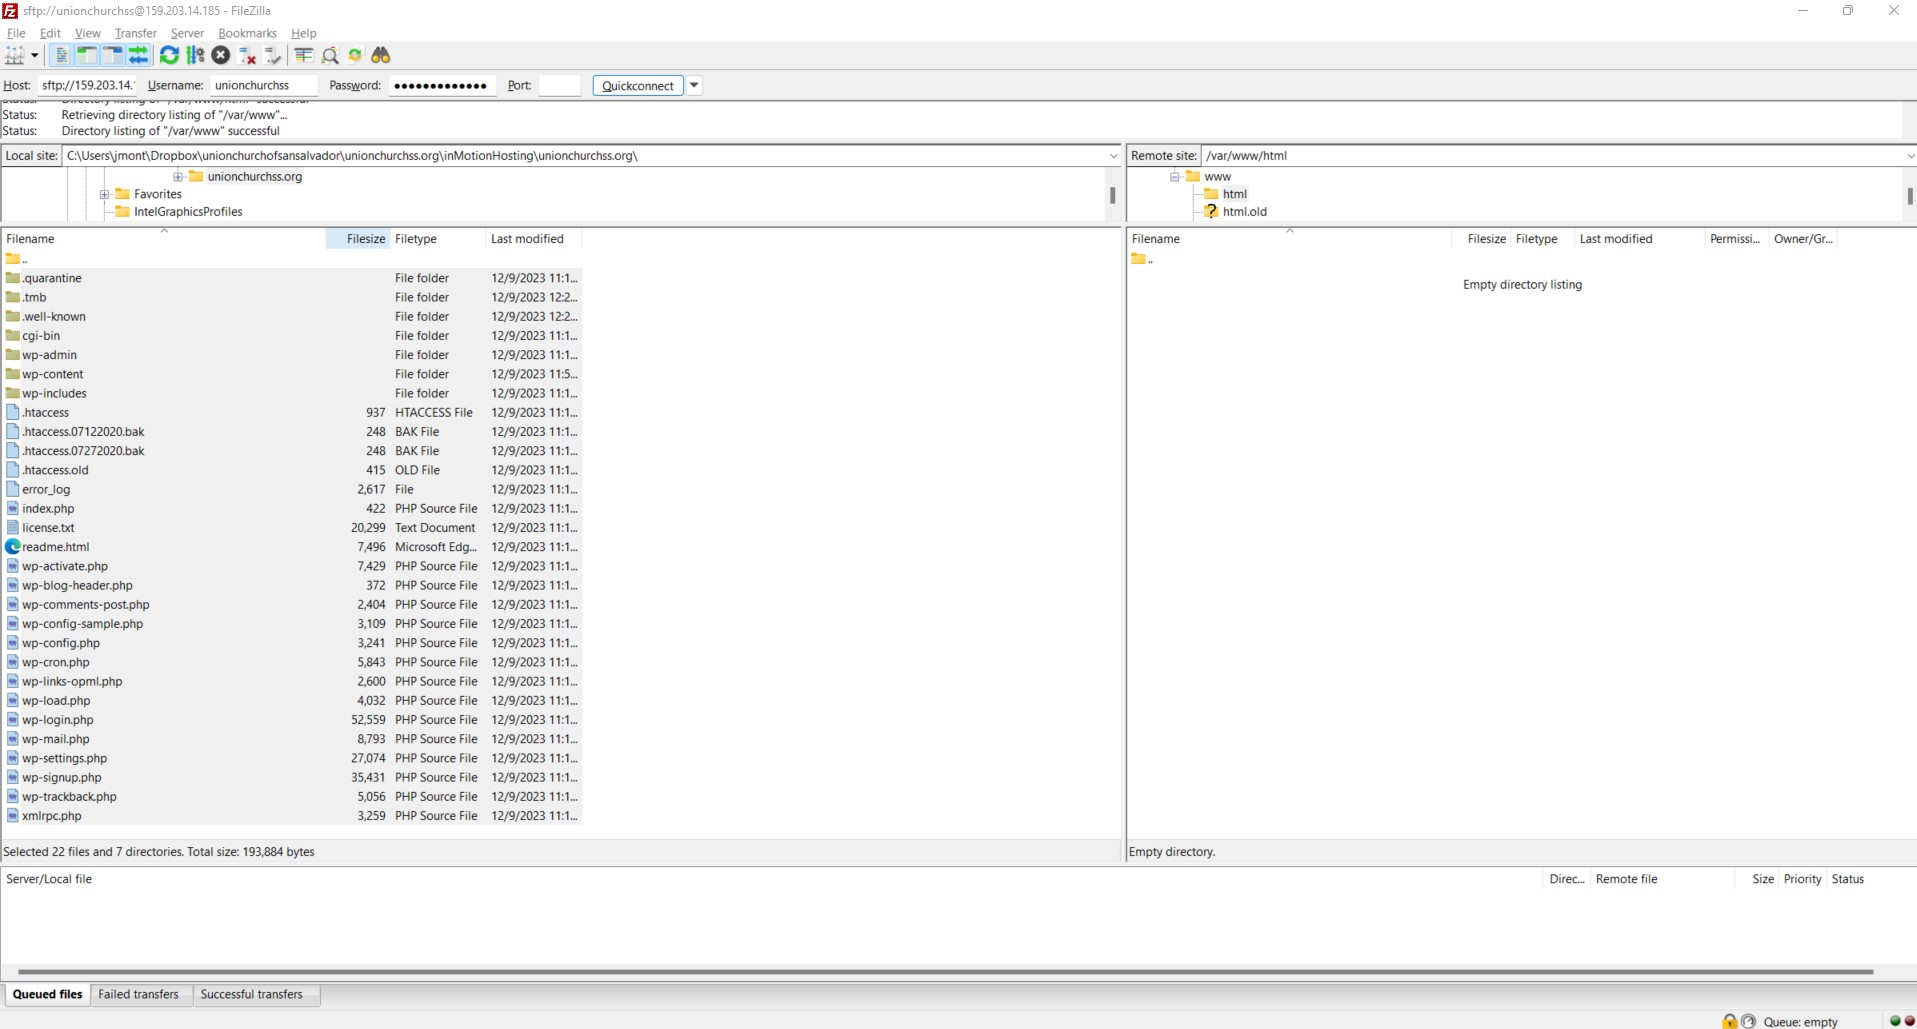
My first step was to use FTP to download WordPress source code and content files hosted on the InMotion Hosting server. I went to my cPanel account at https://secure261.inmotionhosting.com:2083/ to obtain my FTP credentials:
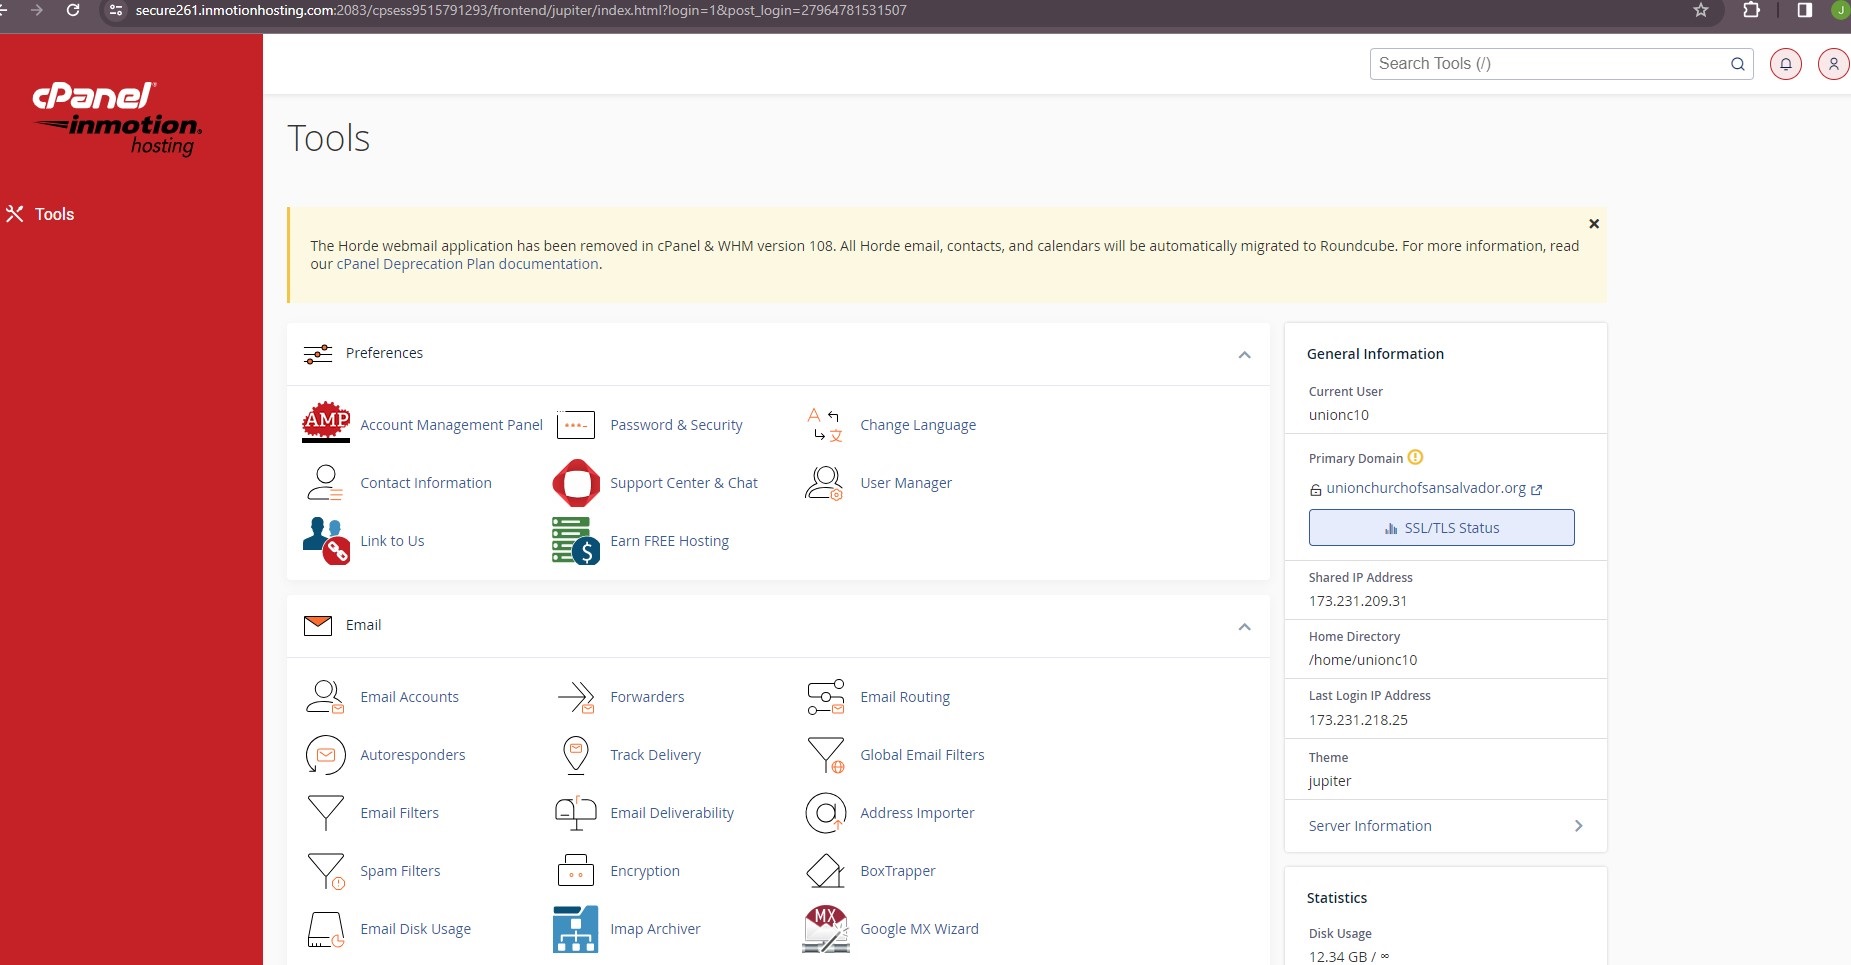
This was the first screen after a successful cPanel login:
I scrolled down to find the FTP Accounts link:
I found the FTP Username Account that I needed to connect to the server using FTP:
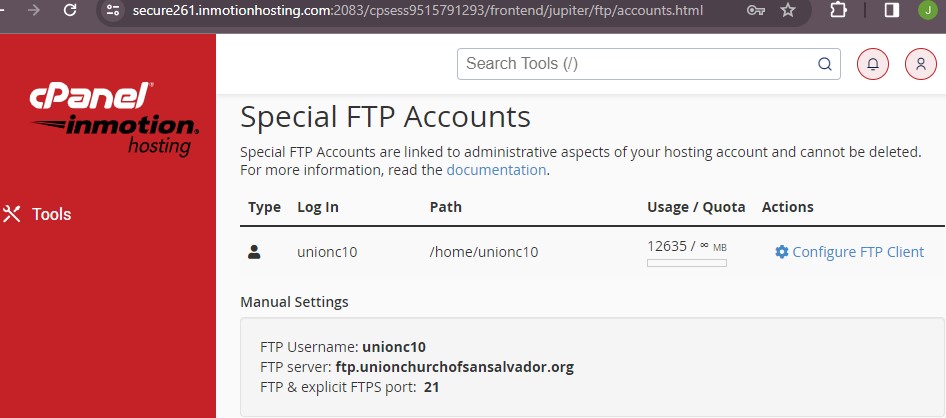
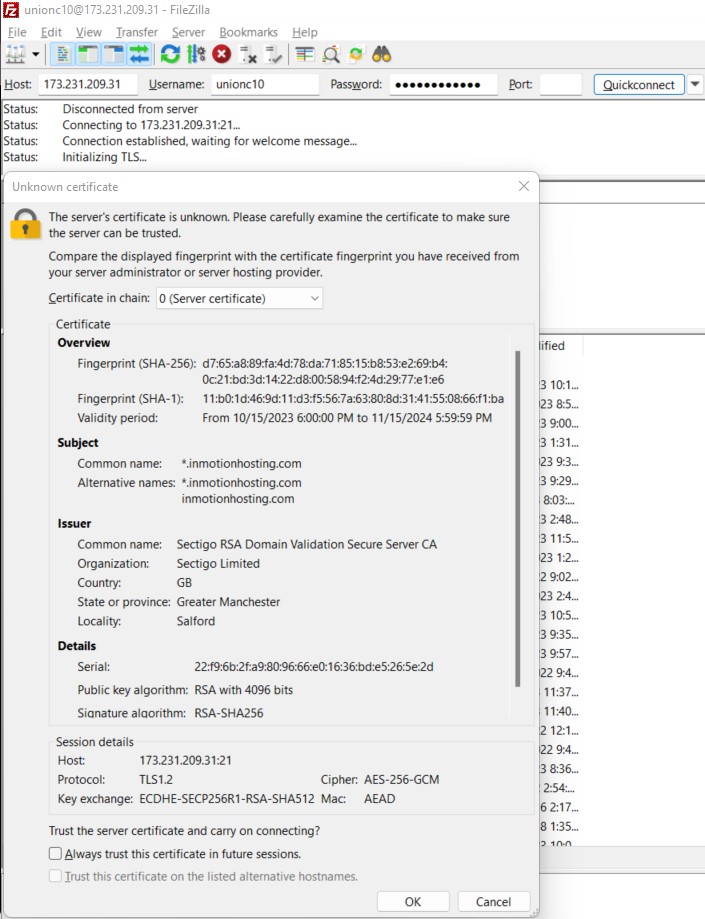
The information above does not specify Host nor the password to connect via FTP. But I found the password from my records of when I created the InMotion Hosting account. For the Host value, I could use either 173.231.209.31 (the shared IP address) or secure261.inmotionhosting.com. That was all I needed to connect to the server using FTP via FileZilla:

I clicked OK to the Unknown certificate pop-up message:
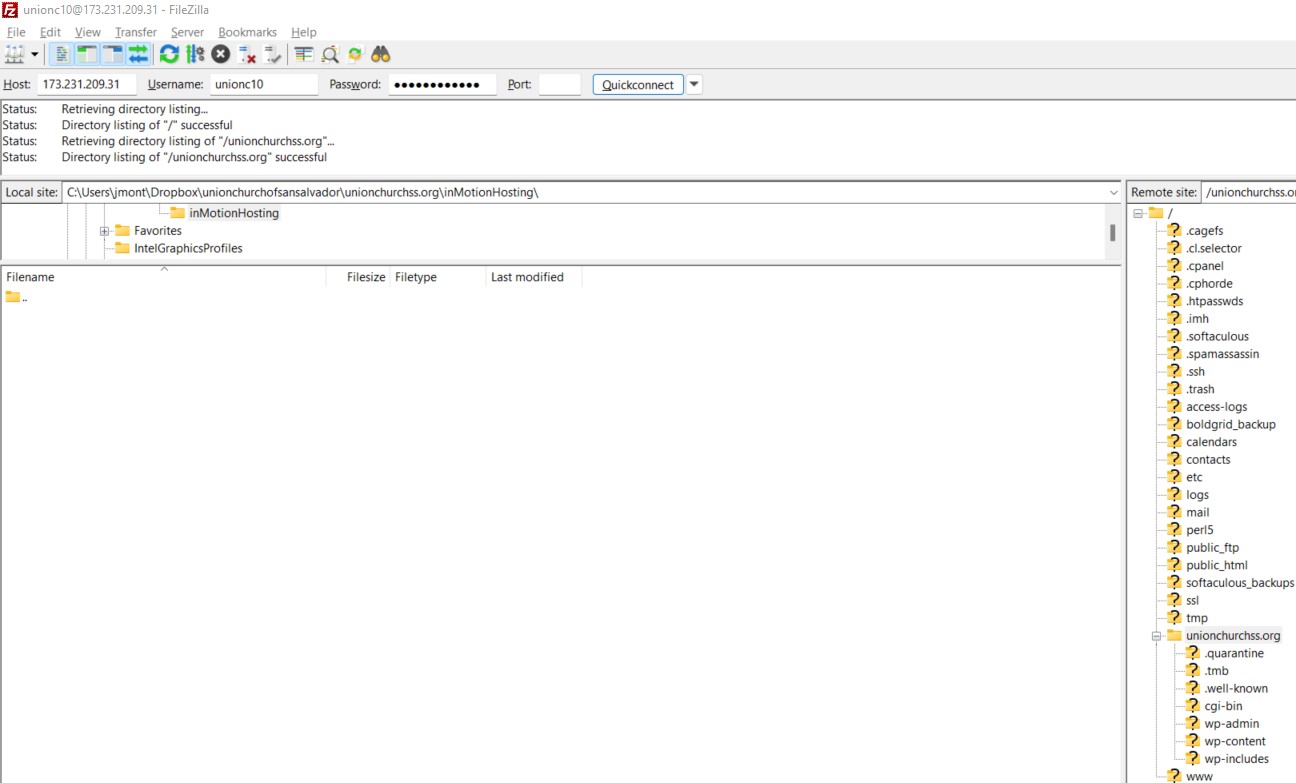
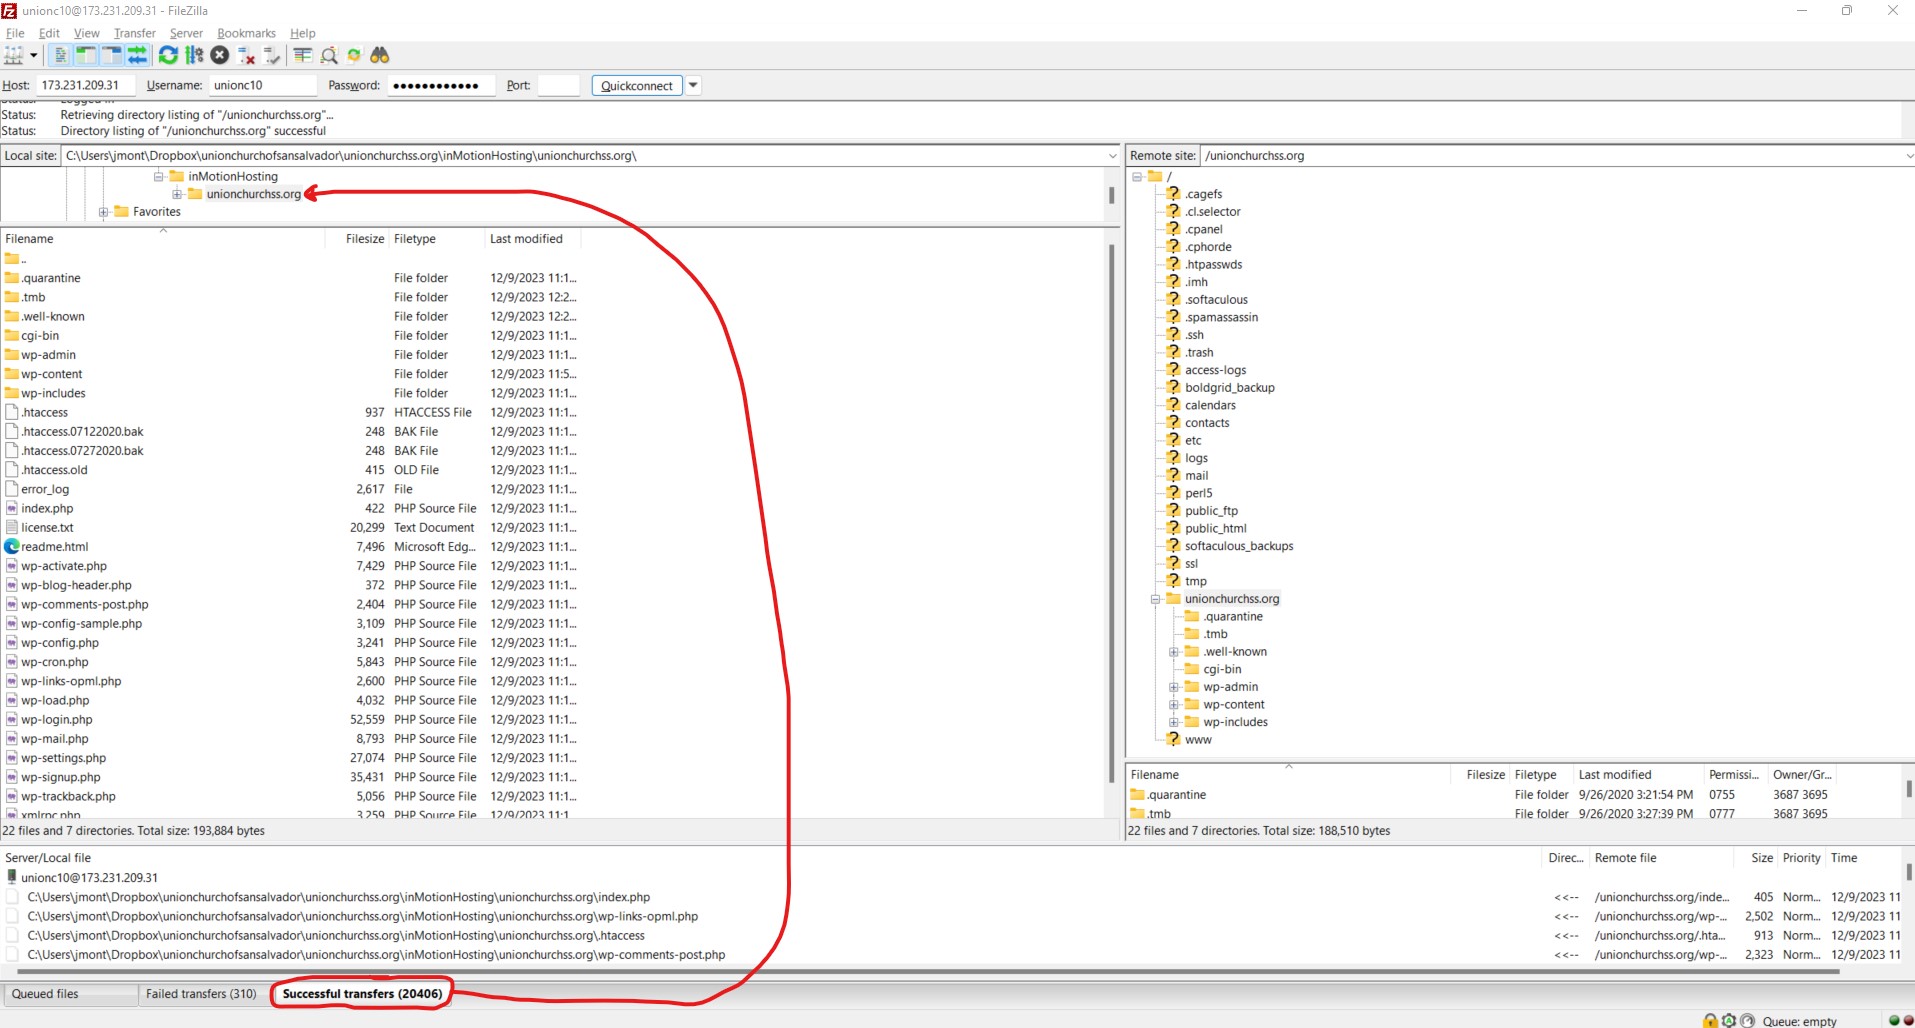
My WordPress files on the server were displayed under the /unionchurchss.org folder:
20406 files were transferred successfully:
The process resulted in 310 failed transfers:
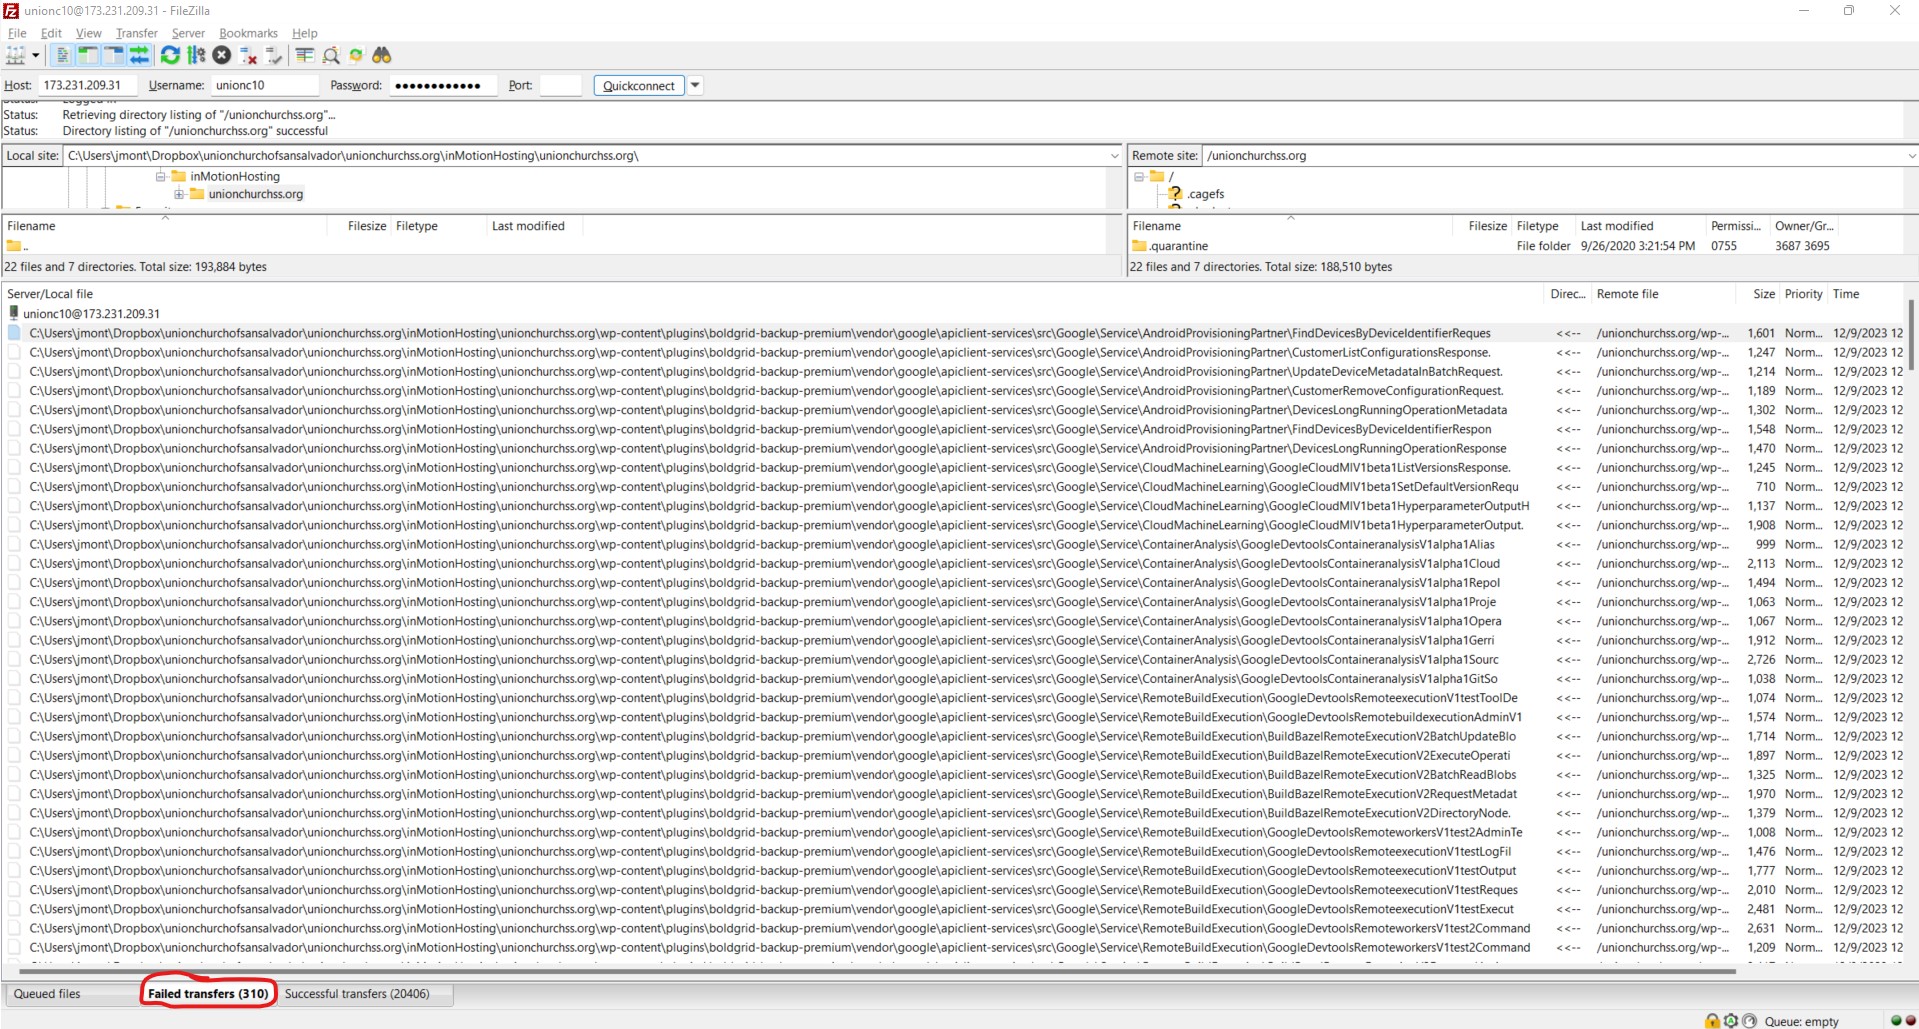
All of the failed transfers are from this directory: unionchurchss.org\wp-content\plugins\boldgrid-backup-premium\vendor\google\apiclient-services\src\Google\Service\. I could safely ignore those failed transfers because that was not going to affect what I needed for the functionality of my website.
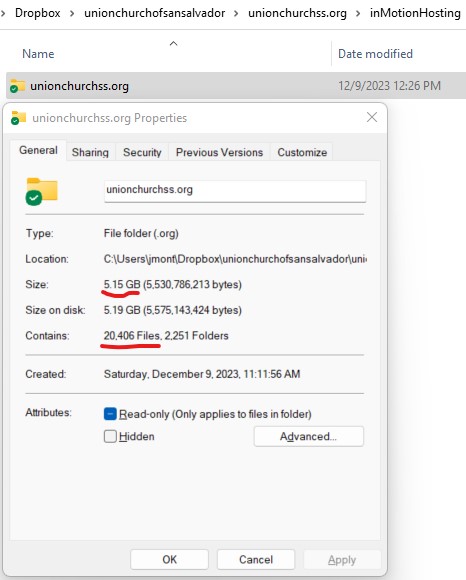
The 20,406 downloaded files, together have a size of 5.15 GB:
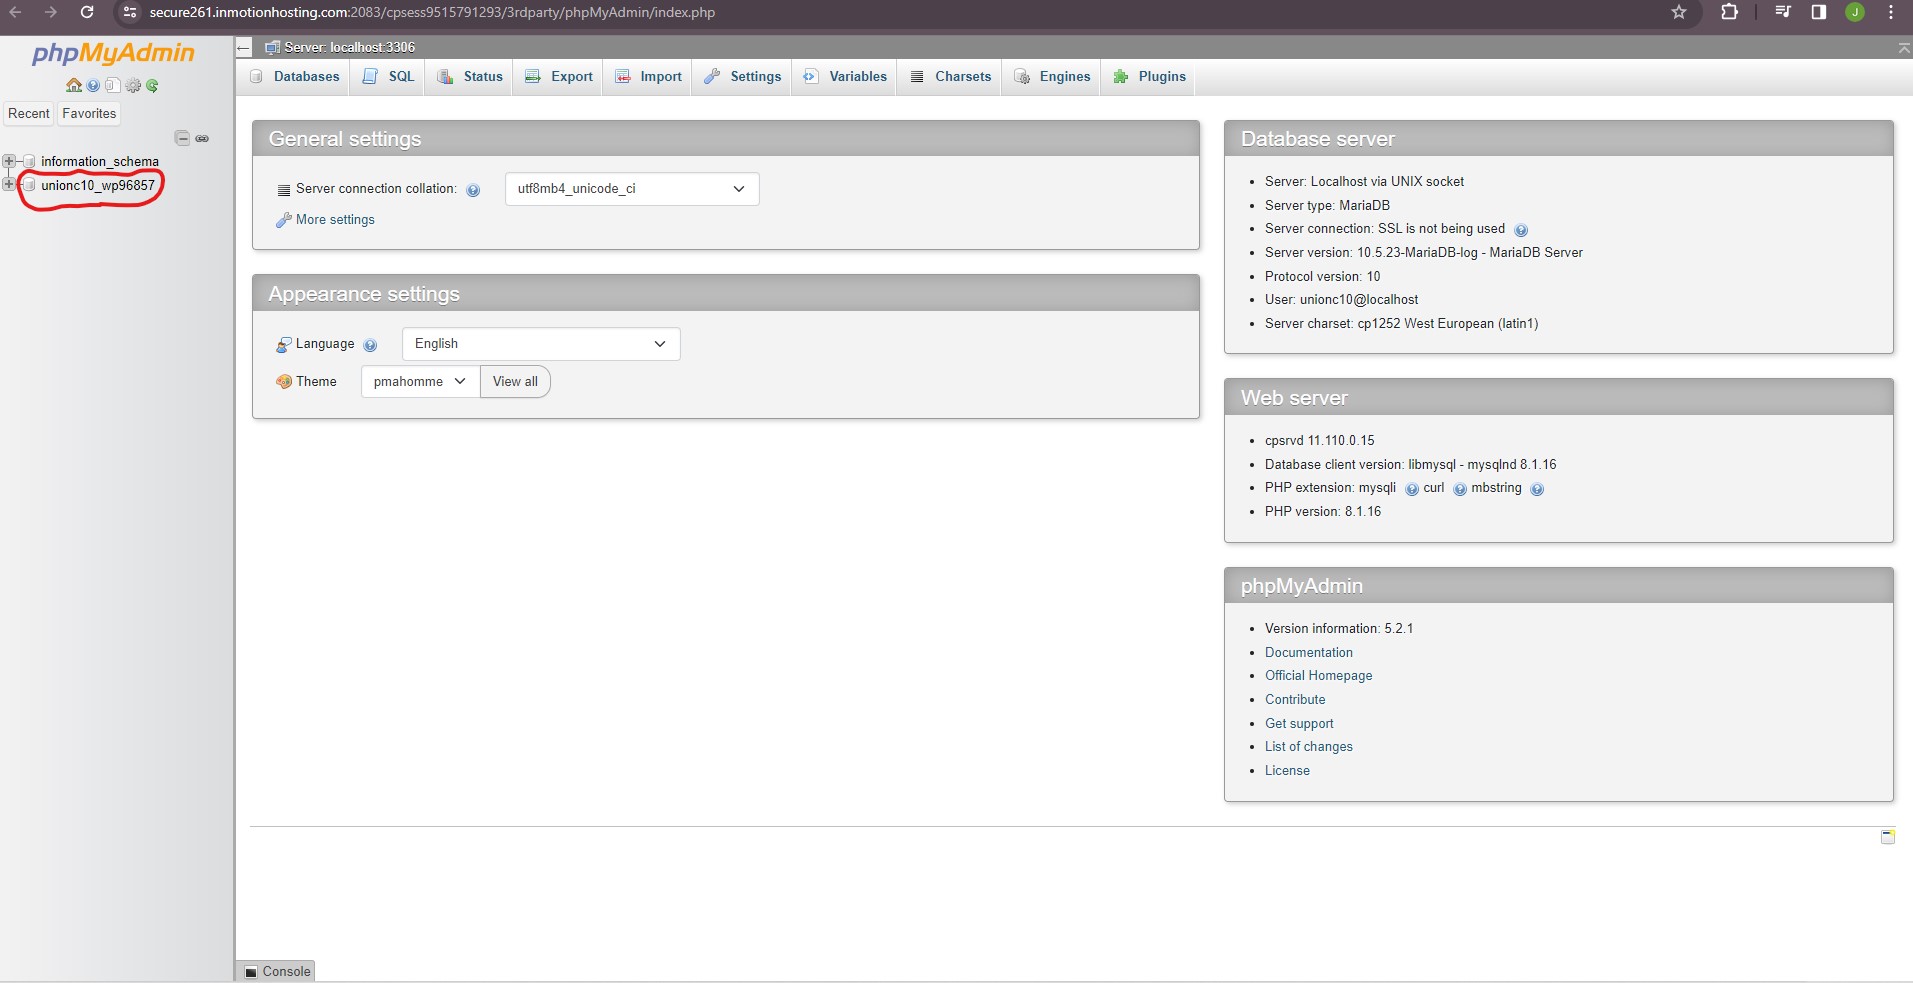
My next step was to download the MySQL database. From cPanel, I clicked the phpMyAdmin link:

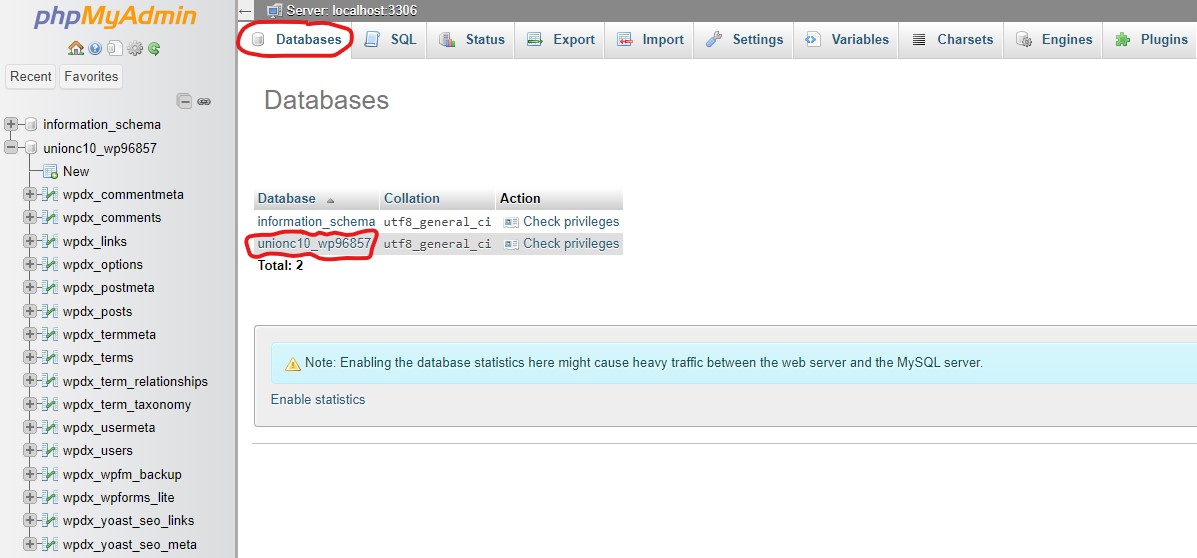
That took me to https://secure261.inmotionhosting.com:2083/cpsess9515791293/3rdparty/phpMyAdmin/index.php, where my database was listed as unionc10_wp96857:
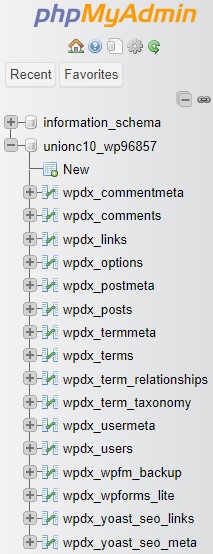
This is the list of tables in the database:
I clicked the Databases tab and after that, I clicked the database that I wanted to export:
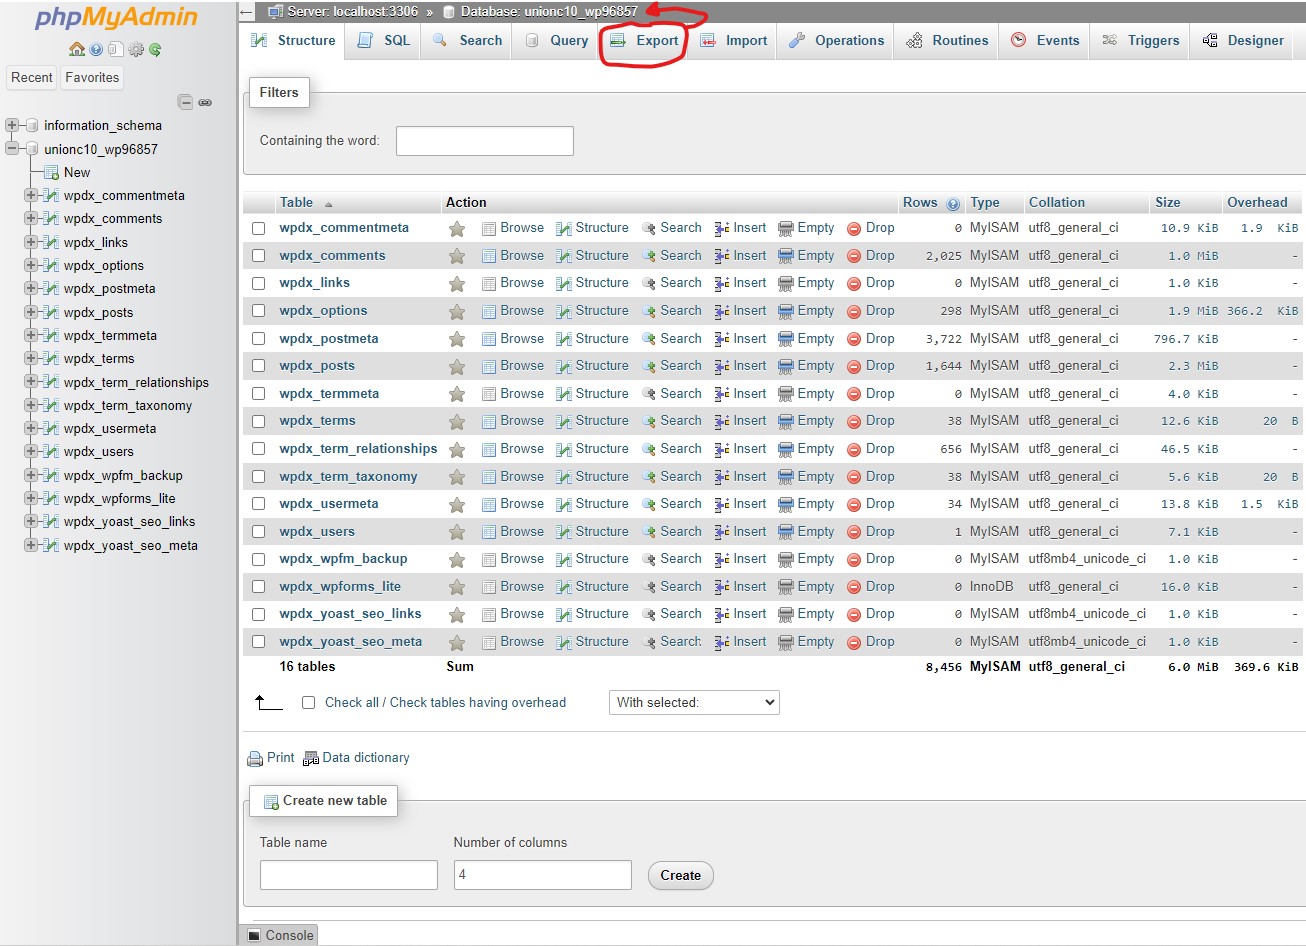
Then I clicked the Export tab:
I used the Quick - display only the minimal options export method and SQL as the output format. Then I clicked Export:

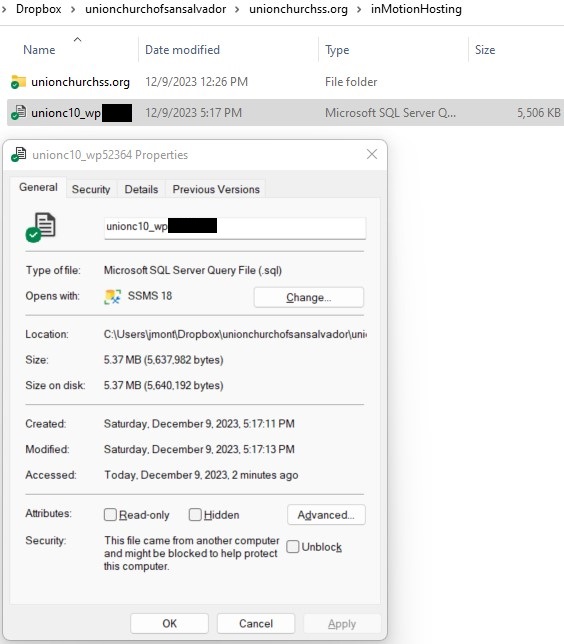
The database was downloaded successfully as a .sql file. Its size was 5.37 MB:
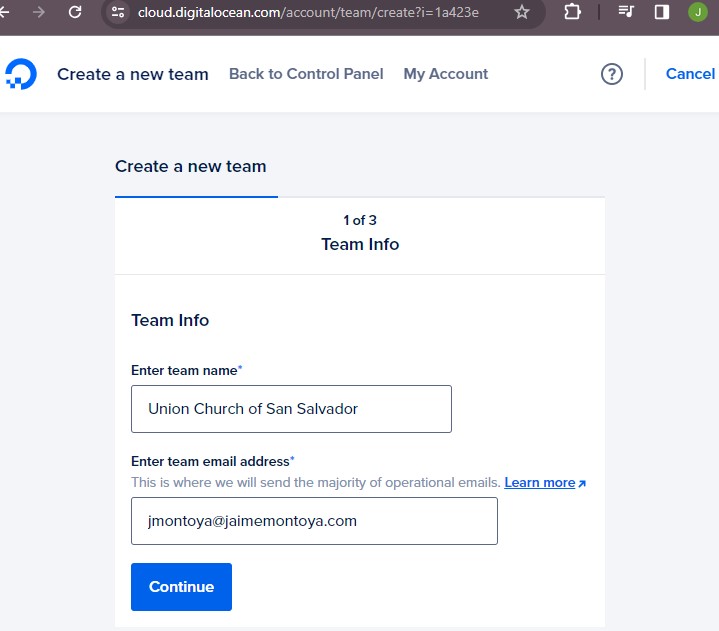
I visited https://digitalocean.com and from my account, I clicked Create a Team:

I provided the new team information and clicked Continue:
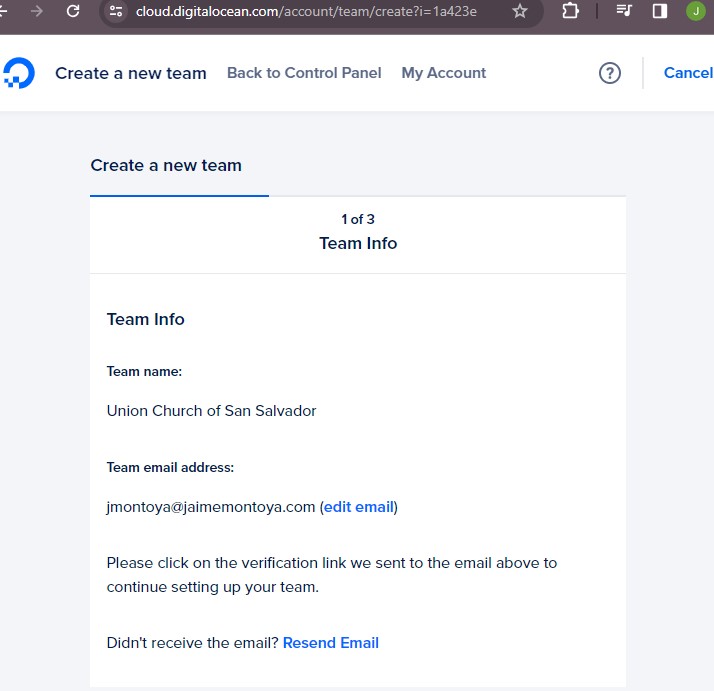
A verification link was sent to the email address I provided:
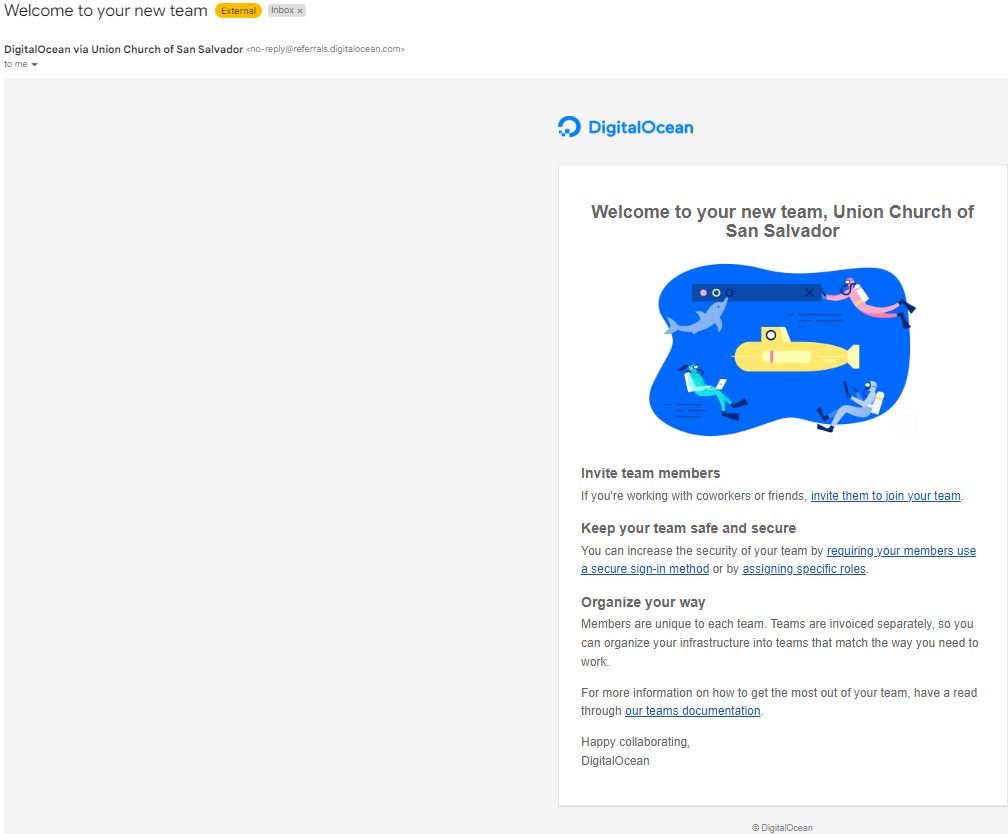
I received a welcome email:
I received a second email with a link to verify my email:

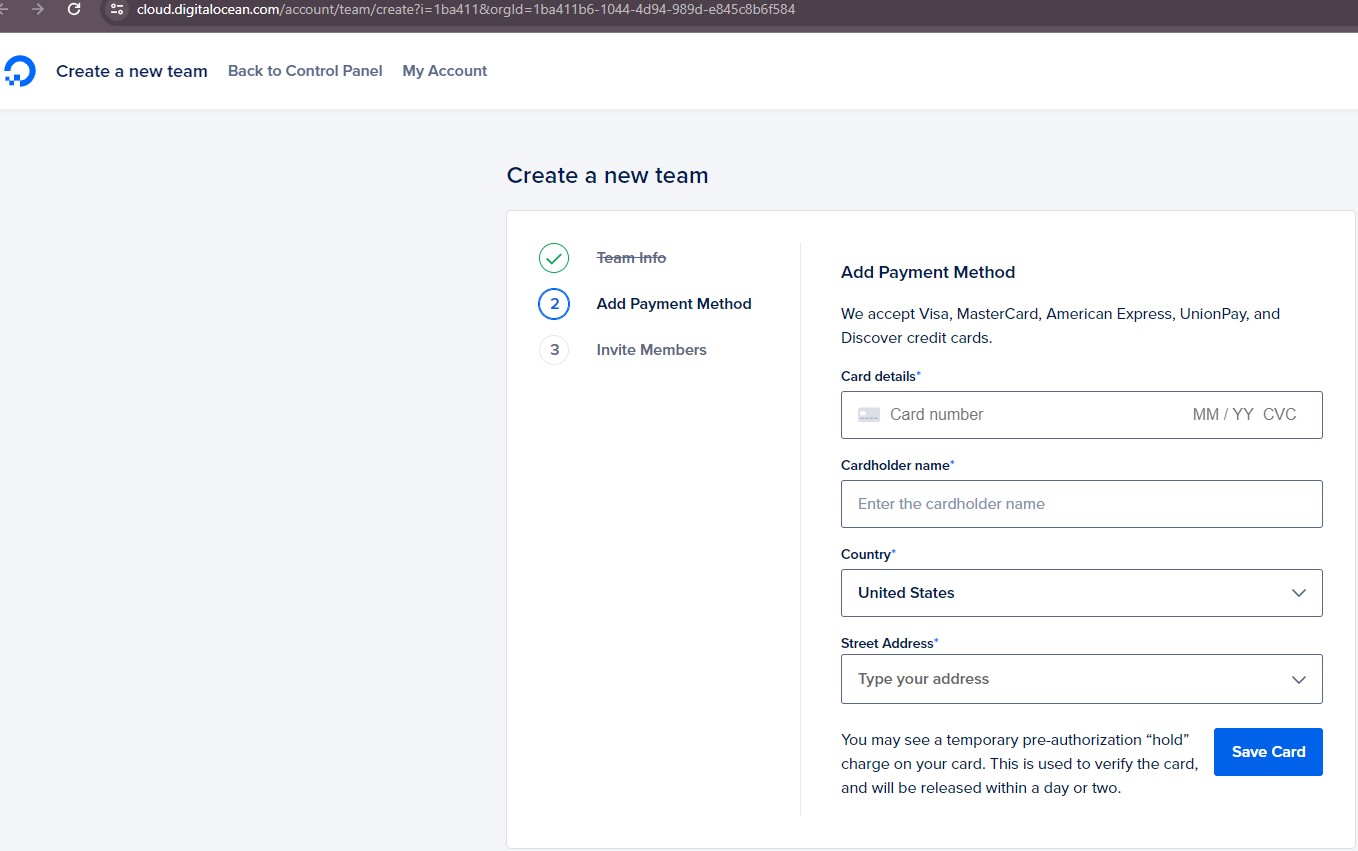
Clicking the link to verify my email address took me to the Add Payment Method section, where I provided my credit card information.
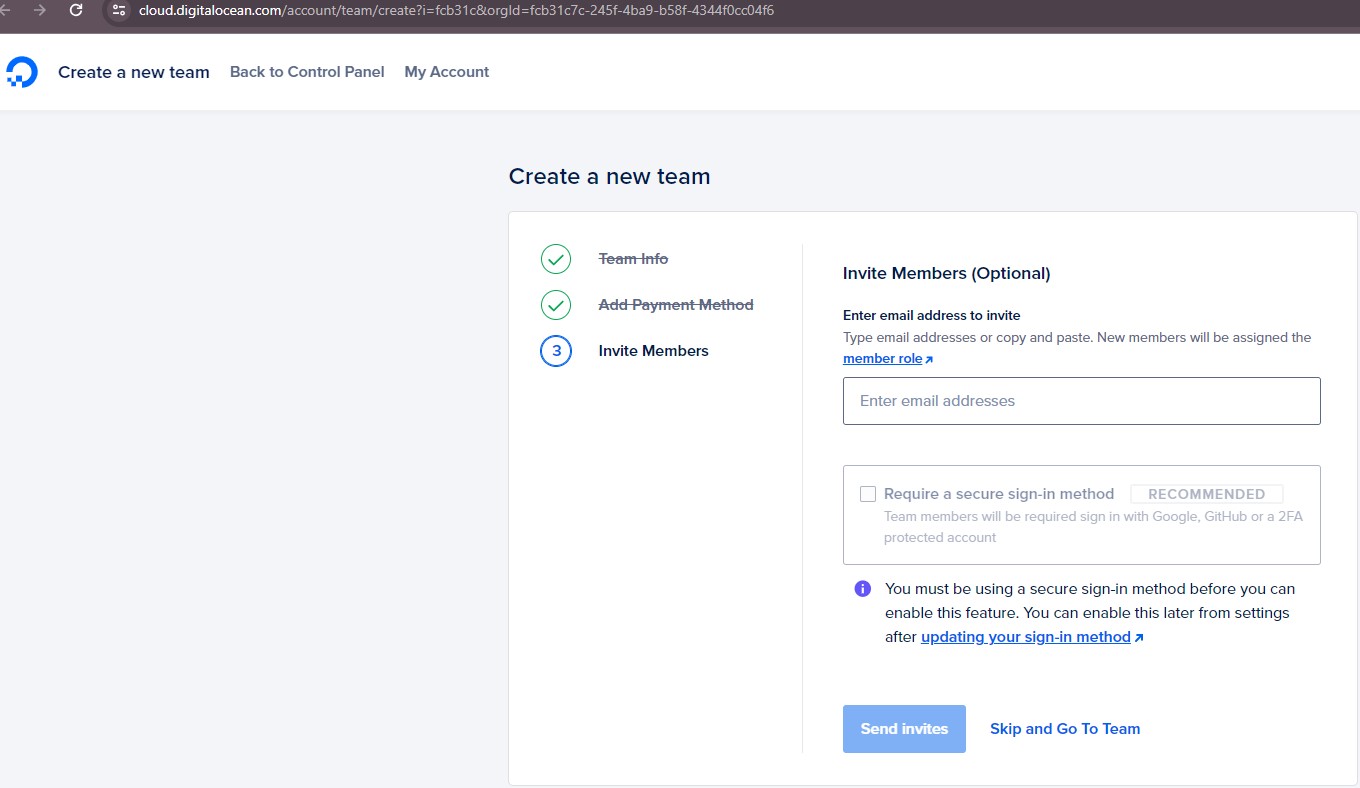
The last step was optional and I decided to skip it for now:
I was charged $1 as a pre-authorization "hold" charge on my card used to verify my card, which will be released within a day or two:
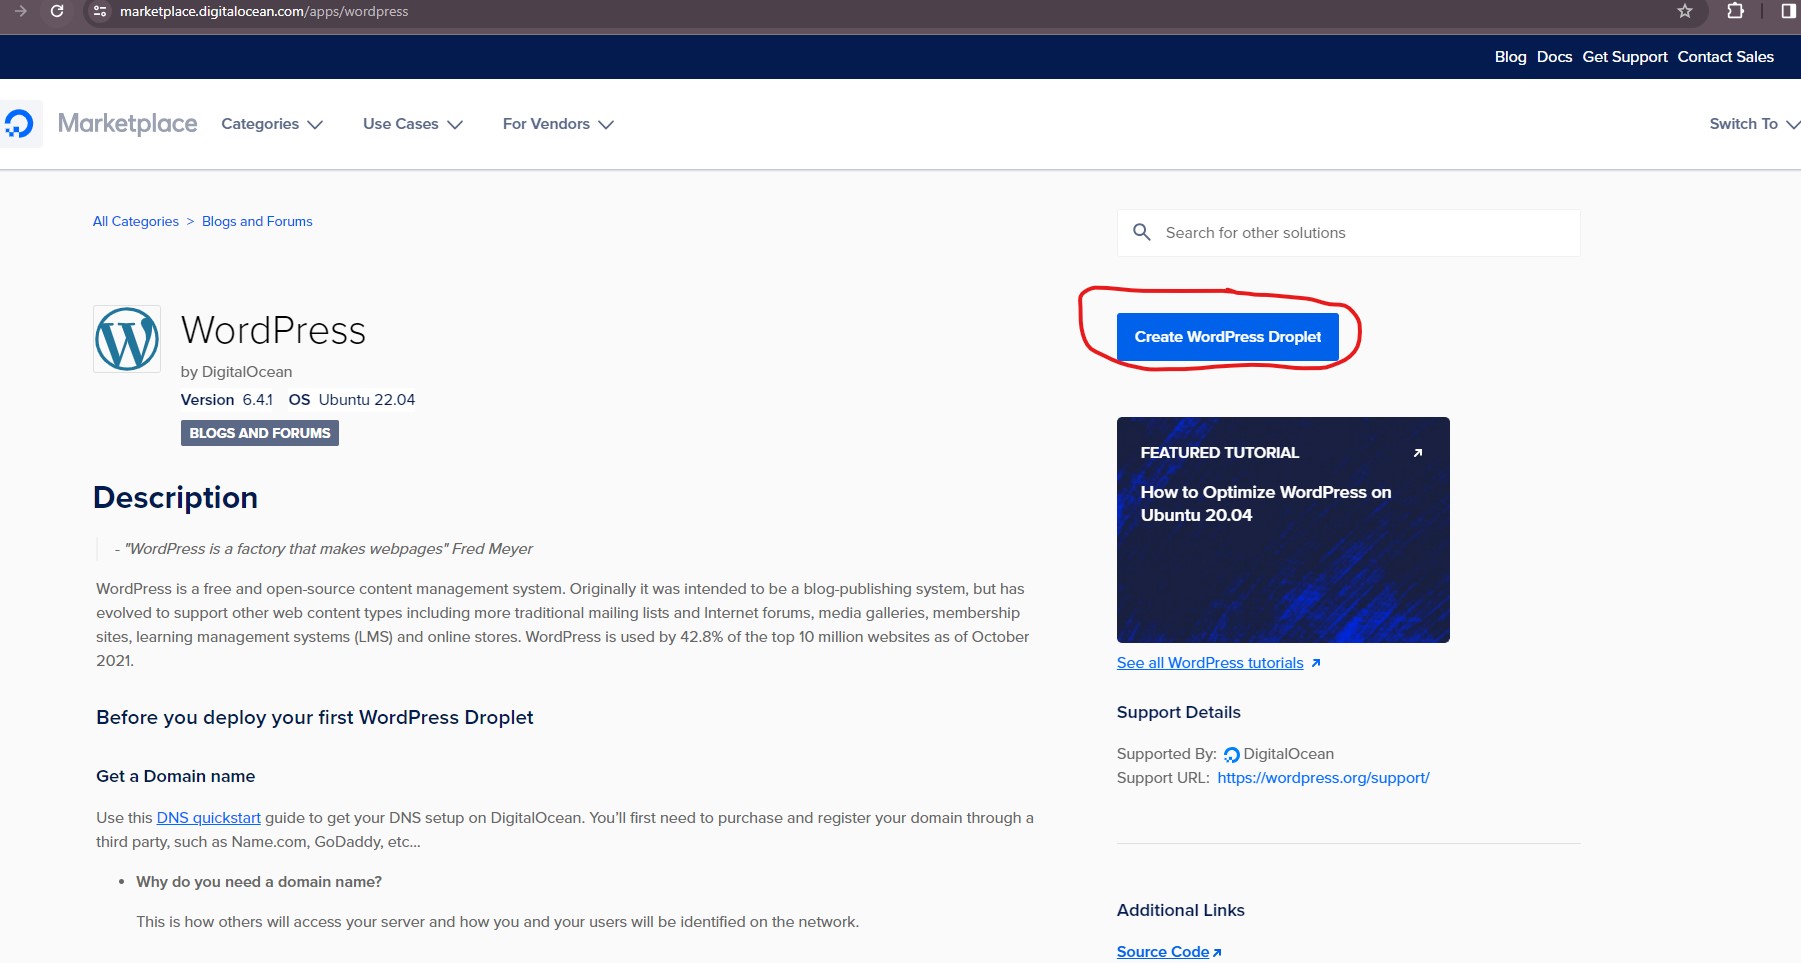
I visited https://marketplace.digitalocean.com/apps/wordpress and clicked Create WordPress Droplet:
I chose Toronto as the Region:

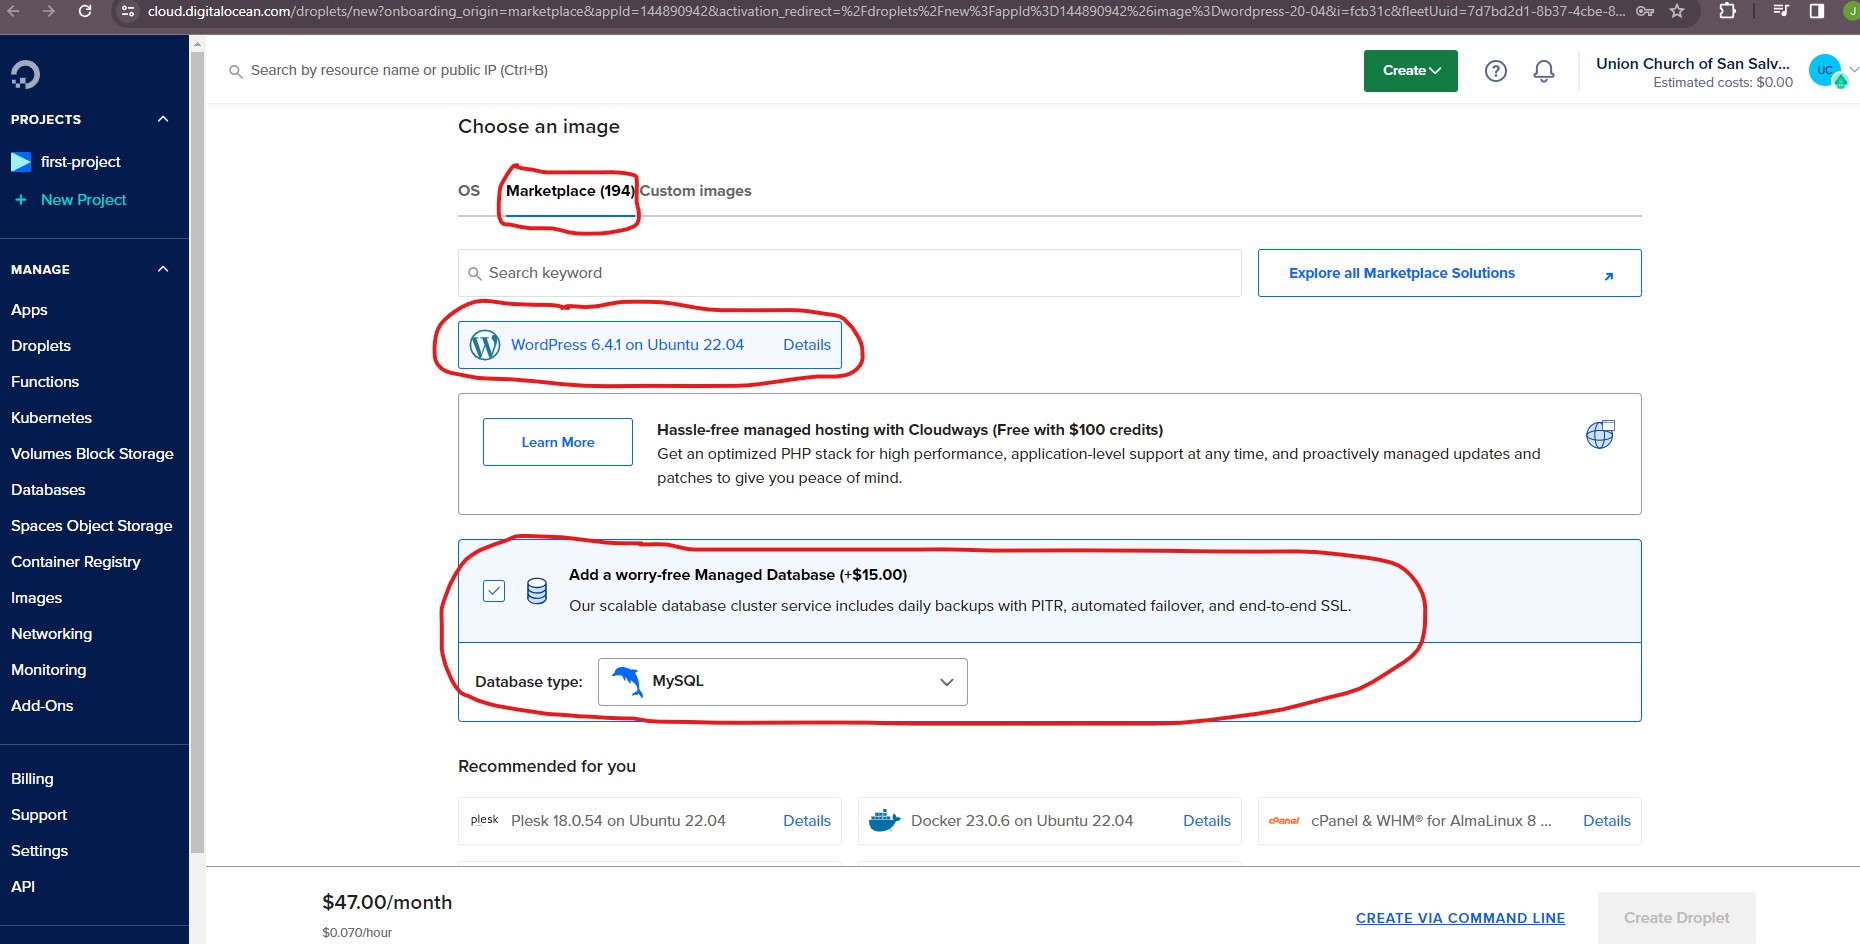
I scrolled down and in the Choose an image section, I added a MySQL Managed Database for an additional $15.00/month:
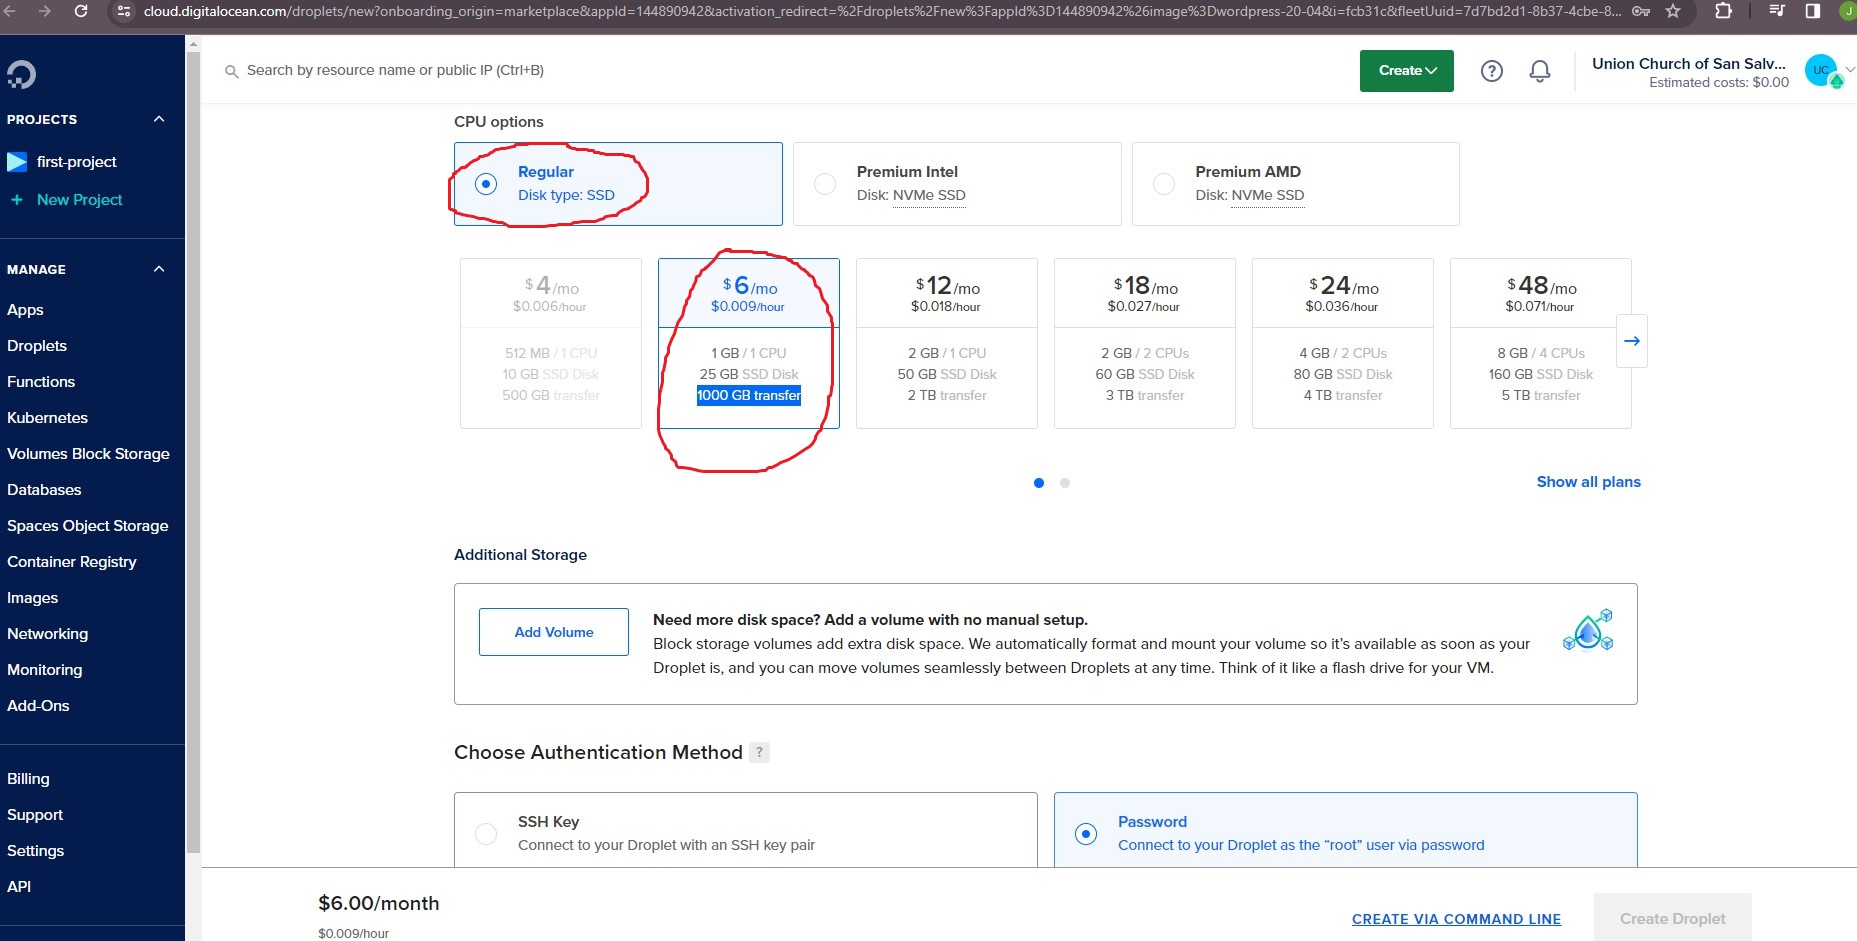
I scrolled down and in the CPU options section, I chose Regular Disk type: SSD and $6 /mo | $0.009 /hour (1 GB / 1 CPU | 25 GB SSD Disk | 1000 GB transfer):
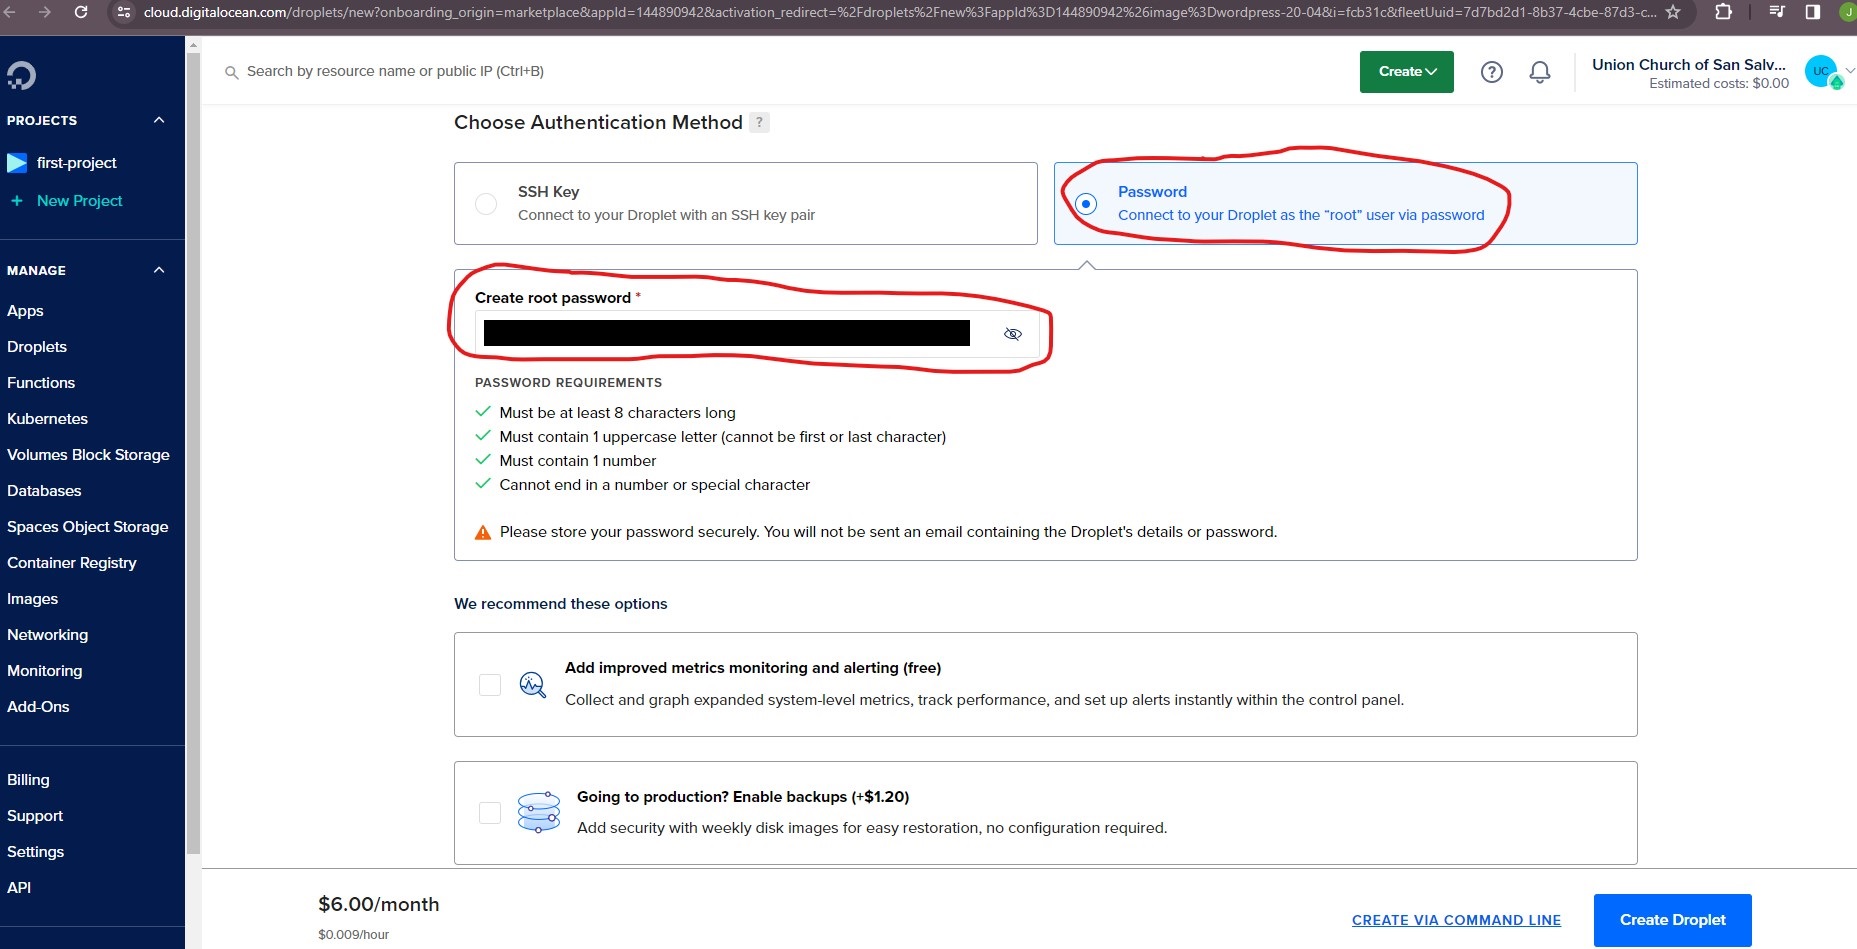
I scrolled down to the Choose Authentication Method section and chose Password - Connect to your Droplet as the "root" user via password, where I created my root password:
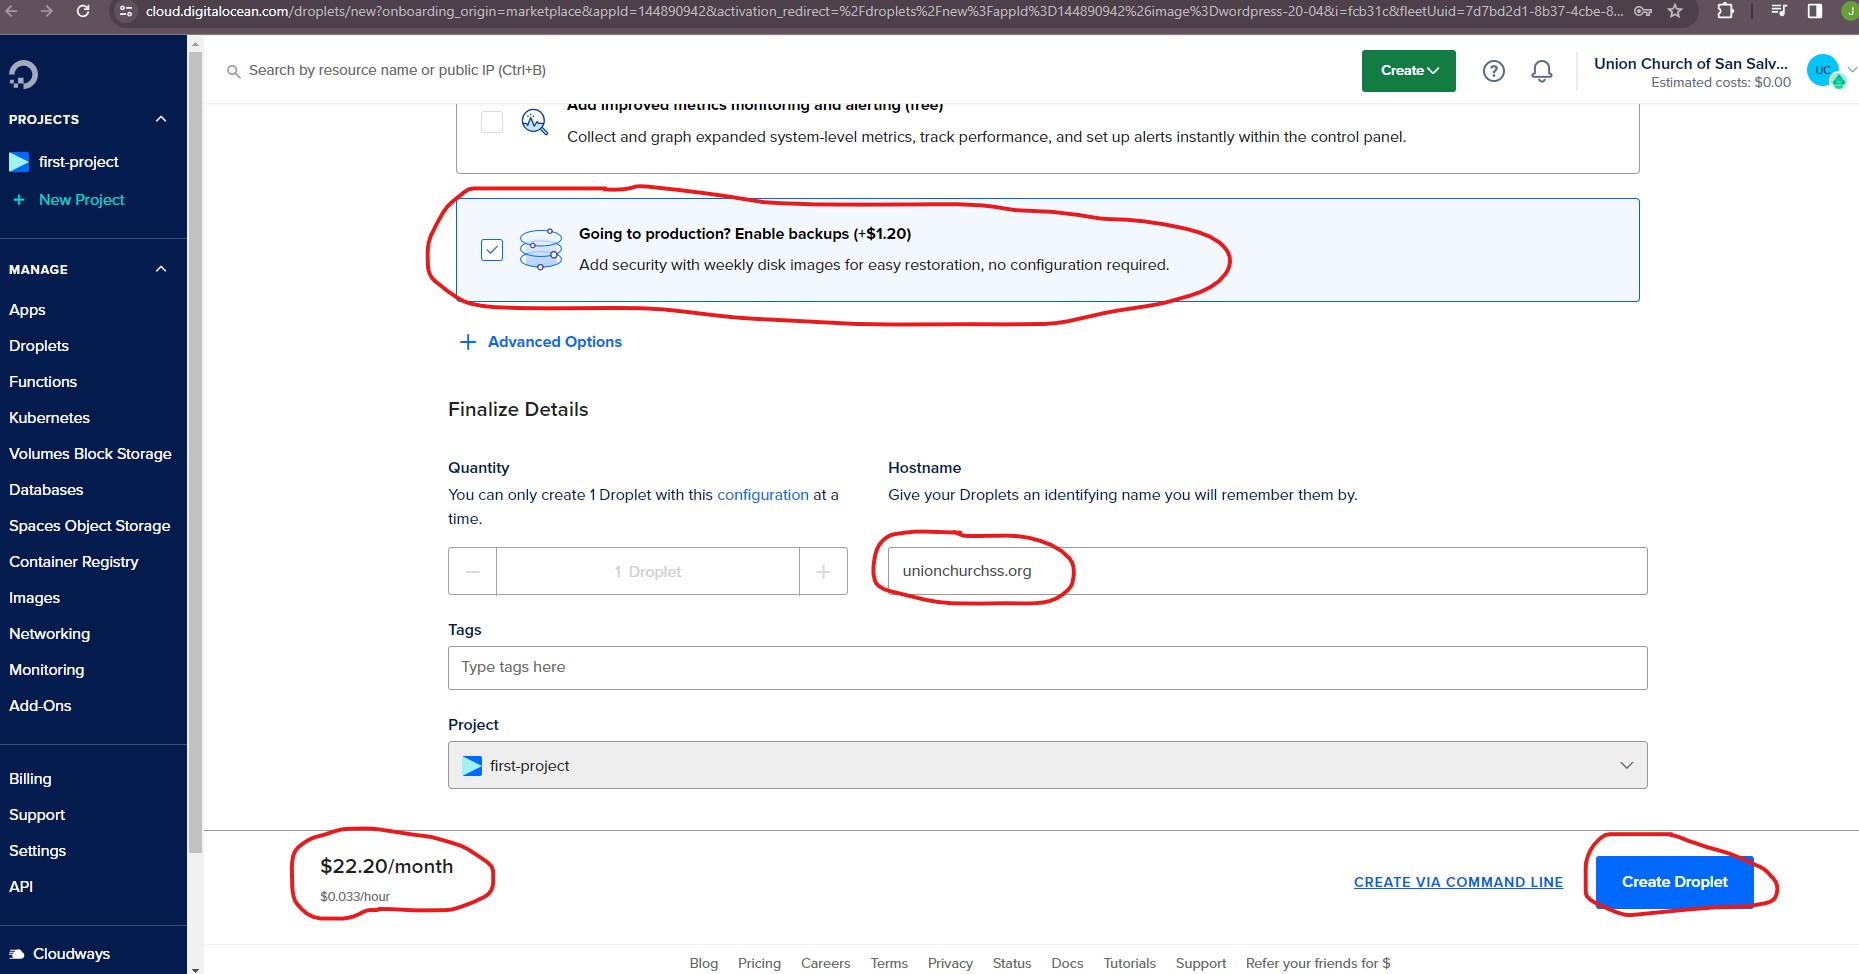
I enabled backups for an additional $1.20/month because I was going to production, and gave my Droplet an identifying name that I will remember it by: unionchurchss.org. The price will be $22.20/month or $0.033/hour. Finally, I clicked Create Droplet:
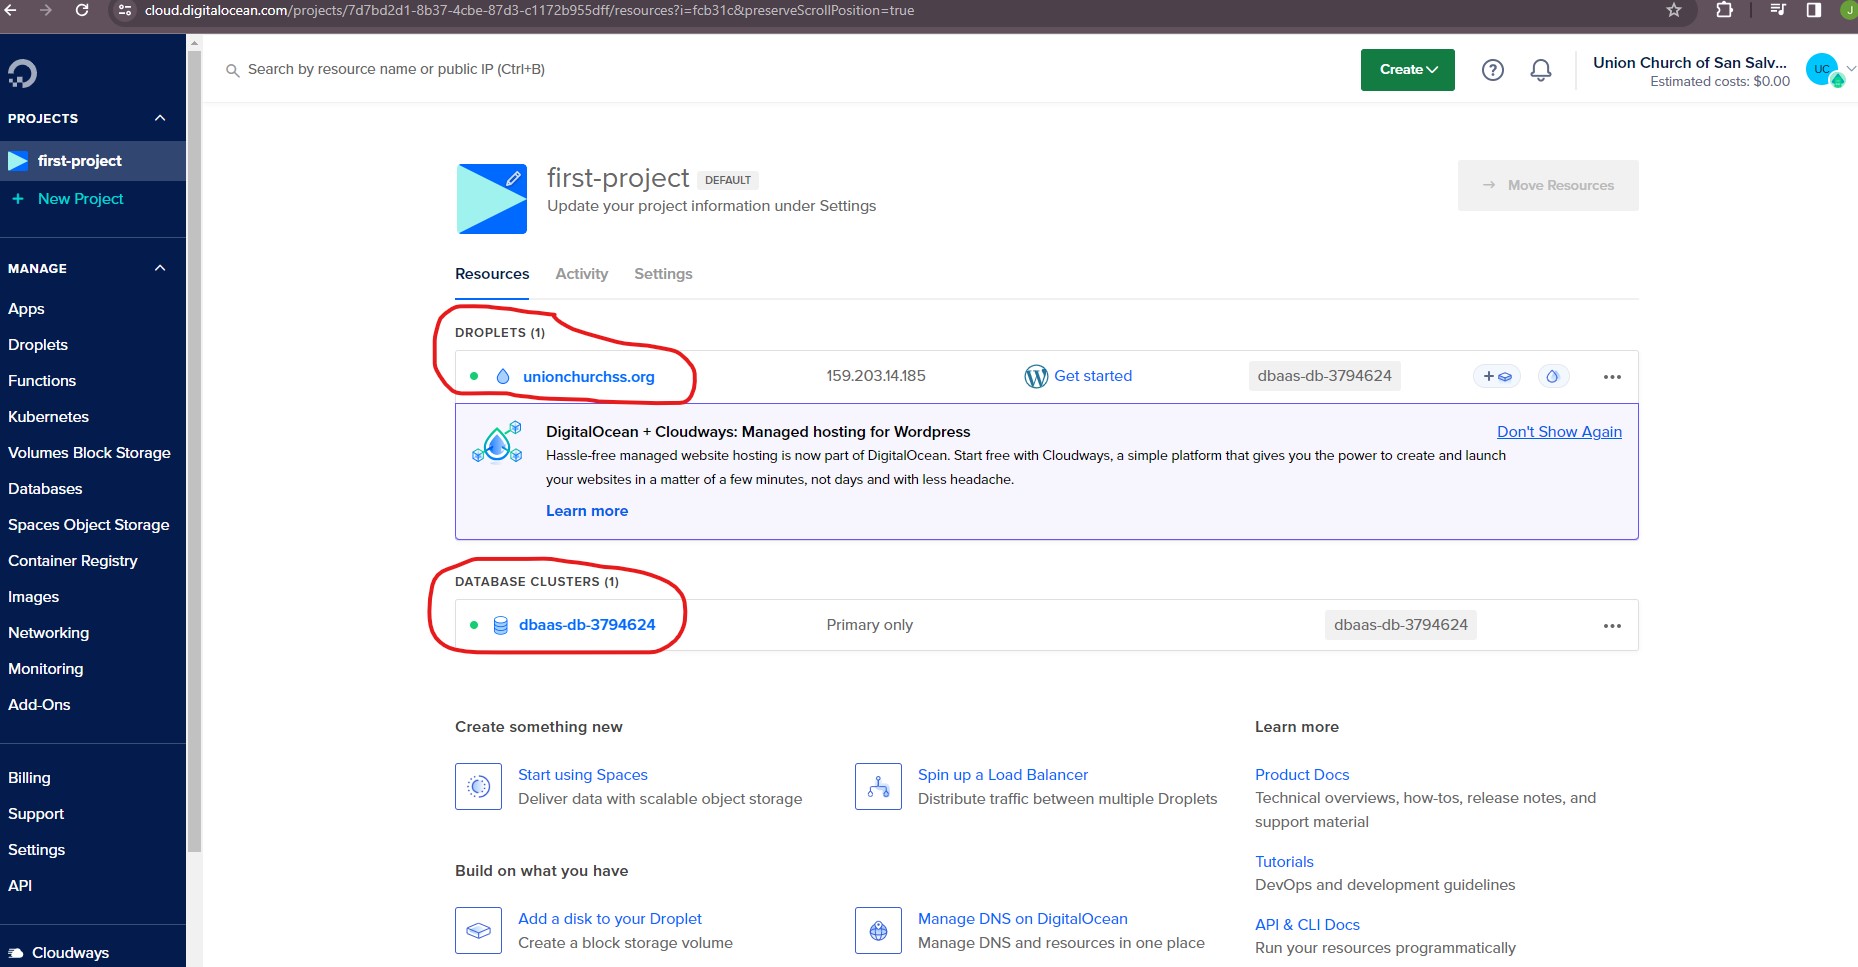
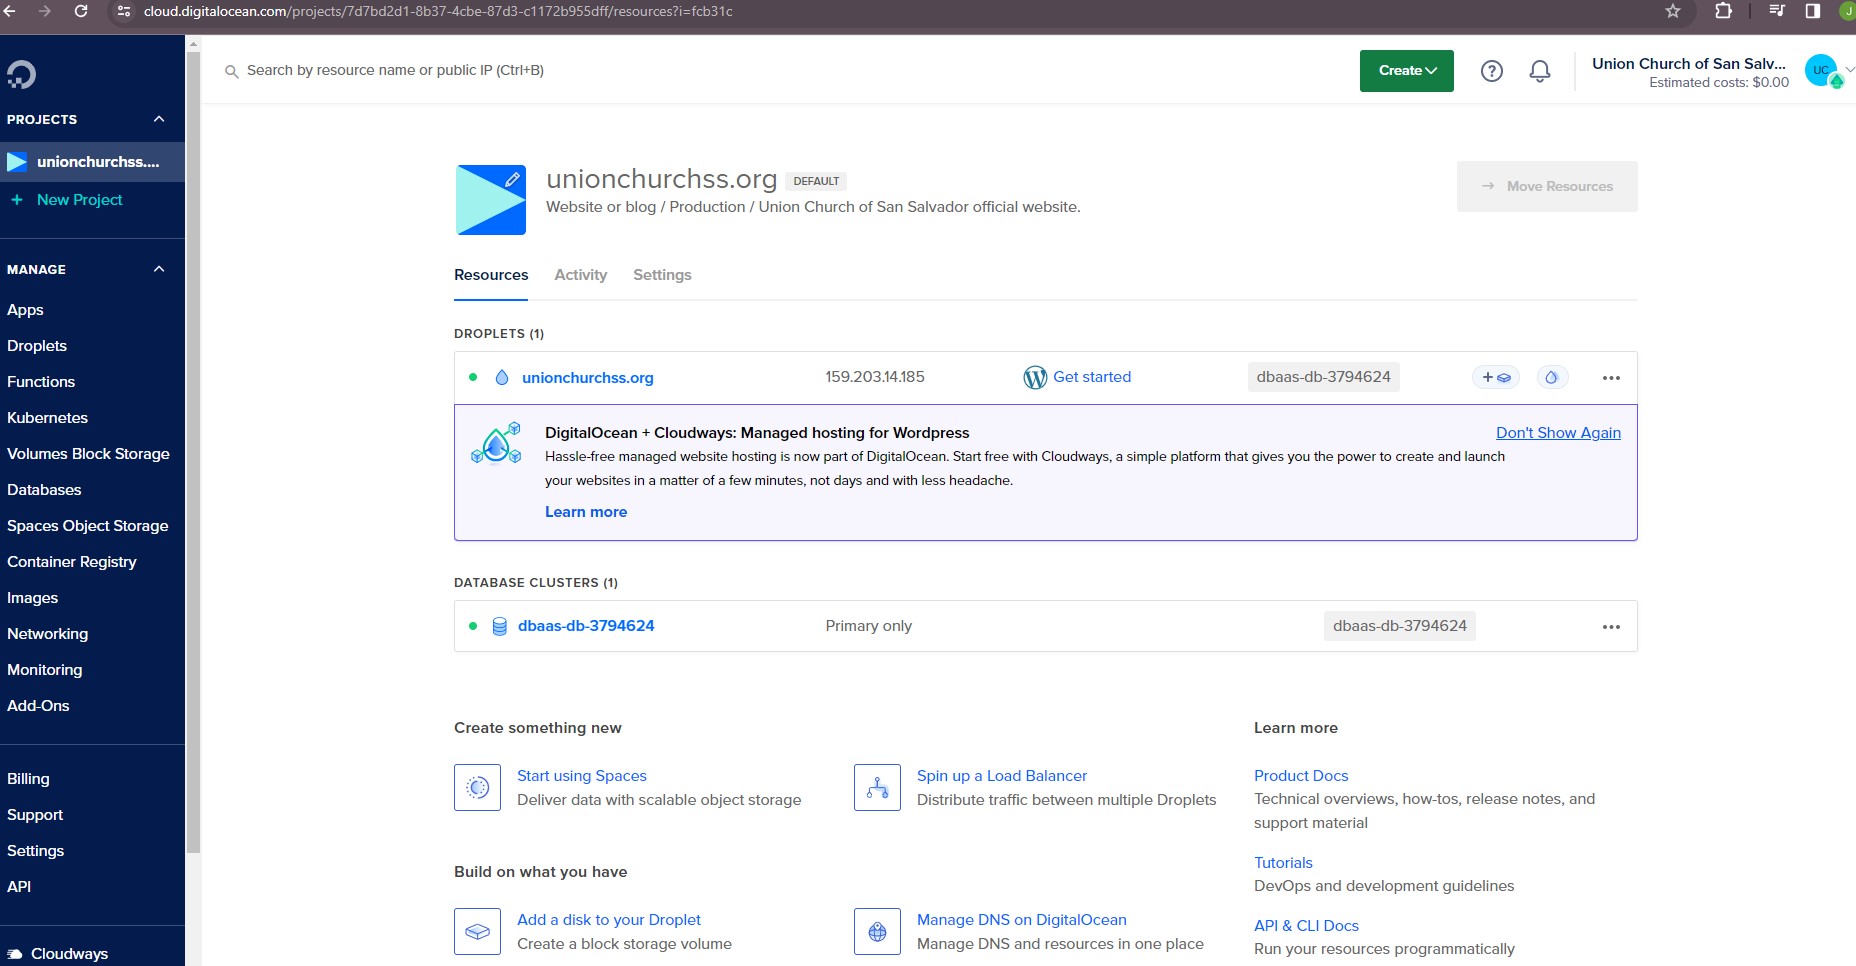
It took a few minutes for the new Droplet and MySQL Managed Database to be created. When the creation was completed, I saw both listed as resources:
In the Settings section, I updated the project details:
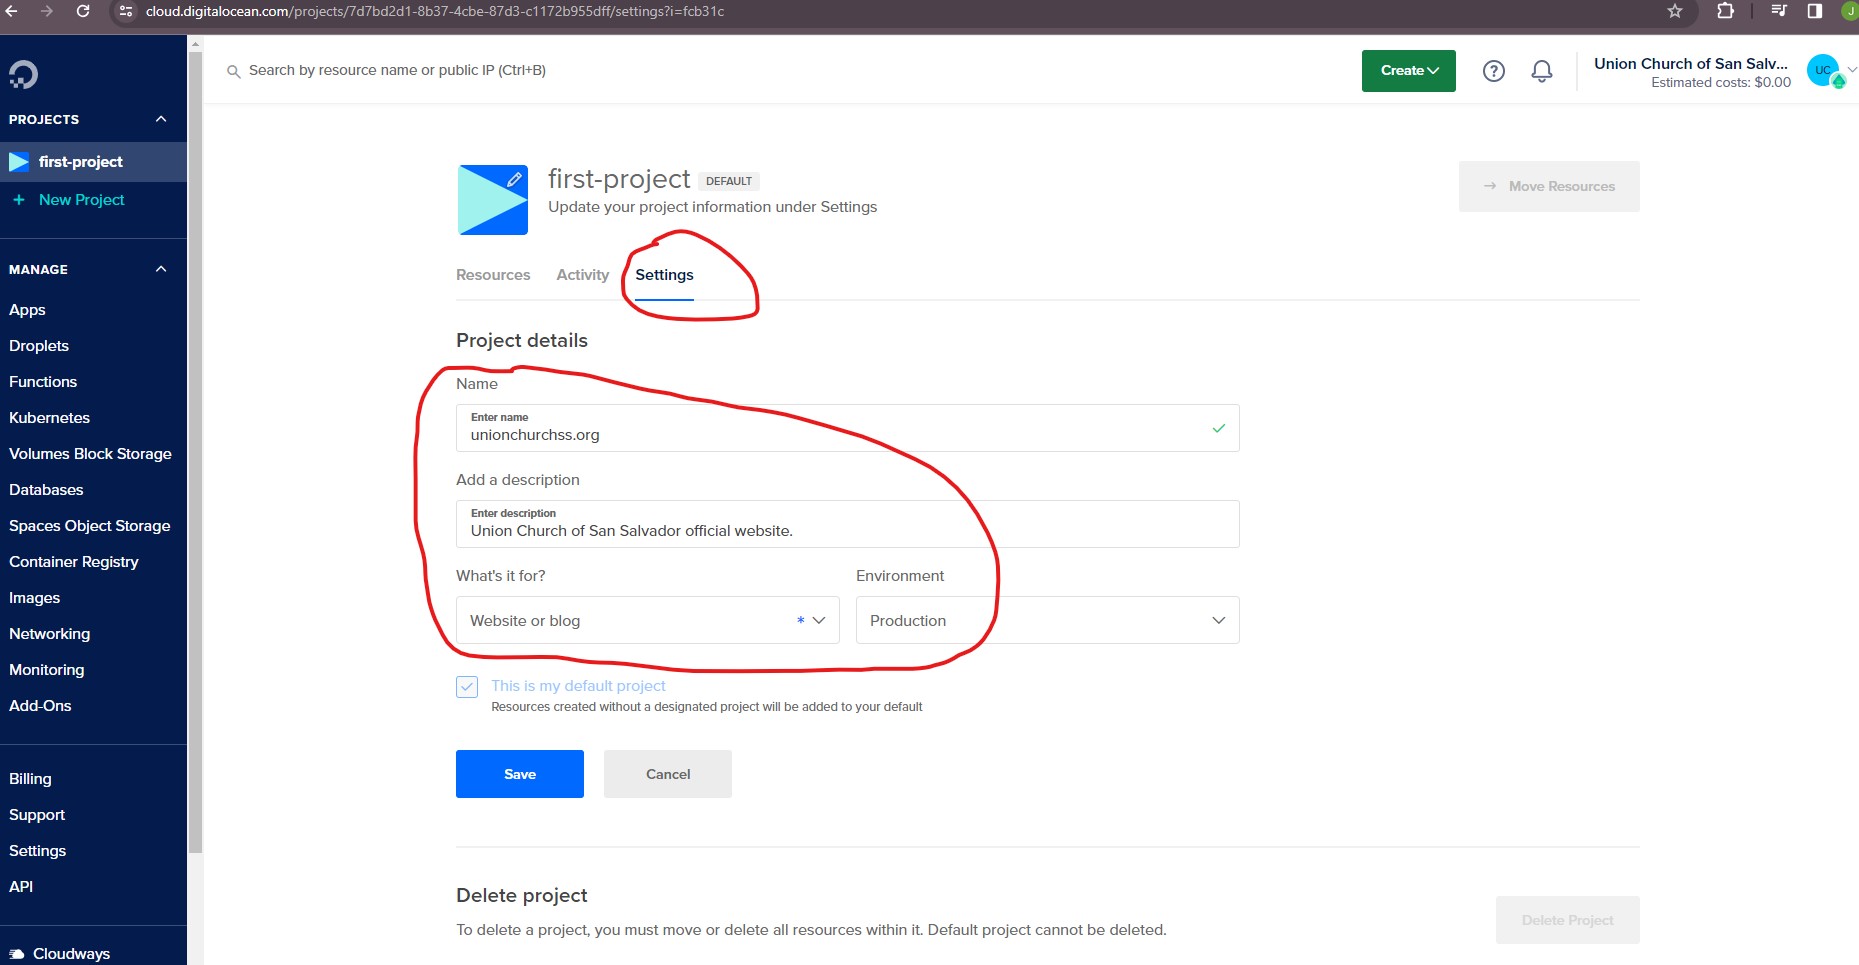
Now I see my project with proper descriptions:
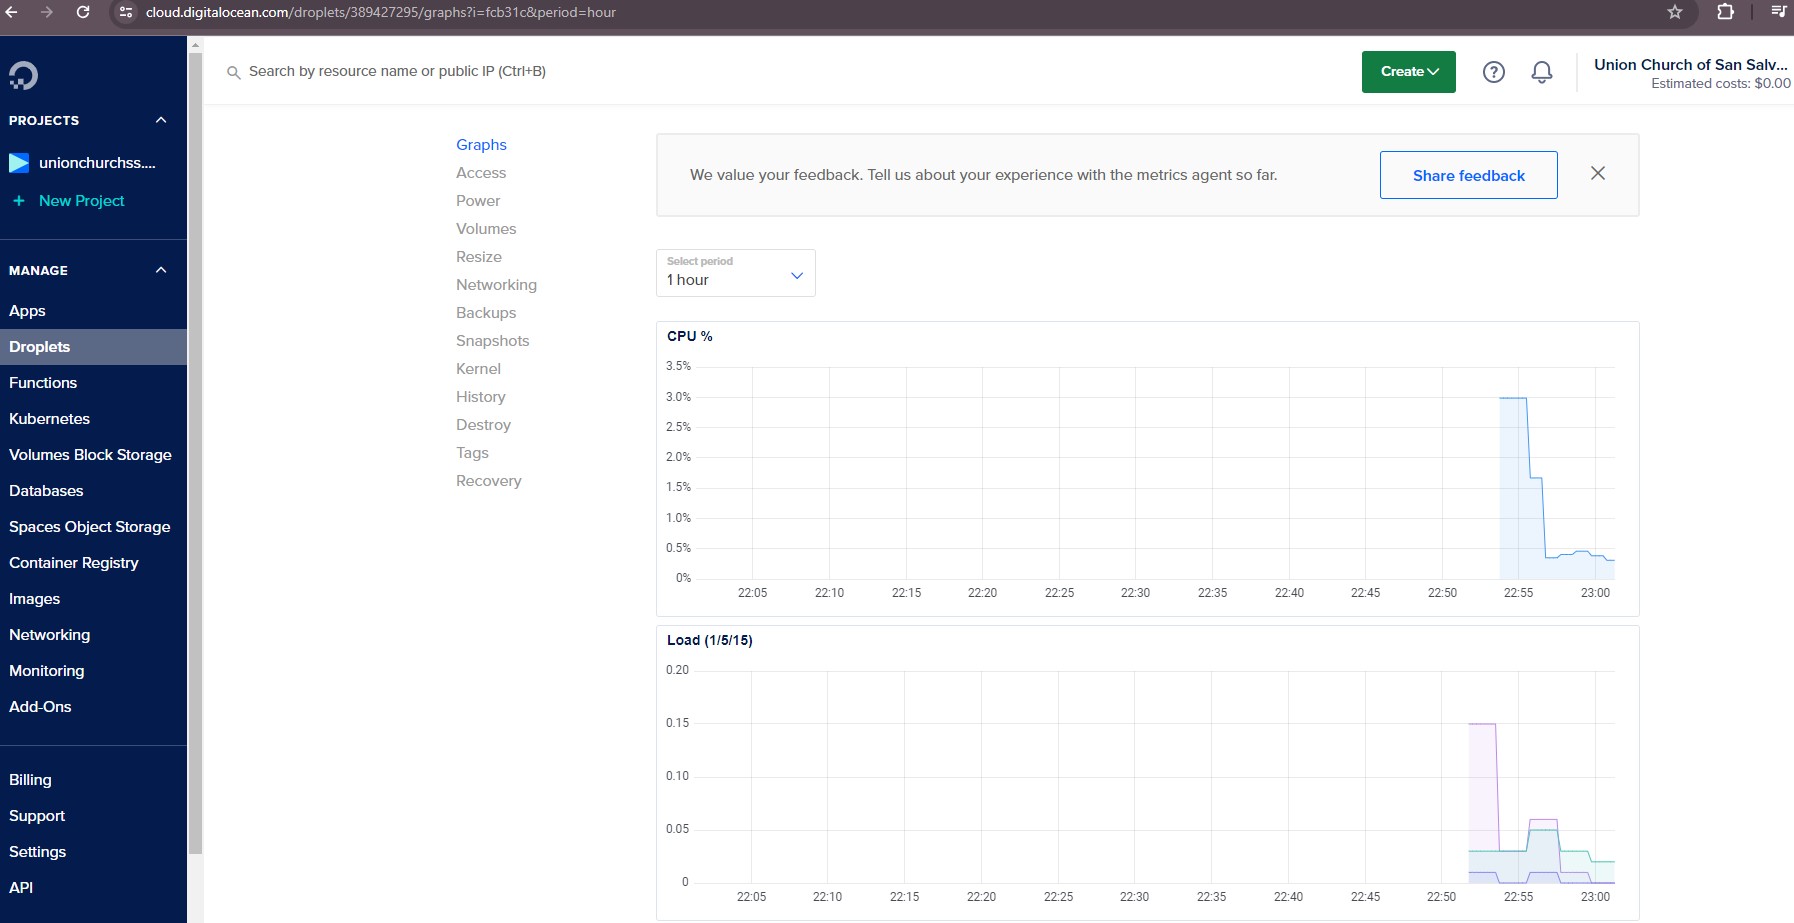
Go to the new Droplet and click Graphs. Notice that there is a message about an upgrade available for additional metrics and alerting:
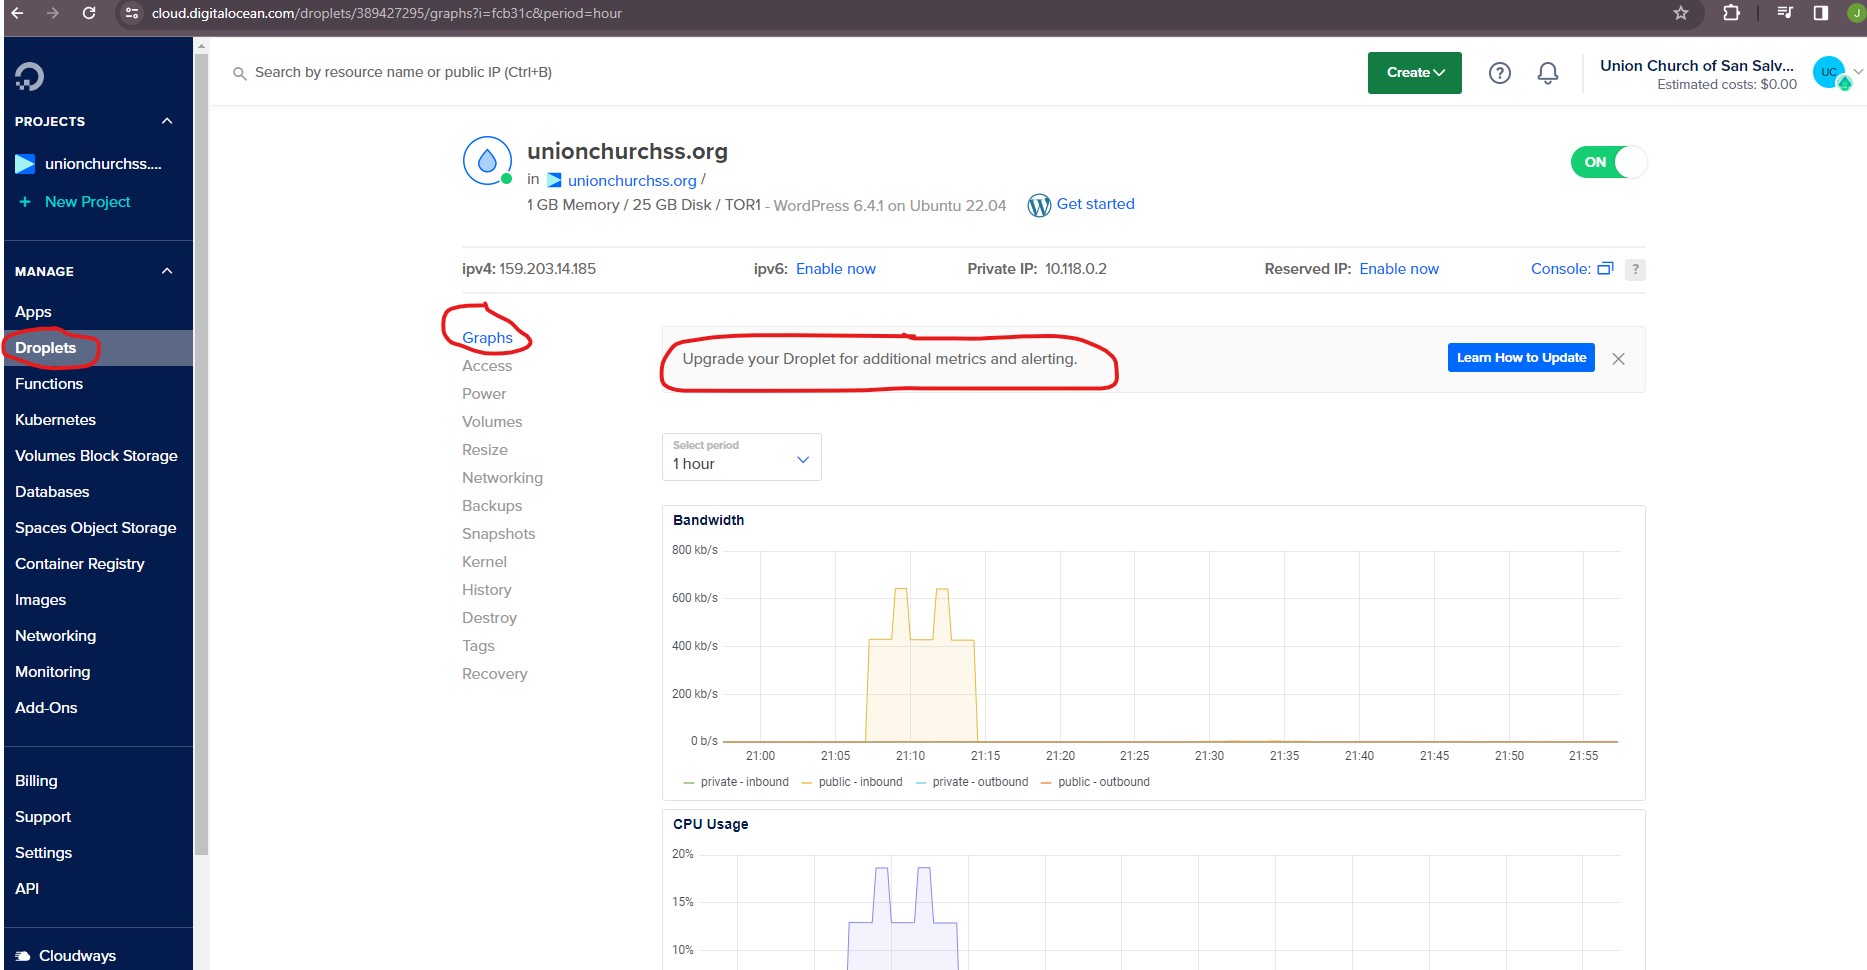
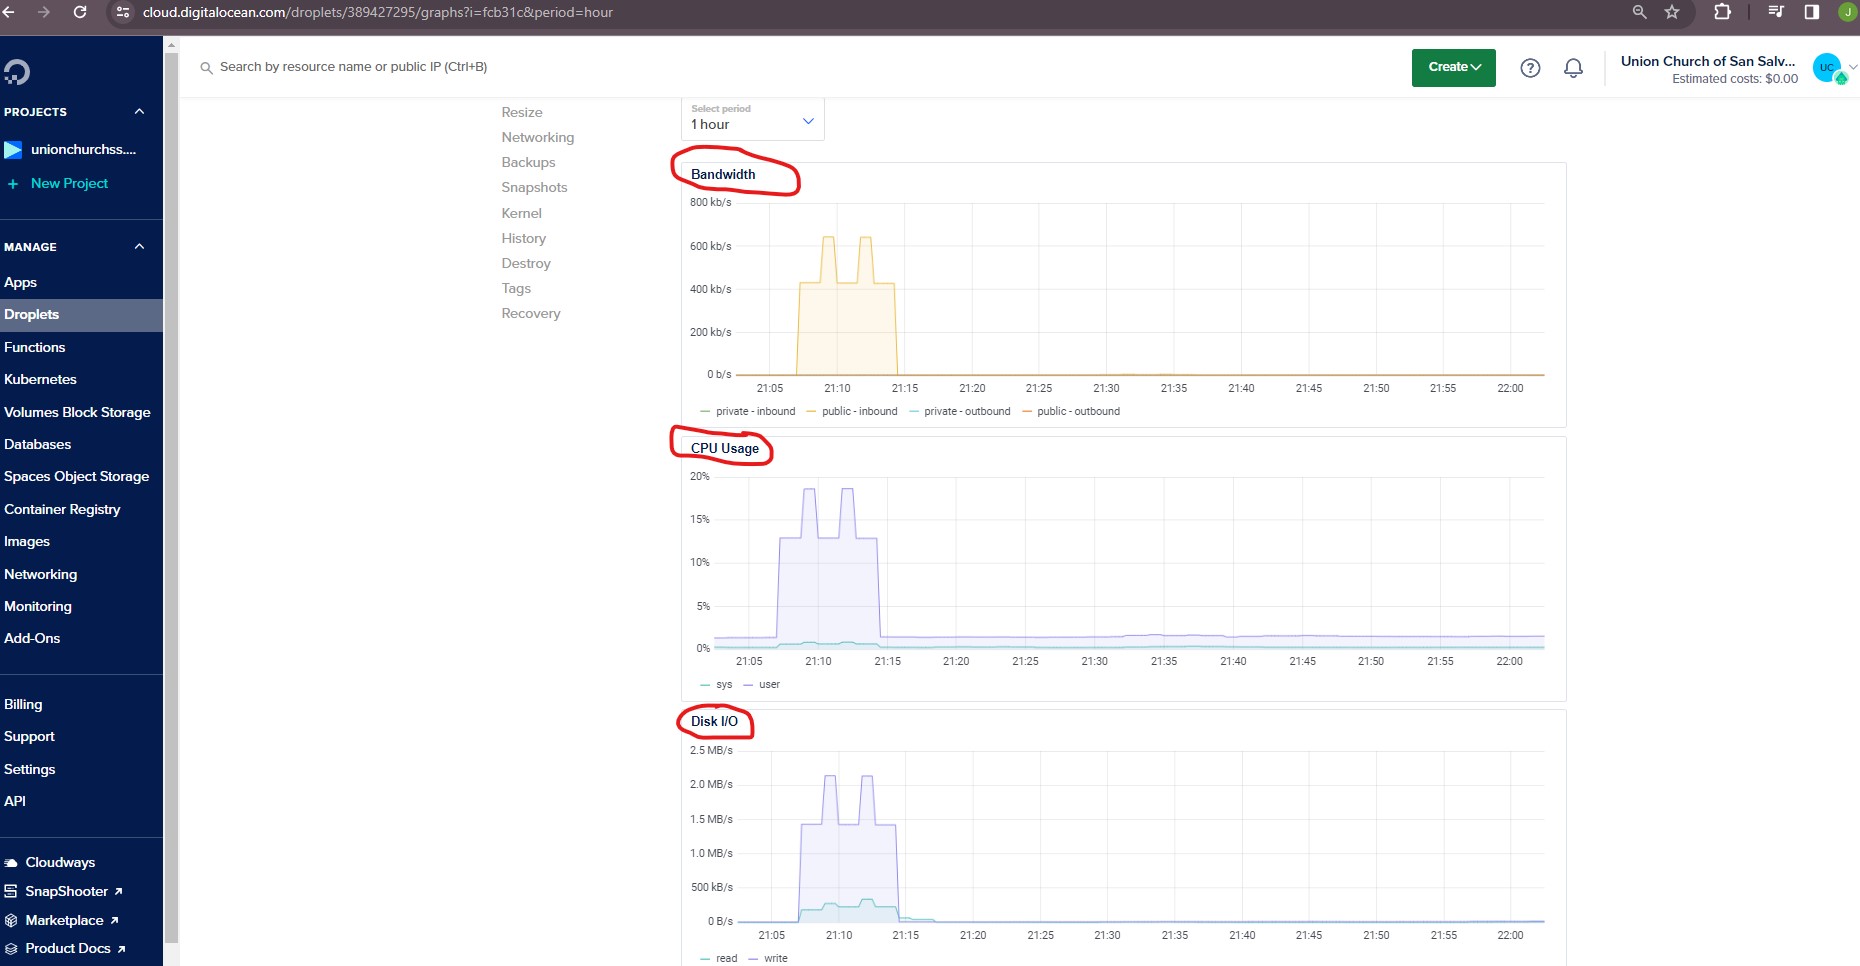
Without the upgrade, only three metrics are available: Bandwidth, CPU Usage and Disk I/O.
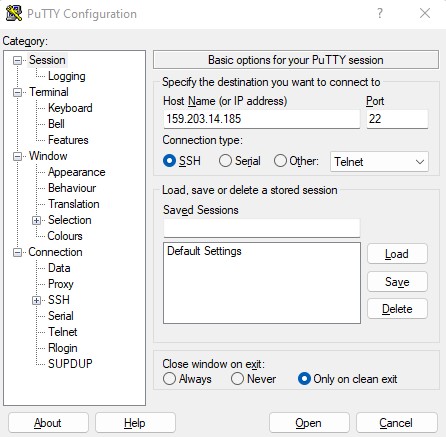
I used PuTTY to log in to my Droplet:
After clicking Open, this pop-up security alert appeared:
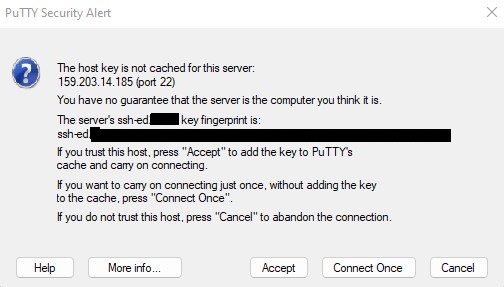
I clicked Accept. Then I connected as root:
Provide root password to login:
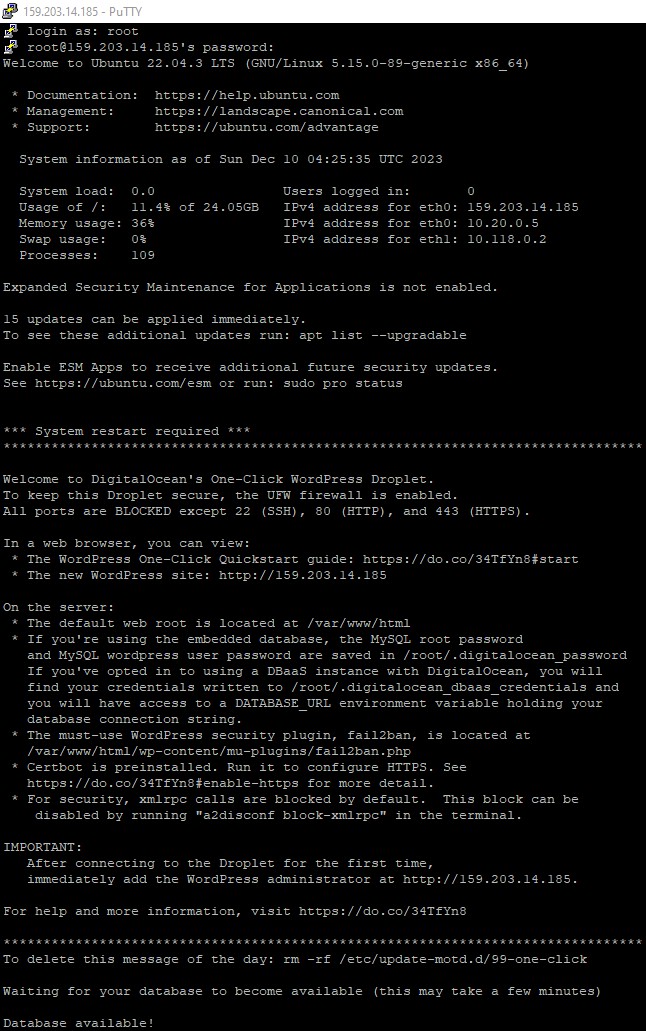
This was the initial output after a successful login:
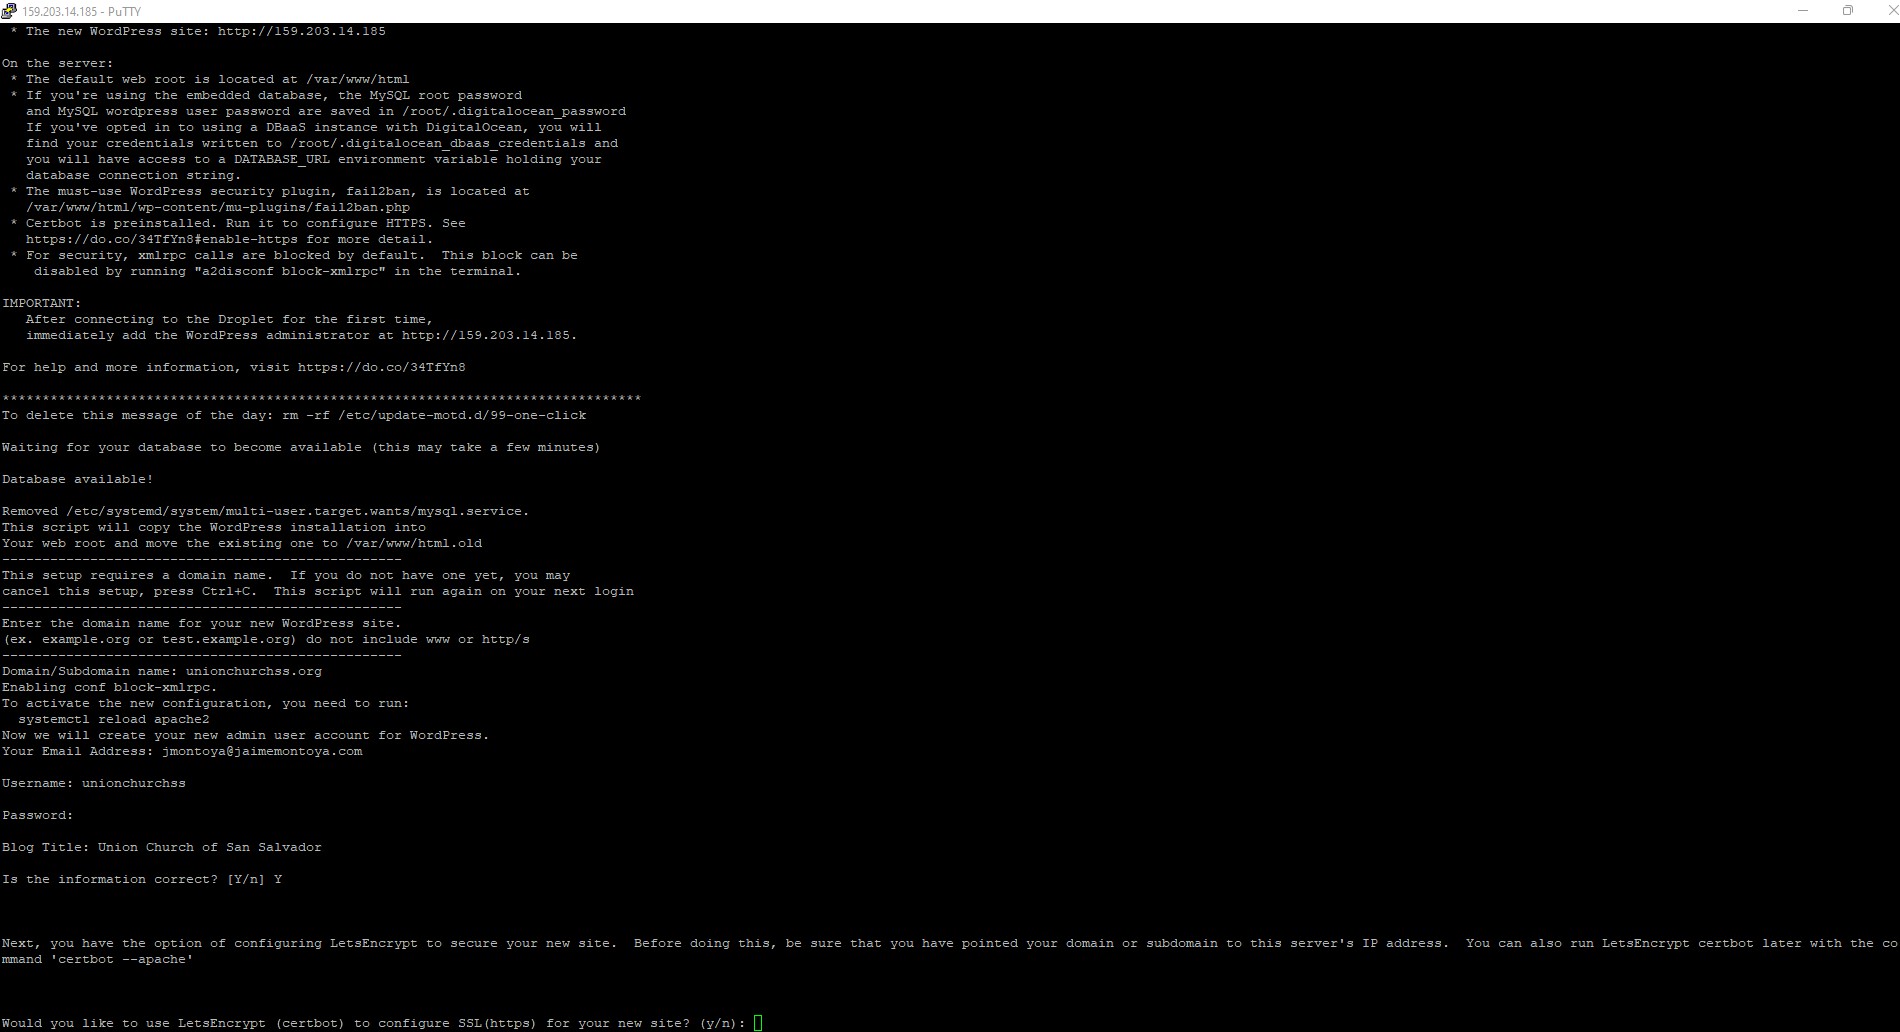
Configure domain name and LetsEncrypt to activate HTTPS (part 1 of 3):
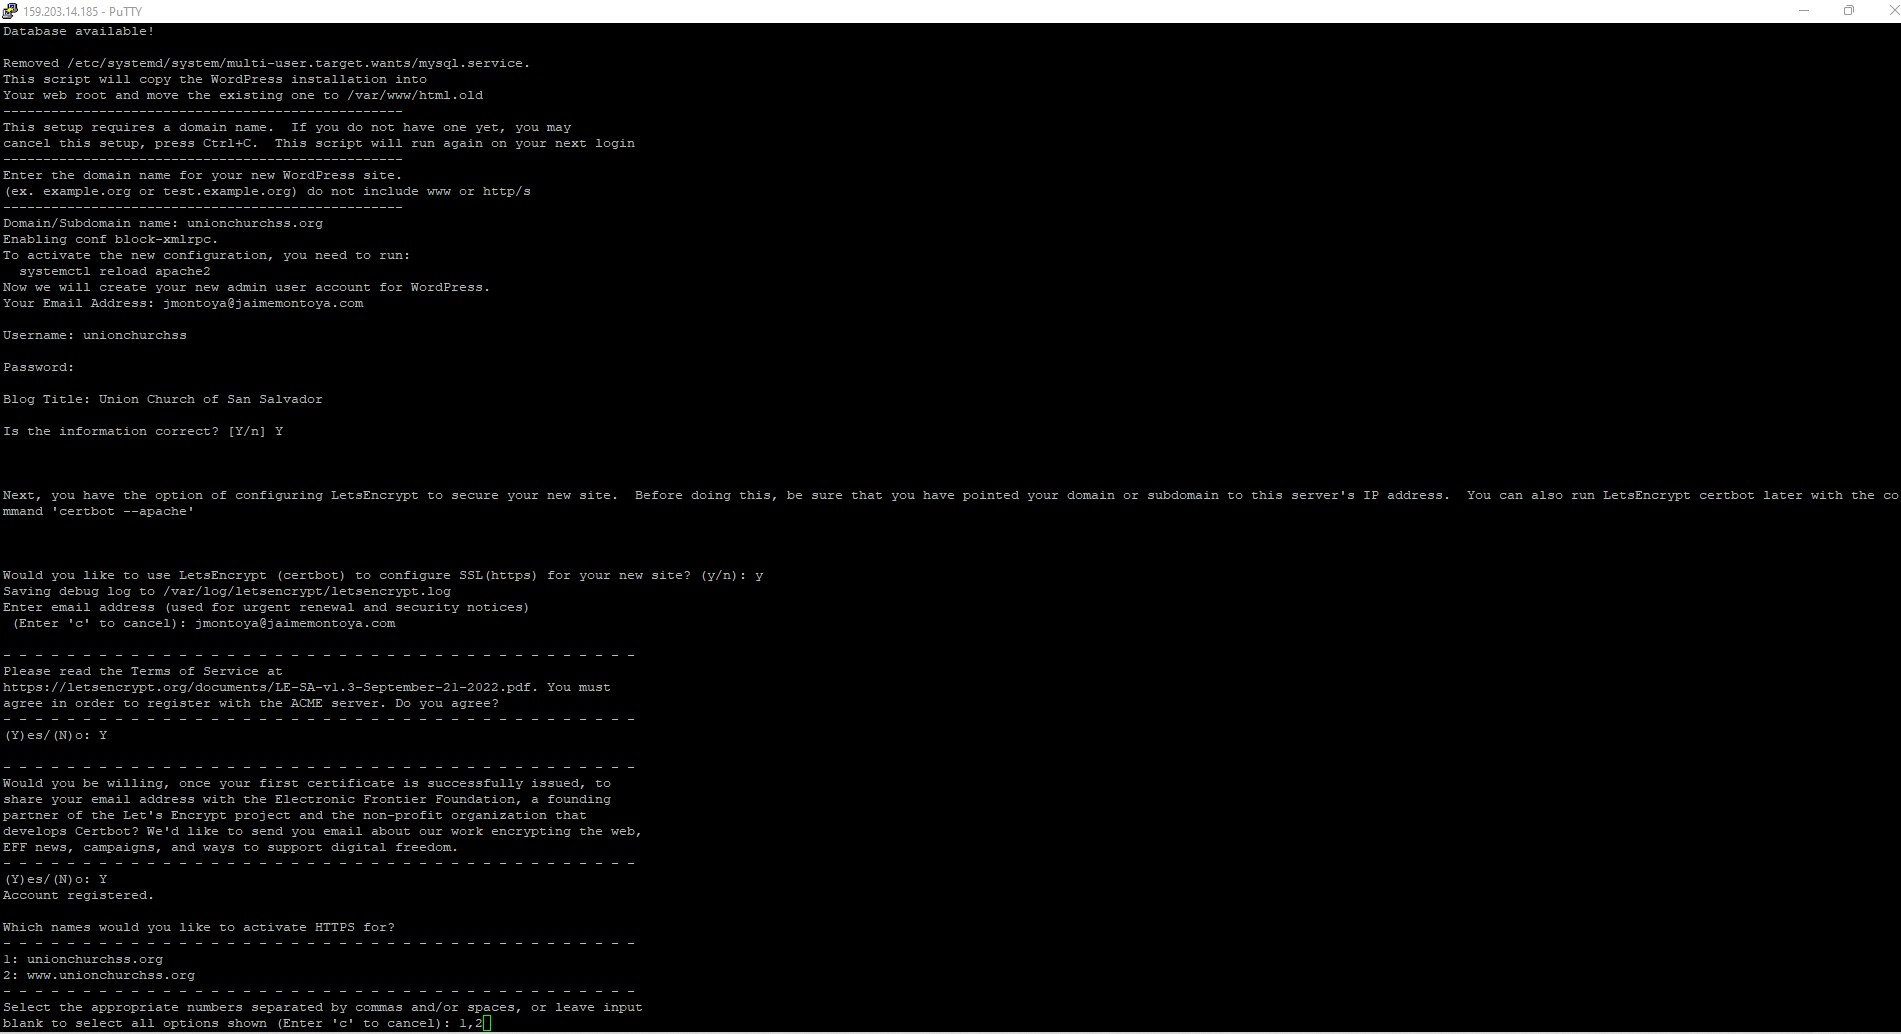
Configure domain name and LetsEncrypt to activate HTTPS (part 2 of 3):
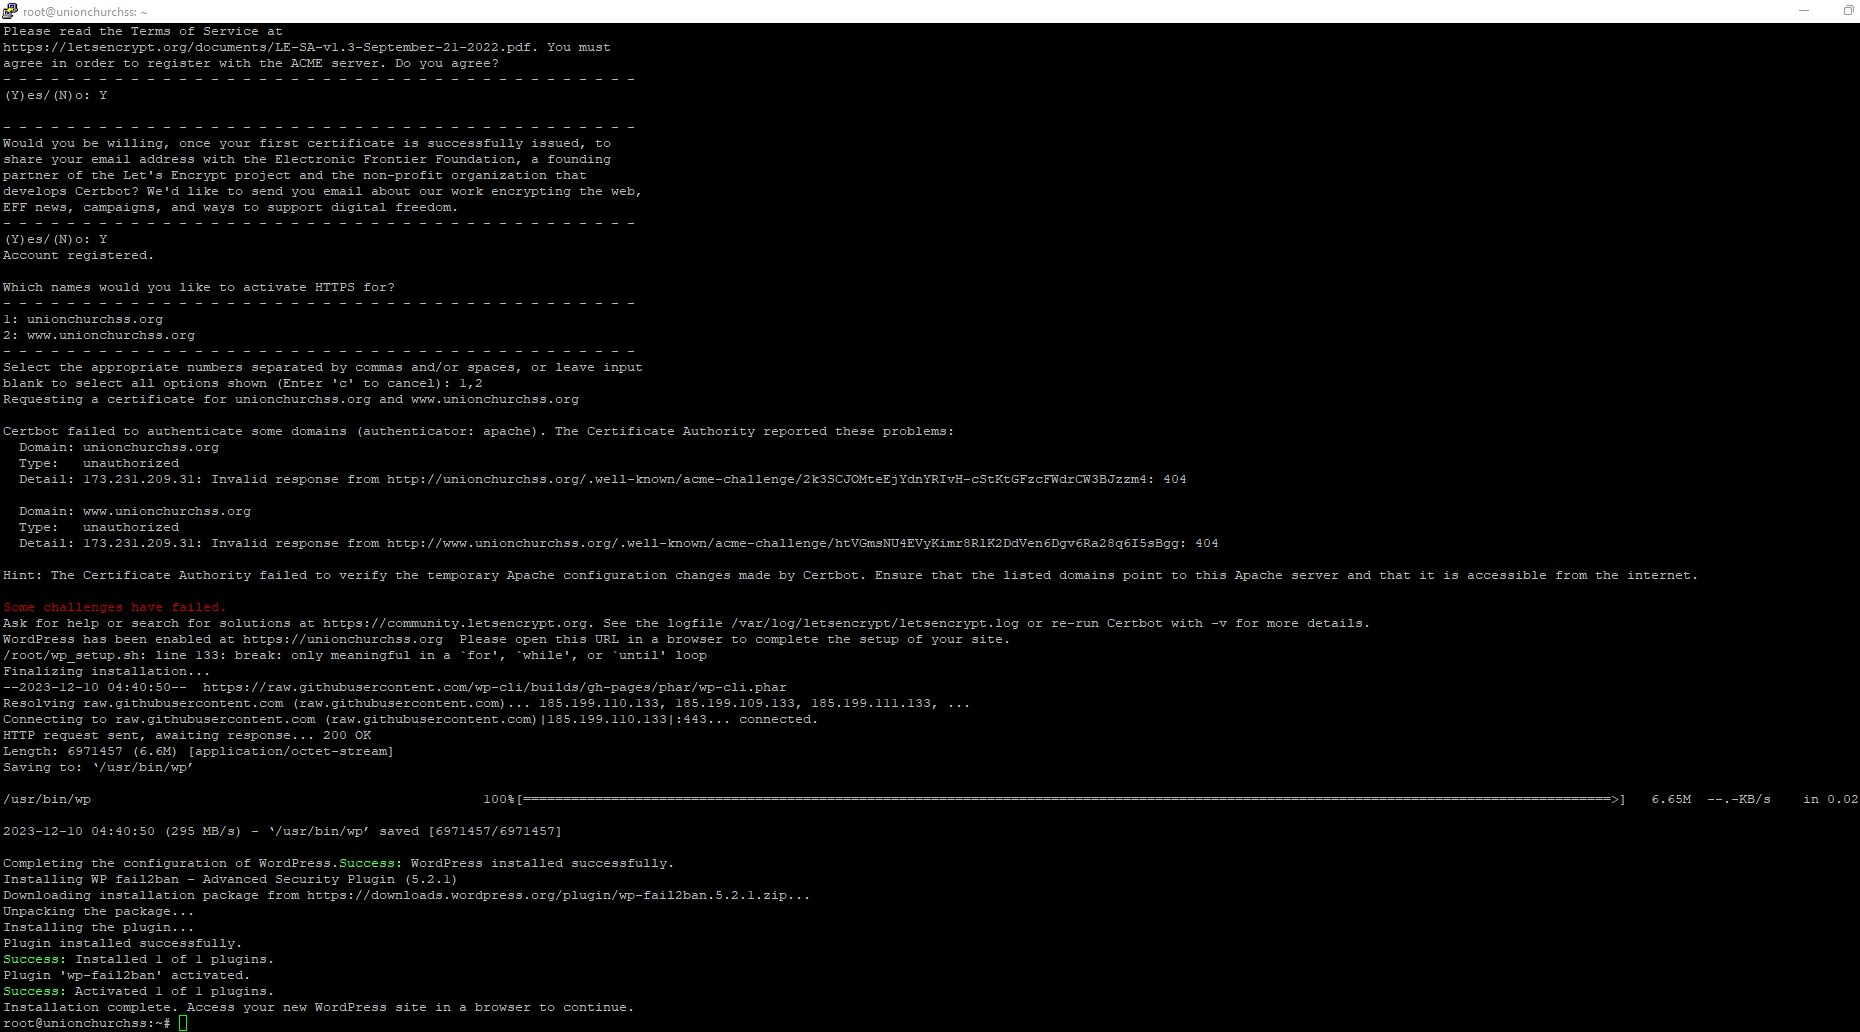
Configure domain name and LetsEncrypt to activate HTTPS (part 3 of 3):
I installed and enabled the metrics agent using curl -sSL https://repos.insights.digitalocean.com/install.sh | sudo bash
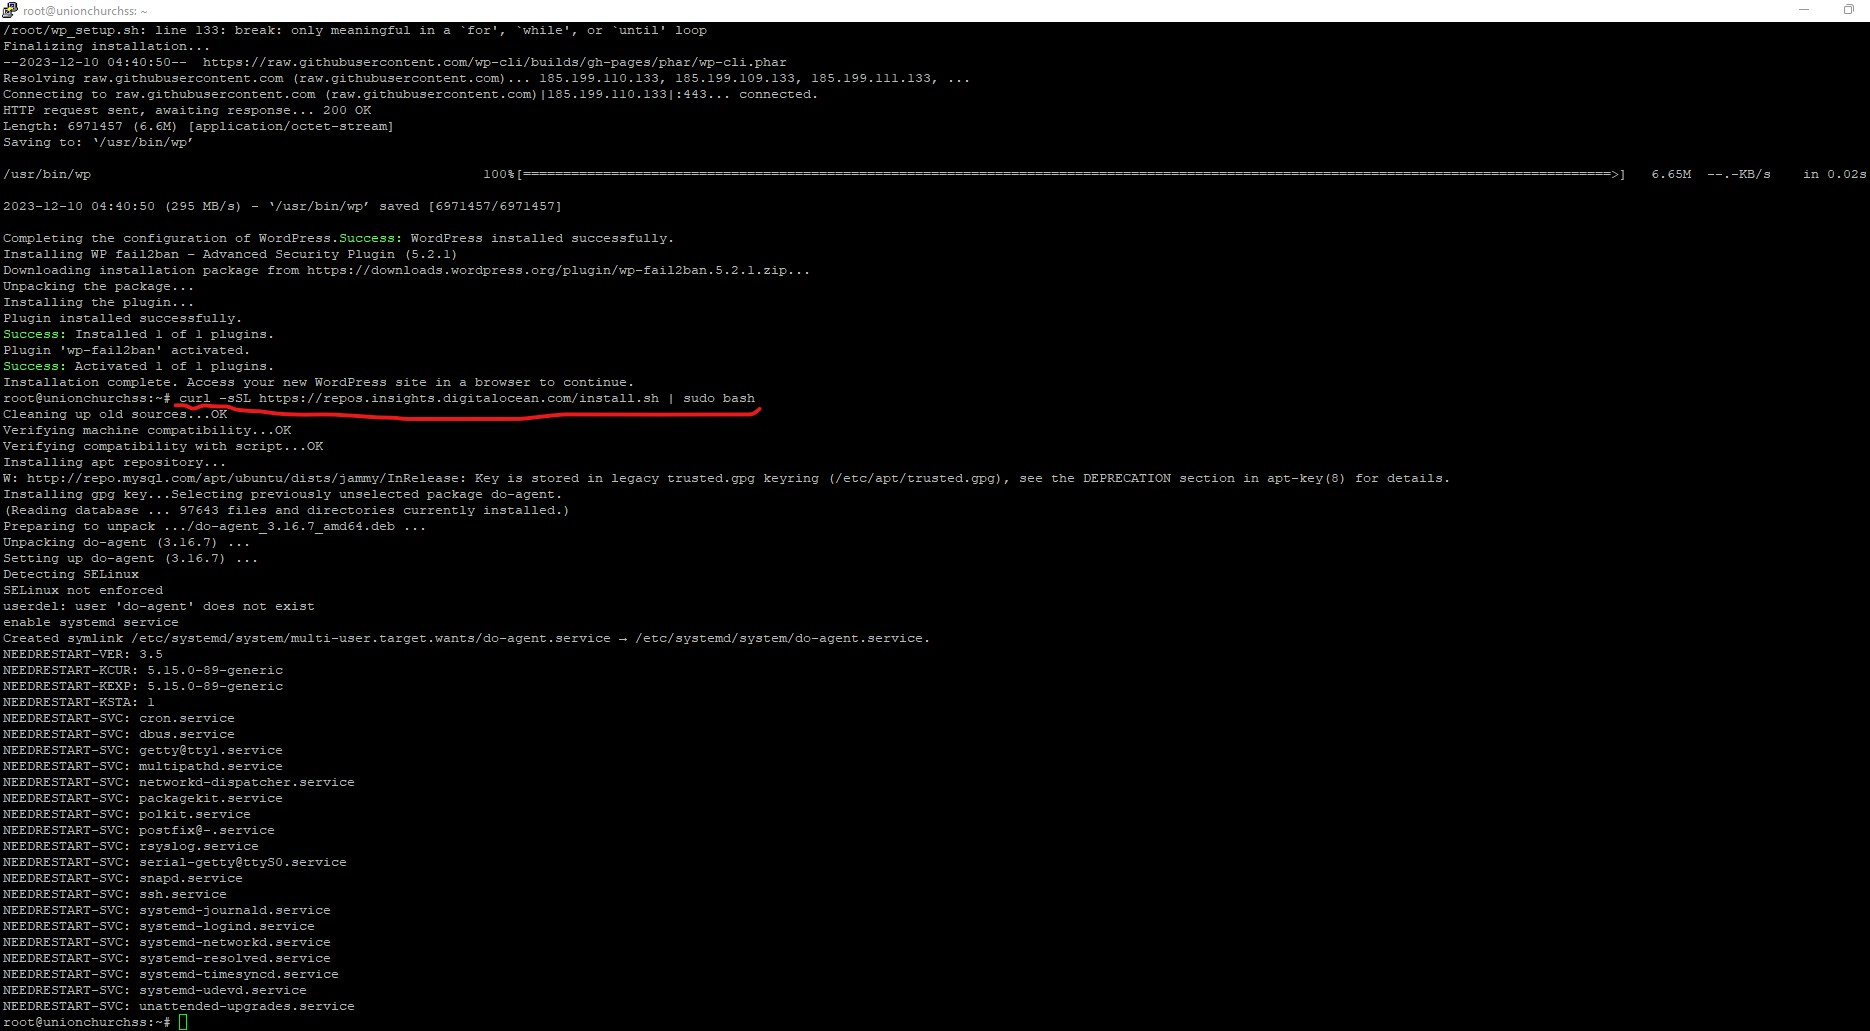
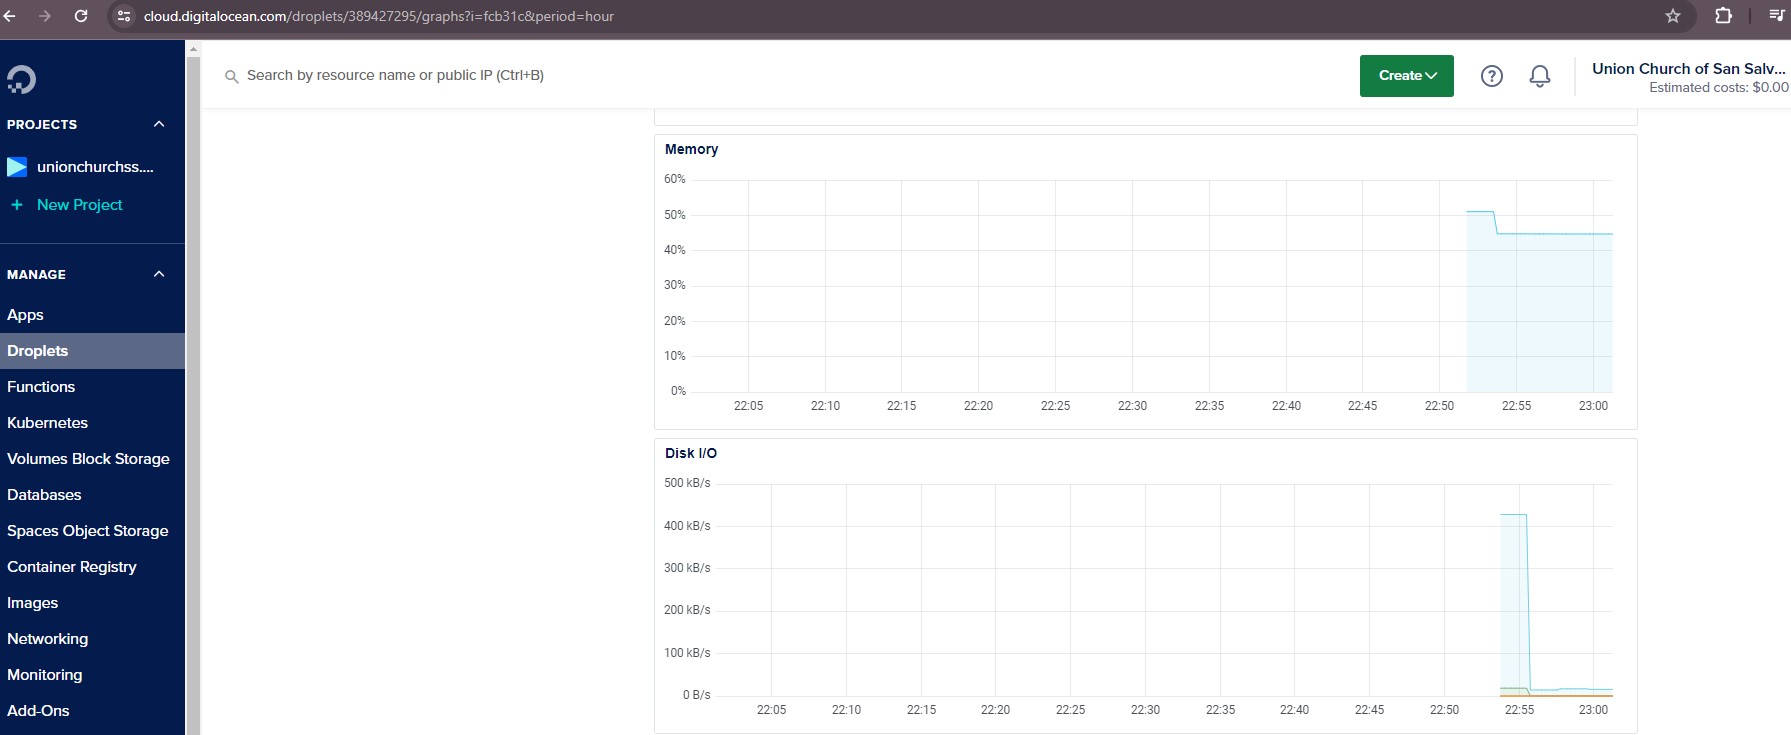
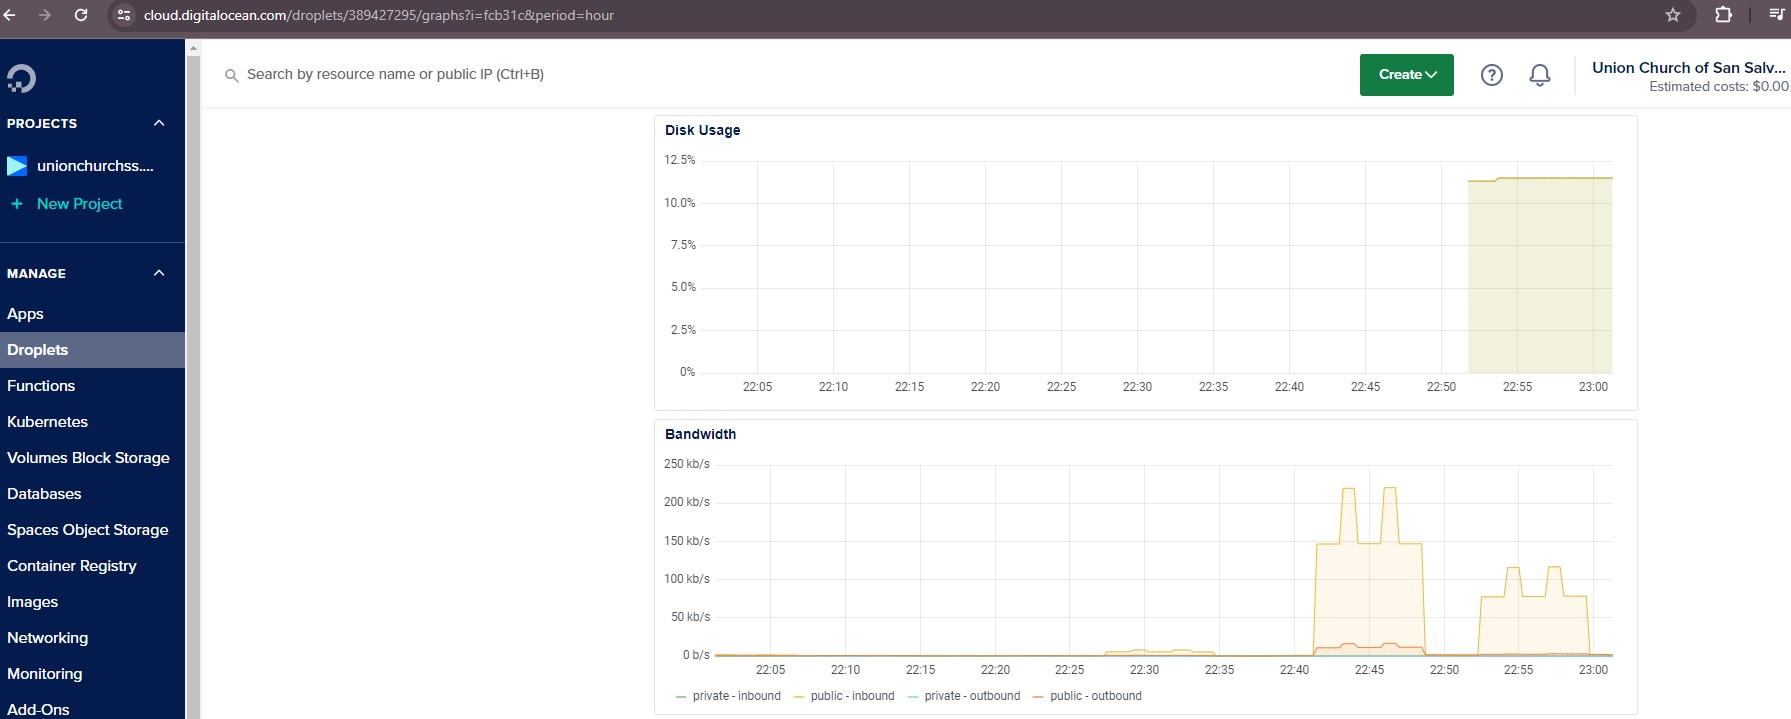
The new metrics Load (1/5/15), Memory and Disk Usage were added.
New metrics part 1 of 3:
New metrics part 2 of 3:
New metrics part 3 of 3:
Use cd /var/www/, adduser unionchurchss, usermod -aG sudo unionchurchss
and chown -R unionchurchss:unionchurchss html to create user, add it to the sudo group, and assign new user as owner of directory where WordPress files are placed: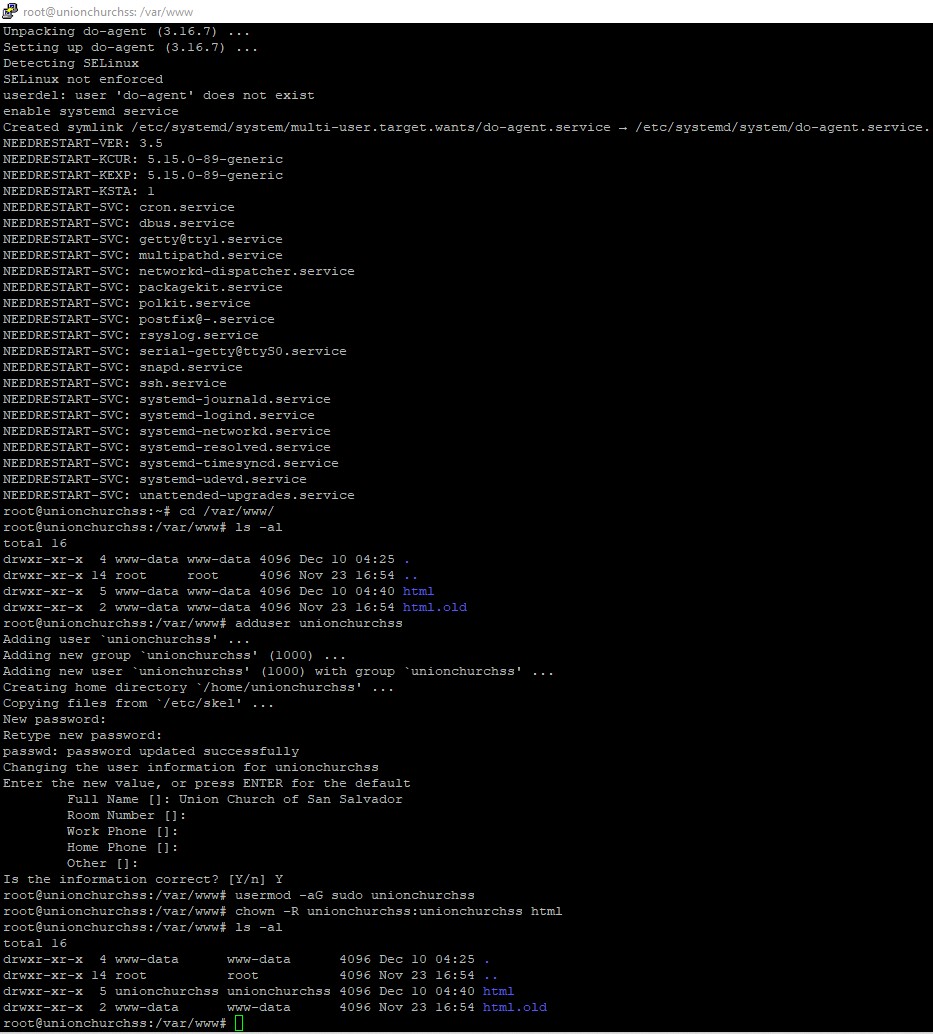
I renamed the html directory to htmlBACKUP and created a new html, assigning proper directory owner and group to this new directory that will host the WordPress files.

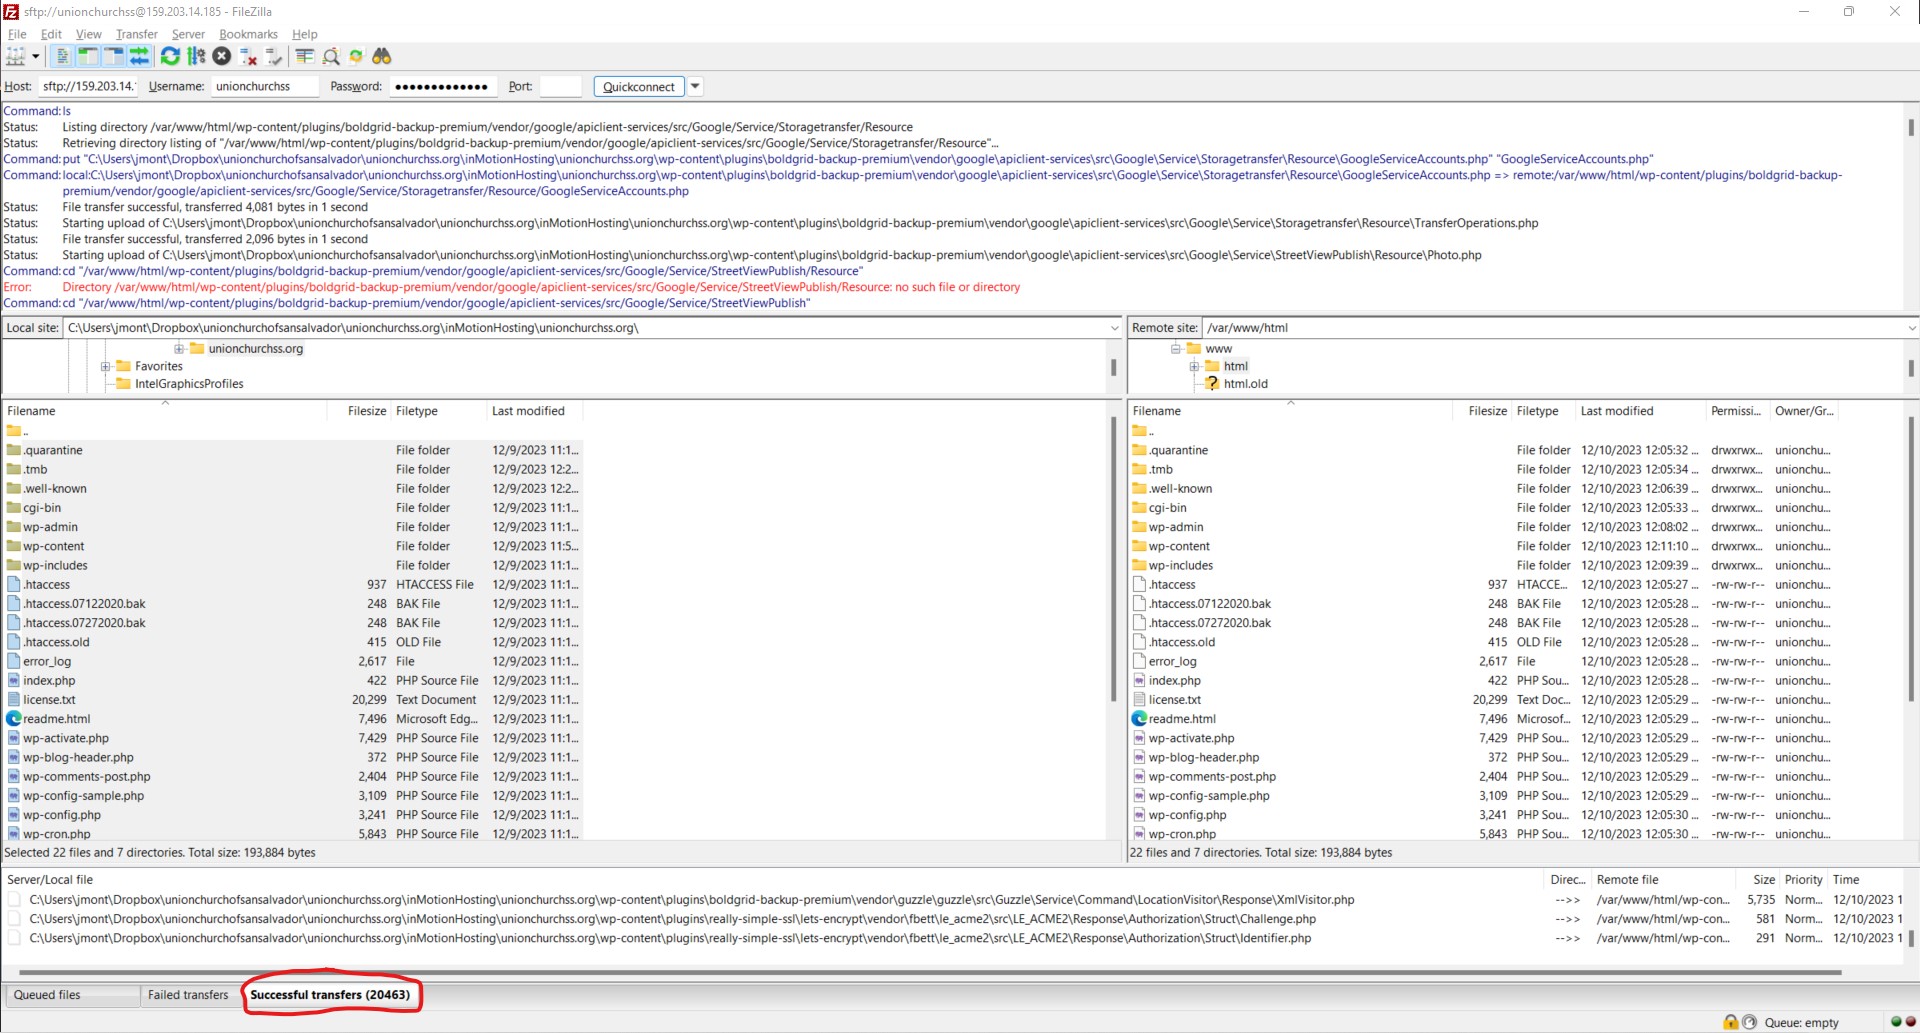
I connected to FTP from FileZilla using 159.203.14.185 as Host, with the username I created, with port 22.

At this point, /var/www/html/ was empty because that was the new folder I created in the previous steps. I uploaded to /var/www/html/ the WordPress source code and content that I downloaded from InMotion Hosting (the 20,406 files with a total size of 5.15 GB, shown in initial steps of this post):
I do not understand why 20,463 files were transferred. I was expecting a transfer of 20,406 files because that was the number that I had at C:\Users\jmont\Dropbox\unionchurchofsansalvador\unionchurchss.org\inMotionHosting\unionchurchss.org\. A possible explanation that I can think of is that maybe some files were counted more than once when a network error did not allow them to be uploaded, and FileZilla tried again. Maybe there was a bug in the FileZilla counter that made the same file to be counted more than once. I will not worry about it and assume that /var/www/html/ has all 20,406 files that I need, nothing less and nothing more.
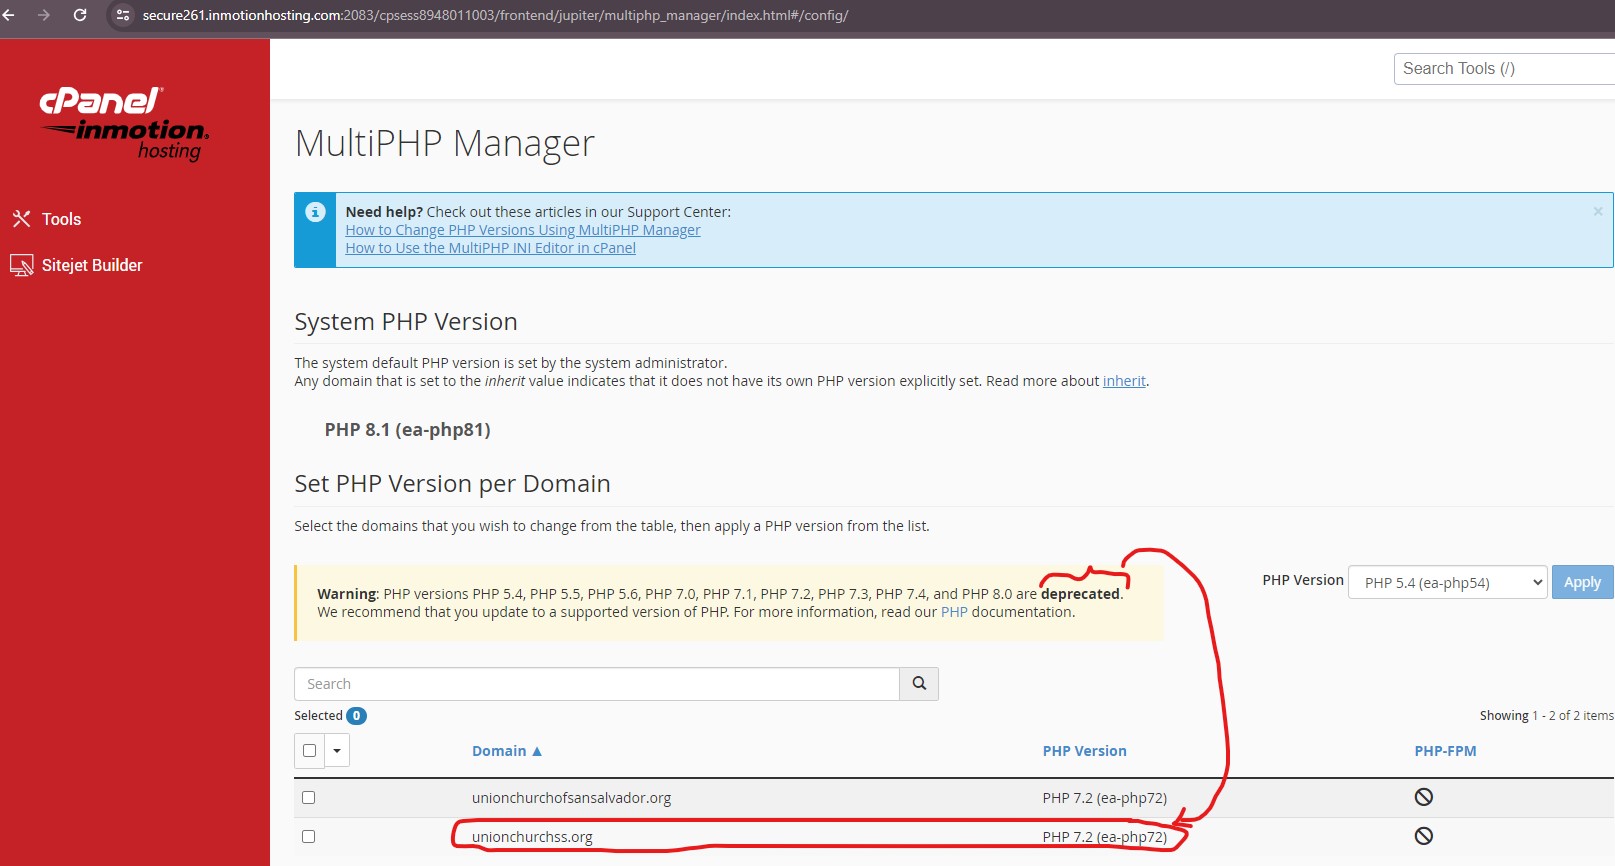
I had to interrupt the migration process because I encountered incompatibility issues with PHP versions for the website. I needed to think carefully about my upgrade and server migration strategy. But I hope the idea was clear. The next steps on the new server would be to load the MySQL database, complete the Apache configurations, and finally changing the DNS settings for the website and email to point to the new server.
The problem was that the website to migrate was running PHP 7.2, a deprecated version:
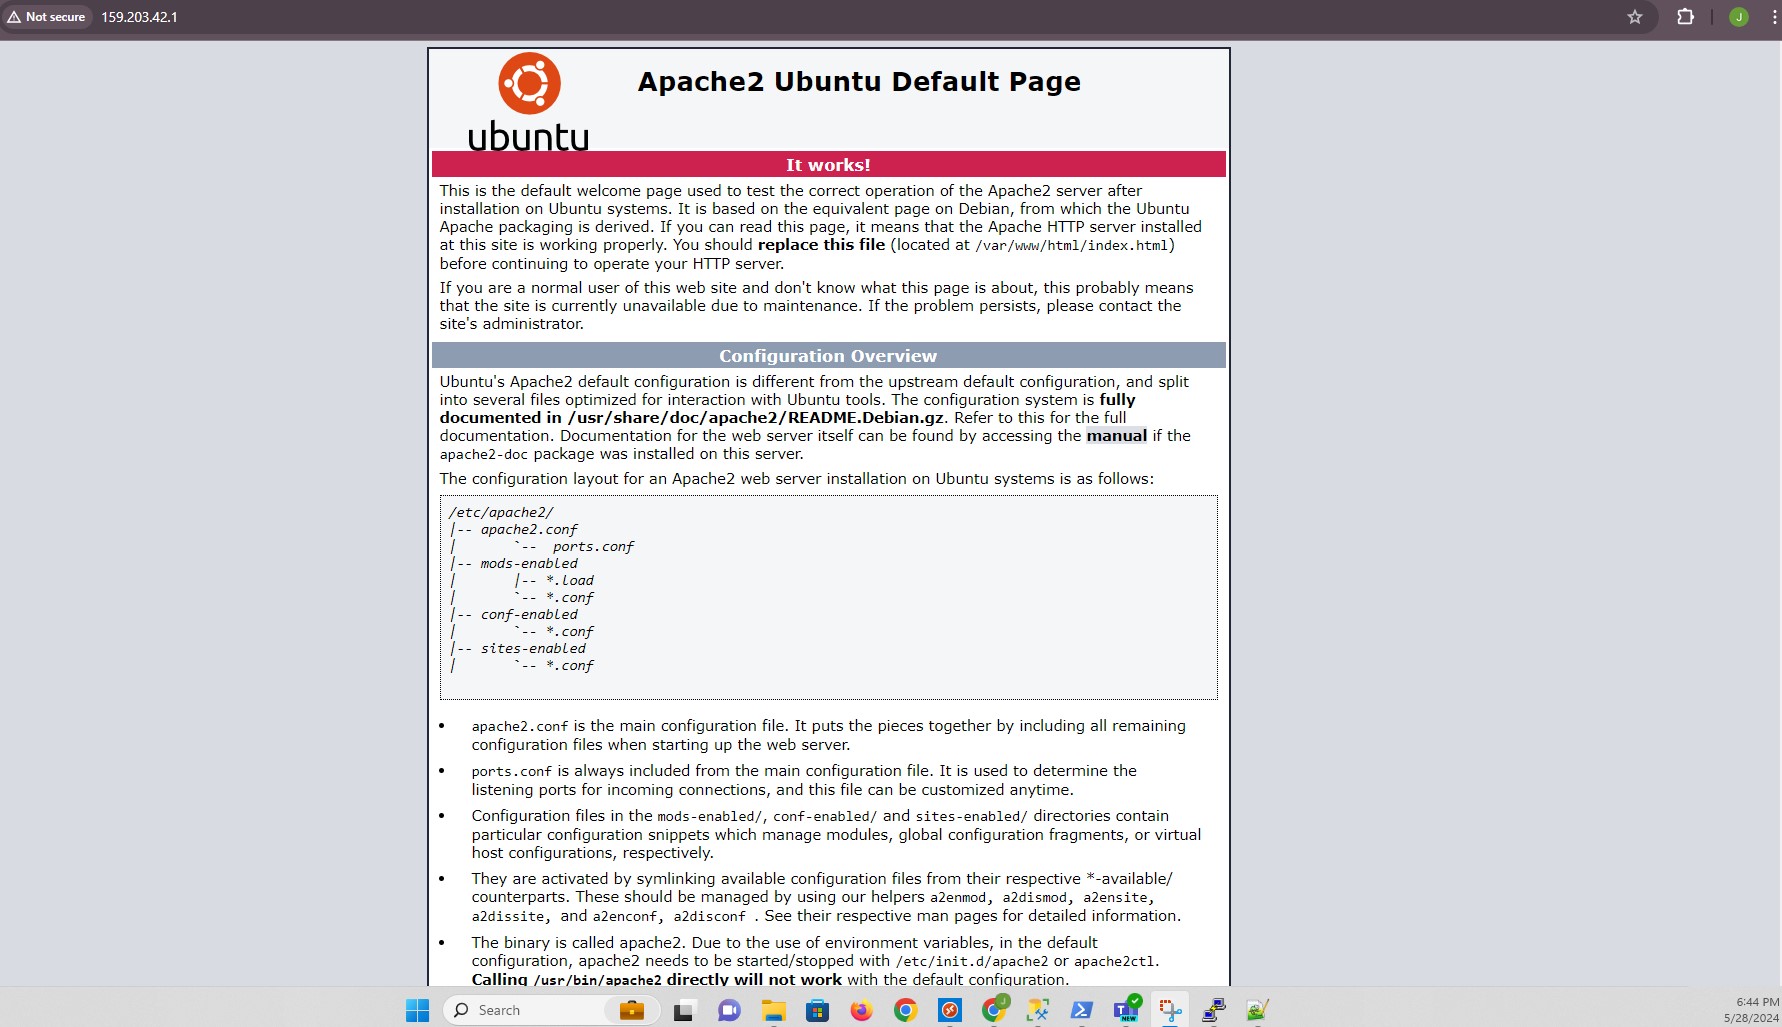
I created a new Droplet with Ubuntu 20.04 (LTS) x64. Then I installed PHP 7.4:
login as: root
root@159.203.42.1's password:
Welcome to Ubuntu 20.04.4 LTS (GNU/Linux 5.4.0-122-generic x86_64)

 * Documentation:  https://help.ubuntu.com
 * Management:     https://landscape.canonical.com
 * Support:        https://ubuntu.com/advantage

  System information as of Tue May 28 21:54:42 UTC 2024

  System load:  0.56              Users logged in:       0
  Usage of /:   6.7% of 24.05GB   IPv4 address for eth0: 159.203.42.1
  Memory usage: 23%               IPv4 address for eth0: 10.20.0.5
  Swap usage:   0%                IPv4 address for eth1: 10.118.0.2
  Processes:    108

199 updates can be applied immediately.
157 of these updates are standard security updates.
To see these additional updates run: apt list --upgradable


The programs included with the Ubuntu system are free software;
the exact distribution terms for each program are described in the
individual files in /usr/share/doc/*/copyright.

Ubuntu comes with ABSOLUTELY NO WARRANTY, to the extent permitted by
applicable law.

root@unionchurchss:~# php -v

Command 'php' not found, but can be installed with:

apt install php7.4-cli

root@unionchurchss:~# apt install php7.4-cli
Reading package lists... Done
Building dependency tree
Reading state information... Done
The following additional packages will be installed:
  php-common php7.4-common php7.4-json php7.4-opcache php7.4-readline
Suggested packages:
  php-pear
The following NEW packages will be installed:
  php-common php7.4-cli php7.4-common php7.4-json php7.4-opcache php7.4-readline
0 upgraded, 6 newly installed, 0 to remove and 194 not upgraded.
Need to get 2655 kB of archives.
After this operation, 13.2 MB of additional disk space will be used.
Do you want to continue? [Y/n] Y
Get:1 http://mirrors.digitalocean.com/ubuntu focal/main amd64 php-common all 2:75 [11.9 kB]
Get:2 http://mirrors.digitalocean.com/ubuntu focal-updates/main amd64 php7.4-common amd64 7.4.3-4ubuntu2.22 [984 kB]
Get:3 http://mirrors.digitalocean.com/ubuntu focal-updates/main amd64 php7.4-json amd64 7.4.3-4ubuntu2.22 [19.2 kB]
Get:4 http://mirrors.digitalocean.com/ubuntu focal-updates/main amd64 php7.4-opcache amd64 7.4.3-4ubuntu2.22 [198 kB]
Get:5 http://mirrors.digitalocean.com/ubuntu focal-updates/main amd64 php7.4-readline amd64 7.4.3-4ubuntu2.22 [12.6 kB]
Get:6 http://mirrors.digitalocean.com/ubuntu focal-updates/main amd64 php7.4-cli amd64 7.4.3-4ubuntu2.22 [1429 kB]
Fetched 2655 kB in 1s (2001 kB/s)
Selecting previously unselected package php-common.
(Reading database ... 63846 files and directories currently installed.)
Preparing to unpack .../0-php-common_2%3a75_all.deb ...
Unpacking php-common (2:75) ...
Selecting previously unselected package php7.4-common.
Preparing to unpack .../1-php7.4-common_7.4.3-4ubuntu2.22_amd64.deb ...
Unpacking php7.4-common (7.4.3-4ubuntu2.22) ...
Selecting previously unselected package php7.4-json.
Preparing to unpack .../2-php7.4-json_7.4.3-4ubuntu2.22_amd64.deb ...
Unpacking php7.4-json (7.4.3-4ubuntu2.22) ...
Selecting previously unselected package php7.4-opcache.
Preparing to unpack .../3-php7.4-opcache_7.4.3-4ubuntu2.22_amd64.deb ...
Unpacking php7.4-opcache (7.4.3-4ubuntu2.22) ...
Selecting previously unselected package php7.4-readline.
Preparing to unpack .../4-php7.4-readline_7.4.3-4ubuntu2.22_amd64.deb ...
Unpacking php7.4-readline (7.4.3-4ubuntu2.22) ...
Selecting previously unselected package php7.4-cli.
Preparing to unpack .../5-php7.4-cli_7.4.3-4ubuntu2.22_amd64.deb ...
Unpacking php7.4-cli (7.4.3-4ubuntu2.22) ...
Setting up php-common (2:75) ...
Created symlink /etc/systemd/system/timers.target.wants/phpsessionclean.timer → /lib/systemd/system/phpsessionclean.timer.
Setting up php7.4-common (7.4.3-4ubuntu2.22) ...

Creating config file /etc/php/7.4/mods-available/calendar.ini with new version

Creating config file /etc/php/7.4/mods-available/ctype.ini with new version

Creating config file /etc/php/7.4/mods-available/exif.ini with new version

Creating config file /etc/php/7.4/mods-available/fileinfo.ini with new version

Creating config file /etc/php/7.4/mods-available/ffi.ini with new version

Creating config file /etc/php/7.4/mods-available/ftp.ini with new version

Creating config file /etc/php/7.4/mods-available/gettext.ini with new version

Creating config file /etc/php/7.4/mods-available/iconv.ini with new version

Creating config file /etc/php/7.4/mods-available/pdo.ini with new version

Creating config file /etc/php/7.4/mods-available/phar.ini with new version

Creating config file /etc/php/7.4/mods-available/posix.ini with new version

Creating config file /etc/php/7.4/mods-available/shmop.ini with new version

Creating config file /etc/php/7.4/mods-available/sockets.ini with new version

Creating config file /etc/php/7.4/mods-available/sysvmsg.ini with new version

Creating config file /etc/php/7.4/mods-available/sysvsem.ini with new version

Creating config file /etc/php/7.4/mods-available/sysvshm.ini with new version

Creating config file /etc/php/7.4/mods-available/tokenizer.ini with new version
Setting up php7.4-readline (7.4.3-4ubuntu2.22) ...

Creating config file /etc/php/7.4/mods-available/readline.ini with new version
Setting up php7.4-opcache (7.4.3-4ubuntu2.22) ...

Creating config file /etc/php/7.4/mods-available/opcache.ini with new version
Setting up php7.4-json (7.4.3-4ubuntu2.22) ...

Creating config file /etc/php/7.4/mods-available/json.ini with new version
Setting up php7.4-cli (7.4.3-4ubuntu2.22) ...
update-alternatives: using /usr/bin/php7.4 to provide /usr/bin/php (php) in auto mode
update-alternatives: using /usr/bin/phar7.4 to provide /usr/bin/phar (phar) in auto mode
update-alternatives: using /usr/bin/phar.phar7.4 to provide /usr/bin/phar.phar (phar.phar) in auto mode

Creating config file /etc/php/7.4/cli/php.ini with new version
Processing triggers for man-db (2.9.1-1) ...
Processing triggers for php7.4-cli (7.4.3-4ubuntu2.22) ...
root@unionchurchss:~# php -v
PHP 7.4.3-4ubuntu2.22 (cli) (built: May  1 2024 10:11:33) ( NTS )
Copyright (c) The PHP Group
Zend Engine v3.4.0, Copyright (c) Zend Technologies
    with Zend OPcache v7.4.3-4ubuntu2.22, Copyright (c), by Zend Technologies
root@unionchurchss:~#
I installed some of the most common modules for PHP:
root@unionchurchss:~# apt-get install -y php7.4-cli php7.4-json php7.4-common php7.4-mysql php7.4-zip php7.4-gd php7.4-mbstring php7.4-curl php7.4-xml php7.4-bcmath
Reading package lists... Done
Building dependency tree
Reading state information... Done
php7.4-cli is already the newest version (7.4.3-4ubuntu2.22).
php7.4-common is already the newest version (7.4.3-4ubuntu2.22).
php7.4-common set to manually installed.
php7.4-json is already the newest version (7.4.3-4ubuntu2.22).
php7.4-json set to manually installed.
The following additional packages will be installed:
  fontconfig-config fonts-dejavu-core libfontconfig1 libgd3 libjbig0 libjpeg-turbo8 libjpeg8 libonig5 libtiff5 libwebp6 libxpm4 libzip5
Suggested packages:
  libgd-tools
The following NEW packages will be installed:
  fontconfig-config fonts-dejavu-core libfontconfig1 libgd3 libjbig0 libjpeg-turbo8 libjpeg8 libonig5 libtiff5 libwebp6 libxpm4 libzip5 php7.4-bcmath php7.4-curl php7.4-gd php7.4-mbstring php7.4-mysql php7.4-xml php7.4-zip
0 upgraded, 19 newly installed, 0 to remove and 194 not upgraded.
Need to get 2733 kB of archives.
After this operation, 8993 kB of additional disk space will be used.
Get:1 http://mirrors.digitalocean.com/ubuntu focal/main amd64 fonts-dejavu-core all 2.37-1 [1041 kB]
Get:2 http://mirrors.digitalocean.com/ubuntu focal/main amd64 fontconfig-config all 2.13.1-2ubuntu3 [28.8 kB]
Get:3 http://mirrors.digitalocean.com/ubuntu focal/main amd64 libfontconfig1 amd64 2.13.1-2ubuntu3 [114 kB]
Get:4 http://mirrors.digitalocean.com/ubuntu focal-updates/main amd64 libjpeg-turbo8 amd64 2.0.3-0ubuntu1.20.04.3 [118 kB]
Get:5 http://mirrors.digitalocean.com/ubuntu focal/main amd64 libjpeg8 amd64 8c-2ubuntu8 [2194 B]
Get:6 http://mirrors.digitalocean.com/ubuntu focal-updates/main amd64 libjbig0 amd64 2.1-3.1ubuntu0.20.04.1 [27.3 kB]
Get:7 http://mirrors.digitalocean.com/ubuntu focal-updates/main amd64 libwebp6 amd64 0.6.1-2ubuntu0.20.04.3 [185 kB]
Get:8 http://mirrors.digitalocean.com/ubuntu focal-updates/main amd64 libtiff5 amd64 4.1.0+git191117-2ubuntu0.20.04.12 [164 kB]
Get:9 http://mirrors.digitalocean.com/ubuntu focal-updates/main amd64 libxpm4 amd64 1:3.5.12-1ubuntu0.20.04.2 [34.9 kB]
Get:10 http://mirrors.digitalocean.com/ubuntu focal-updates/main amd64 libgd3 amd64 2.2.5-5.2ubuntu2.1 [118 kB]
Get:11 http://mirrors.digitalocean.com/ubuntu focal/universe amd64 libonig5 amd64 6.9.4-1 [142 kB]
Get:12 http://mirrors.digitalocean.com/ubuntu focal/universe amd64 libzip5 amd64 1.5.1-0ubuntu1 [46.7 kB]
Get:13 http://mirrors.digitalocean.com/ubuntu focal-updates/universe amd64 php7.4-bcmath amd64 7.4.3-4ubuntu2.22 [15.1 kB]
Get:14 http://mirrors.digitalocean.com/ubuntu focal-updates/main amd64 php7.4-curl amd64 7.4.3-4ubuntu2.22 [31.0 kB]
Get:15 http://mirrors.digitalocean.com/ubuntu focal-updates/main amd64 php7.4-gd amd64 7.4.3-4ubuntu2.22 [28.0 kB]
Get:16 http://mirrors.digitalocean.com/ubuntu focal-updates/universe amd64 php7.4-mbstring amd64 7.4.3-4ubuntu2.22 [395 kB]
Get:17 http://mirrors.digitalocean.com/ubuntu focal-updates/main amd64 php7.4-mysql amd64 7.4.3-4ubuntu2.22 [121 kB]
Get:18 http://mirrors.digitalocean.com/ubuntu focal-updates/main amd64 php7.4-xml amd64 7.4.3-4ubuntu2.22 [99.4 kB]
Get:19 http://mirrors.digitalocean.com/ubuntu focal-updates/universe amd64 php7.4-zip amd64 7.4.3-4ubuntu2.22 [21.5 kB]
Fetched 2733 kB in 1s (3387 kB/s)
Selecting previously unselected package fonts-dejavu-core.
(Reading database ... 63965 files and directories currently installed.)
Preparing to unpack .../00-fonts-dejavu-core_2.37-1_all.deb ...
Unpacking fonts-dejavu-core (2.37-1) ...
Selecting previously unselected package fontconfig-config.
Preparing to unpack .../01-fontconfig-config_2.13.1-2ubuntu3_all.deb ...
Unpacking fontconfig-config (2.13.1-2ubuntu3) ...
Selecting previously unselected package libfontconfig1:amd64.
Preparing to unpack .../02-libfontconfig1_2.13.1-2ubuntu3_amd64.deb ...
Unpacking libfontconfig1:amd64 (2.13.1-2ubuntu3) ...
Selecting previously unselected package libjpeg-turbo8:amd64.
Preparing to unpack .../03-libjpeg-turbo8_2.0.3-0ubuntu1.20.04.3_amd64.deb ...
Unpacking libjpeg-turbo8:amd64 (2.0.3-0ubuntu1.20.04.3) ...
Selecting previously unselected package libjpeg8:amd64.
Preparing to unpack .../04-libjpeg8_8c-2ubuntu8_amd64.deb ...
Unpacking libjpeg8:amd64 (8c-2ubuntu8) ...
Selecting previously unselected package libjbig0:amd64.
Preparing to unpack .../05-libjbig0_2.1-3.1ubuntu0.20.04.1_amd64.deb ...
Unpacking libjbig0:amd64 (2.1-3.1ubuntu0.20.04.1) ...
Selecting previously unselected package libwebp6:amd64.
Preparing to unpack .../06-libwebp6_0.6.1-2ubuntu0.20.04.3_amd64.deb ...
Unpacking libwebp6:amd64 (0.6.1-2ubuntu0.20.04.3) ...
Selecting previously unselected package libtiff5:amd64.
Preparing to unpack .../07-libtiff5_4.1.0+git191117-2ubuntu0.20.04.12_amd64.deb ...
Unpacking libtiff5:amd64 (4.1.0+git191117-2ubuntu0.20.04.12) ...
Selecting previously unselected package libxpm4:amd64.
Preparing to unpack .../08-libxpm4_1%3a3.5.12-1ubuntu0.20.04.2_amd64.deb ...
Unpacking libxpm4:amd64 (1:3.5.12-1ubuntu0.20.04.2) ...
Selecting previously unselected package libgd3:amd64.
Preparing to unpack .../09-libgd3_2.2.5-5.2ubuntu2.1_amd64.deb ...
Unpacking libgd3:amd64 (2.2.5-5.2ubuntu2.1) ...
Selecting previously unselected package libonig5:amd64.
Preparing to unpack .../10-libonig5_6.9.4-1_amd64.deb ...
Unpacking libonig5:amd64 (6.9.4-1) ...
Selecting previously unselected package libzip5:amd64.
Preparing to unpack .../11-libzip5_1.5.1-0ubuntu1_amd64.deb ...
Unpacking libzip5:amd64 (1.5.1-0ubuntu1) ...
Selecting previously unselected package php7.4-bcmath.
Preparing to unpack .../12-php7.4-bcmath_7.4.3-4ubuntu2.22_amd64.deb ...
Unpacking php7.4-bcmath (7.4.3-4ubuntu2.22) ...
Selecting previously unselected package php7.4-curl.
Preparing to unpack .../13-php7.4-curl_7.4.3-4ubuntu2.22_amd64.deb ...
Unpacking php7.4-curl (7.4.3-4ubuntu2.22) ...
Selecting previously unselected package php7.4-gd.
Preparing to unpack .../14-php7.4-gd_7.4.3-4ubuntu2.22_amd64.deb ...
Unpacking php7.4-gd (7.4.3-4ubuntu2.22) ...
Selecting previously unselected package php7.4-mbstring.
Preparing to unpack .../15-php7.4-mbstring_7.4.3-4ubuntu2.22_amd64.deb ...
Unpacking php7.4-mbstring (7.4.3-4ubuntu2.22) ...
Selecting previously unselected package php7.4-mysql.
Preparing to unpack .../16-php7.4-mysql_7.4.3-4ubuntu2.22_amd64.deb ...
Unpacking php7.4-mysql (7.4.3-4ubuntu2.22) ...
Selecting previously unselected package php7.4-xml.
Preparing to unpack .../17-php7.4-xml_7.4.3-4ubuntu2.22_amd64.deb ...
Unpacking php7.4-xml (7.4.3-4ubuntu2.22) ...
Selecting previously unselected package php7.4-zip.
Preparing to unpack .../18-php7.4-zip_7.4.3-4ubuntu2.22_amd64.deb ...
Unpacking php7.4-zip (7.4.3-4ubuntu2.22) ...
Setting up php7.4-xml (7.4.3-4ubuntu2.22) ...

Creating config file /etc/php/7.4/mods-available/dom.ini with new version

Creating config file /etc/php/7.4/mods-available/simplexml.ini with new version

Creating config file /etc/php/7.4/mods-available/xml.ini with new version

Creating config file /etc/php/7.4/mods-available/xmlreader.ini with new version

Creating config file /etc/php/7.4/mods-available/xmlwriter.ini with new version

Creating config file /etc/php/7.4/mods-available/xsl.ini with new version
Setting up libxpm4:amd64 (1:3.5.12-1ubuntu0.20.04.2) ...
Setting up php7.4-curl (7.4.3-4ubuntu2.22) ...

Creating config file /etc/php/7.4/mods-available/curl.ini with new version
Setting up php7.4-mysql (7.4.3-4ubuntu2.22) ...

Creating config file /etc/php/7.4/mods-available/mysqlnd.ini with new version

Creating config file /etc/php/7.4/mods-available/mysqli.ini with new version

Creating config file /etc/php/7.4/mods-available/pdo_mysql.ini with new version
Setting up libzip5:amd64 (1.5.1-0ubuntu1) ...
Setting up php7.4-bcmath (7.4.3-4ubuntu2.22) ...

Creating config file /etc/php/7.4/mods-available/bcmath.ini with new version
Setting up libjbig0:amd64 (2.1-3.1ubuntu0.20.04.1) ...
Setting up php7.4-zip (7.4.3-4ubuntu2.22) ...

Creating config file /etc/php/7.4/mods-available/zip.ini with new version
Setting up libwebp6:amd64 (0.6.1-2ubuntu0.20.04.3) ...
Setting up fonts-dejavu-core (2.37-1) ...
Setting up libjpeg-turbo8:amd64 (2.0.3-0ubuntu1.20.04.3) ...
Setting up libonig5:amd64 (6.9.4-1) ...
Setting up libjpeg8:amd64 (8c-2ubuntu8) ...
Setting up fontconfig-config (2.13.1-2ubuntu3) ...
Setting up php7.4-mbstring (7.4.3-4ubuntu2.22) ...

Creating config file /etc/php/7.4/mods-available/mbstring.ini with new version
Setting up libtiff5:amd64 (4.1.0+git191117-2ubuntu0.20.04.12) ...
Setting up libfontconfig1:amd64 (2.13.1-2ubuntu3) ...
Setting up libgd3:amd64 (2.2.5-5.2ubuntu2.1) ...
Setting up php7.4-gd (7.4.3-4ubuntu2.22) ...

Creating config file /etc/php/7.4/mods-available/gd.ini with new version
Processing triggers for man-db (2.9.1-1) ...
Processing triggers for libc-bin (2.31-0ubuntu9.9) ...
Processing triggers for php7.4-cli (7.4.3-4ubuntu2.22) ...
root@unionchurchss:~#
I installed and configured Apache:
root@unionchurchss:~# apt update
Hit:1 http://security.ubuntu.com/ubuntu focal-security InRelease
Hit:2 http://mirrors.digitalocean.com/ubuntu focal InRelease
Hit:3 http://mirrors.digitalocean.com/ubuntu focal-updates InRelease
Hit:4 https://repos-droplet.digitalocean.com/apt/droplet-agent main InRelease
Hit:5 https://repos.insights.digitalocean.com/apt/do-agent main InRelease
Hit:6 http://mirrors.digitalocean.com/ubuntu focal-backports InRelease
Reading package lists... Done
Building dependency tree
Reading state information... Done
194 packages can be upgraded. Run 'apt list --upgradable' to see them.
root@unionchurchss:~# apt install apache2
Reading package lists... Done
Building dependency tree
Reading state information... Done
The following additional packages will be installed:
  apache2-bin apache2-data apache2-utils libapr1 libaprutil1 libaprutil1-dbd-sqlite3 libaprutil1-ldap libjansson4 liblua5.2-0 ssl-cert
Suggested packages:
  apache2-doc apache2-suexec-pristine | apache2-suexec-custom www-browser openssl-blacklist
The following NEW packages will be installed:
  apache2 apache2-bin apache2-data apache2-utils libapr1 libaprutil1 libaprutil1-dbd-sqlite3 libaprutil1-ldap libjansson4 liblua5.2-0 ssl-cert
0 upgraded, 11 newly installed, 0 to remove and 194 not upgraded.
Need to get 1873 kB of archives.
After this operation, 8118 kB of additional disk space will be used.
Do you want to continue? [Y/n] Y
Get:1 http://mirrors.digitalocean.com/ubuntu focal/main amd64 libapr1 amd64 1.6.5-1ubuntu1 [91.4 kB]
Get:2 http://mirrors.digitalocean.com/ubuntu focal-updates/main amd64 libaprutil1 amd64 1.6.1-4ubuntu2.2 [85.1 kB]
Get:3 http://mirrors.digitalocean.com/ubuntu focal-updates/main amd64 libaprutil1-dbd-sqlite3 amd64 1.6.1-4ubuntu2.2 [10.5 kB]
Get:4 http://mirrors.digitalocean.com/ubuntu focal-updates/main amd64 libaprutil1-ldap amd64 1.6.1-4ubuntu2.2 [8752 B]
Get:5 http://mirrors.digitalocean.com/ubuntu focal/main amd64 libjansson4 amd64 2.12-1build1 [28.9 kB]
Get:6 http://mirrors.digitalocean.com/ubuntu focal/main amd64 liblua5.2-0 amd64 5.2.4-1.1build3 [106 kB]
Get:7 http://mirrors.digitalocean.com/ubuntu focal-updates/main amd64 apache2-bin amd64 2.4.41-4ubuntu3.17 [1187 kB]
Get:8 http://mirrors.digitalocean.com/ubuntu focal-updates/main amd64 apache2-data all 2.4.41-4ubuntu3.17 [158 kB]
Get:9 http://mirrors.digitalocean.com/ubuntu focal-updates/main amd64 apache2-utils amd64 2.4.41-4ubuntu3.17 [84.1 kB]
Get:10 http://mirrors.digitalocean.com/ubuntu focal-updates/main amd64 apache2 amd64 2.4.41-4ubuntu3.17 [95.5 kB]
Get:11 http://mirrors.digitalocean.com/ubuntu focal/main amd64 ssl-cert all 1.0.39 [17.0 kB]
Fetched 1873 kB in 0s (4292 kB/s)
Preconfiguring packages ...
Selecting previously unselected package libapr1:amd64.
(Reading database ... 64200 files and directories currently installed.)
Preparing to unpack .../00-libapr1_1.6.5-1ubuntu1_amd64.deb ...
Unpacking libapr1:amd64 (1.6.5-1ubuntu1) ...
Selecting previously unselected package libaprutil1:amd64.
Preparing to unpack .../01-libaprutil1_1.6.1-4ubuntu2.2_amd64.deb ...
Unpacking libaprutil1:amd64 (1.6.1-4ubuntu2.2) ...
Selecting previously unselected package libaprutil1-dbd-sqlite3:amd64.
Preparing to unpack .../02-libaprutil1-dbd-sqlite3_1.6.1-4ubuntu2.2_amd64.deb ...
Unpacking libaprutil1-dbd-sqlite3:amd64 (1.6.1-4ubuntu2.2) ...
Selecting previously unselected package libaprutil1-ldap:amd64.
Preparing to unpack .../03-libaprutil1-ldap_1.6.1-4ubuntu2.2_amd64.deb ...
Unpacking libaprutil1-ldap:amd64 (1.6.1-4ubuntu2.2) ...
Selecting previously unselected package libjansson4:amd64.
Preparing to unpack .../04-libjansson4_2.12-1build1_amd64.deb ...
Unpacking libjansson4:amd64 (2.12-1build1) ...
Selecting previously unselected package liblua5.2-0:amd64.
Preparing to unpack .../05-liblua5.2-0_5.2.4-1.1build3_amd64.deb ...
Unpacking liblua5.2-0:amd64 (5.2.4-1.1build3) ...
Selecting previously unselected package apache2-bin.
Preparing to unpack .../06-apache2-bin_2.4.41-4ubuntu3.17_amd64.deb ...
Unpacking apache2-bin (2.4.41-4ubuntu3.17) ...
Selecting previously unselected package apache2-data.
Preparing to unpack .../07-apache2-data_2.4.41-4ubuntu3.17_all.deb ...
Unpacking apache2-data (2.4.41-4ubuntu3.17) ...
Selecting previously unselected package apache2-utils.
Preparing to unpack .../08-apache2-utils_2.4.41-4ubuntu3.17_amd64.deb ...
Unpacking apache2-utils (2.4.41-4ubuntu3.17) ...
Selecting previously unselected package apache2.
Preparing to unpack .../09-apache2_2.4.41-4ubuntu3.17_amd64.deb ...
Unpacking apache2 (2.4.41-4ubuntu3.17) ...
Selecting previously unselected package ssl-cert.
Preparing to unpack .../10-ssl-cert_1.0.39_all.deb ...
Unpacking ssl-cert (1.0.39) ...
Setting up libapr1:amd64 (1.6.5-1ubuntu1) ...
Setting up libjansson4:amd64 (2.12-1build1) ...
Setting up ssl-cert (1.0.39) ...
Setting up liblua5.2-0:amd64 (5.2.4-1.1build3) ...
Setting up apache2-data (2.4.41-4ubuntu3.17) ...
Setting up libaprutil1:amd64 (1.6.1-4ubuntu2.2) ...
Setting up libaprutil1-ldap:amd64 (1.6.1-4ubuntu2.2) ...
Setting up libaprutil1-dbd-sqlite3:amd64 (1.6.1-4ubuntu2.2) ...
Setting up apache2-utils (2.4.41-4ubuntu3.17) ...
Setting up apache2-bin (2.4.41-4ubuntu3.17) ...
Setting up apache2 (2.4.41-4ubuntu3.17) ...
Enabling module mpm_event.
Enabling module authz_core.
Enabling module authz_host.
Enabling module authn_core.
Enabling module auth_basic.
Enabling module access_compat.
Enabling module authn_file.
Enabling module authz_user.
Enabling module alias.
Enabling module dir.
Enabling module autoindex.
Enabling module env.
Enabling module mime.
Enabling module negotiation.
Enabling module setenvif.
Enabling module filter.
Enabling module deflate.
Enabling module status.
Enabling module reqtimeout.
Enabling conf charset.
Enabling conf localized-error-pages.
Enabling conf other-vhosts-access-log.
Enabling conf security.
Enabling conf serve-cgi-bin.
Enabling site 000-default.
Created symlink /etc/systemd/system/multi-user.target.wants/apache2.service → /lib/systemd/system/apache2.service.
Created symlink /etc/systemd/system/multi-user.target.wants/apache-htcacheclean.service → /lib/systemd/system/apache-htcacheclean.service.
Processing triggers for ufw (0.36-6ubuntu1) ...
Processing triggers for systemd (245.4-4ubuntu3.17) ...
Processing triggers for man-db (2.9.1-1) ...
Processing triggers for libc-bin (2.31-0ubuntu9.9) ...
root@unionchurchss:~# ufw app list
Available applications:
  Apache
  Apache Full
  Apache Secure
  OpenSSH
root@unionchurchss:~# ufw allow in "Apache"
Rules updated
Rules updated (v6)
root@unionchurchss:~# ufw status
Status: inactive
root@unionchurchss:~# ufw allow in 80
Rules updated
Rules updated (v6)
root@unionchurchss:~# ufw status
Status: inactive
root@unionchurchss:~# ufw enable
Command may disrupt existing ssh connections. Proceed with operation (y|n)? y
Firewall is active and enabled on system startup
root@unionchurchss:~# ufw status
Status: active

To                         Action      From
--                         ------      ----
Apache                     ALLOW       Anywhere
80                         ALLOW       Anywhere
Apache (v6)                ALLOW       Anywhere (v6)
80 (v6)                    ALLOW       Anywhere (v6)
root@unionchurchss:~# ufw app list
Available applications:
  Apache
  Apache Full
  Apache Secure
  OpenSSH
root@unionchurchss:~# ufw allow in "OpenSSH"
Rule added
Rule added (v6)
root@unionchurchss:~# ufw status
Status: active

To                         Action      From
--                         ------      ----
Apache                     ALLOW       Anywhere
80                         ALLOW       Anywhere
OpenSSH                    ALLOW       Anywhere
Apache (v6)                ALLOW       Anywhere (v6)
80 (v6)                    ALLOW       Anywhere (v6)
OpenSSH (v6)               ALLOW       Anywhere (v6)
root@unionchurchss:~# ufw allow in "Apache Full"
Rule added
Rule added (v6)
root@unionchurchss:~# ufw status
Status: active

To                         Action      From
--                         ------      ----
Apache                     ALLOW       Anywhere
80                         ALLOW       Anywhere
OpenSSH                    ALLOW       Anywhere
Apache Full                ALLOW       Anywhere
Apache (v6)                ALLOW       Anywhere (v6)
80 (v6)                    ALLOW       Anywhere (v6)
OpenSSH (v6)               ALLOW       Anywhere (v6)
Apache Full (v6)           ALLOW       Anywhere (v6)
I found my ipv4:

I verified that everything went as planned by visiting http://159.203.42.1/:
In order to make Apache look for an index.php file first, I applied the following change:
root@unionchurchss:~# cd /etc/apache2/mods-enabled/
root@unionchurchss:/etc/apache2/mods-enabled# cat dir.conf
<IfModule mod_dir.c>
        DirectoryIndex index.html index.cgi index.pl index.php index.xhtml index.htm
</IfModule>

# vim: syntax=apache ts=4 sw=4 sts=4 sr noet
root@unionchurchss:/etc/apache2/mods-enabled# pico dir.conf
root@unionchurchss:/etc/apache2/mods-enabled# cat dir.conf
<IfModule mod_dir.c>
        DirectoryIndex index.php index.html index.cgi index.pl index.xhtml index.htm
</IfModule>

# vim: syntax=apache ts=4 sw=4 sts=4 sr noet
I restarted the Apache web server: systemctl restart apache2. Then I checked on the status of the apache2 service:
root@unionchurchss:/etc/apache2/mods-enabled# systemctl status apache2
● apache2.service - The Apache HTTP Server
     Loaded: loaded (/lib/systemd/system/apache2.service; enabled; vendor preset: enabled)
     Active: active (running) since Wed 2024-05-29 00:16:42 UTC; 52min ago
       Docs: https://httpd.apache.org/docs/2.4/
    Process: 19842 ExecStart=/usr/sbin/apachectl start (code=exited, status=0/SUCCESS)
   Main PID: 19857 (apache2)
      Tasks: 55 (limit: 1131)
     Memory: 5.7M
     CGroup: /system.slice/apache2.service
             ├─19857 /usr/sbin/apache2 -k start
             ├─19858 /usr/sbin/apache2 -k start
             └─19859 /usr/sbin/apache2 -k start
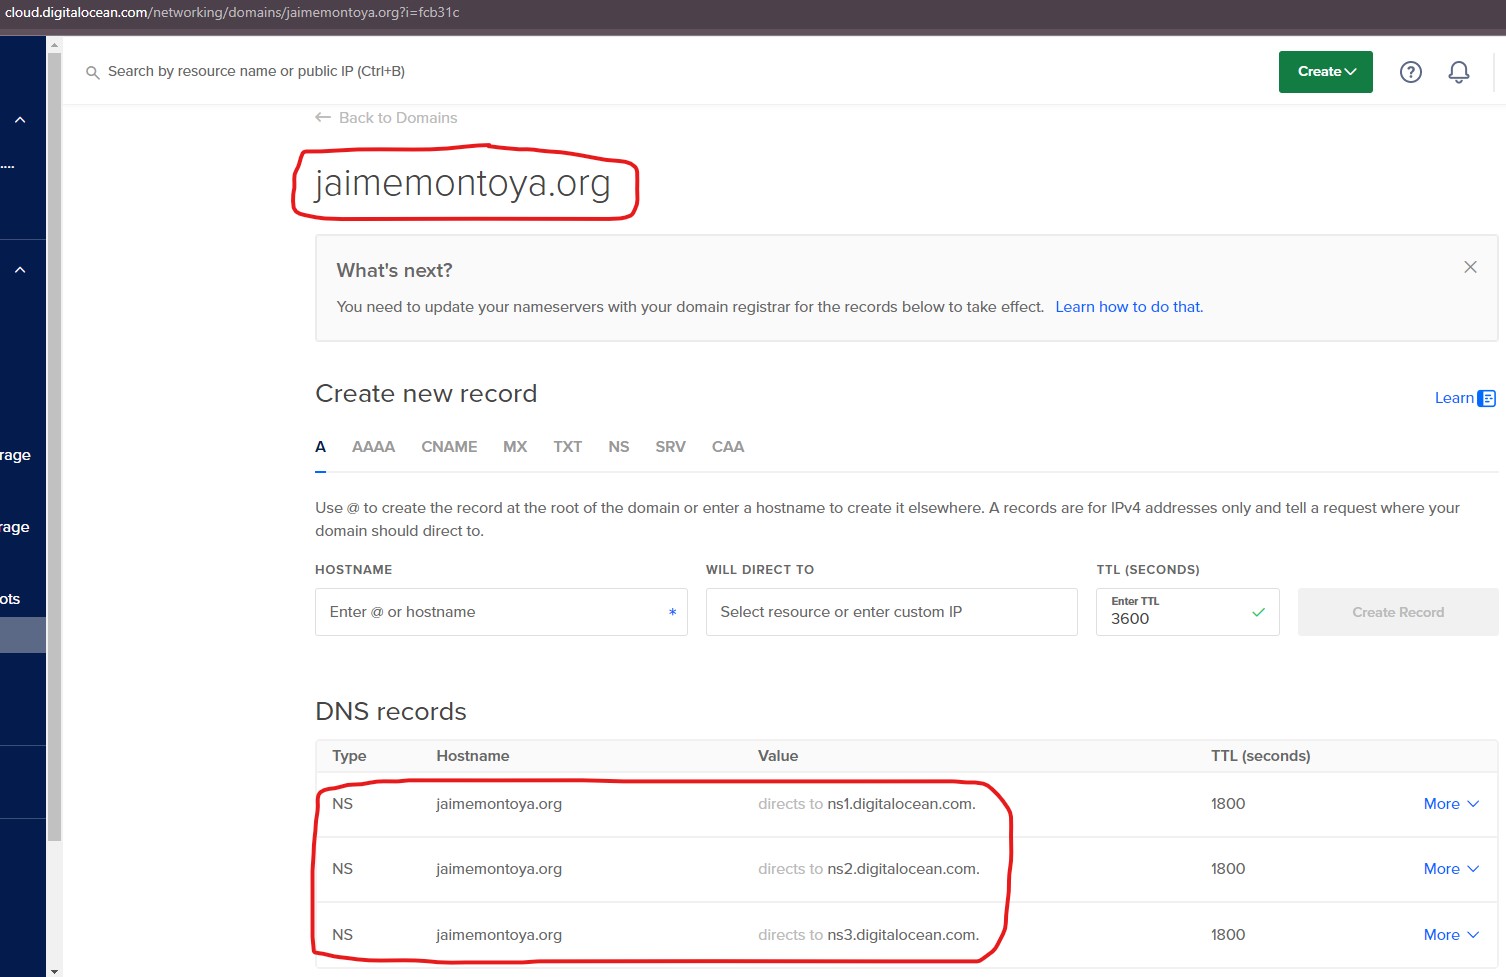
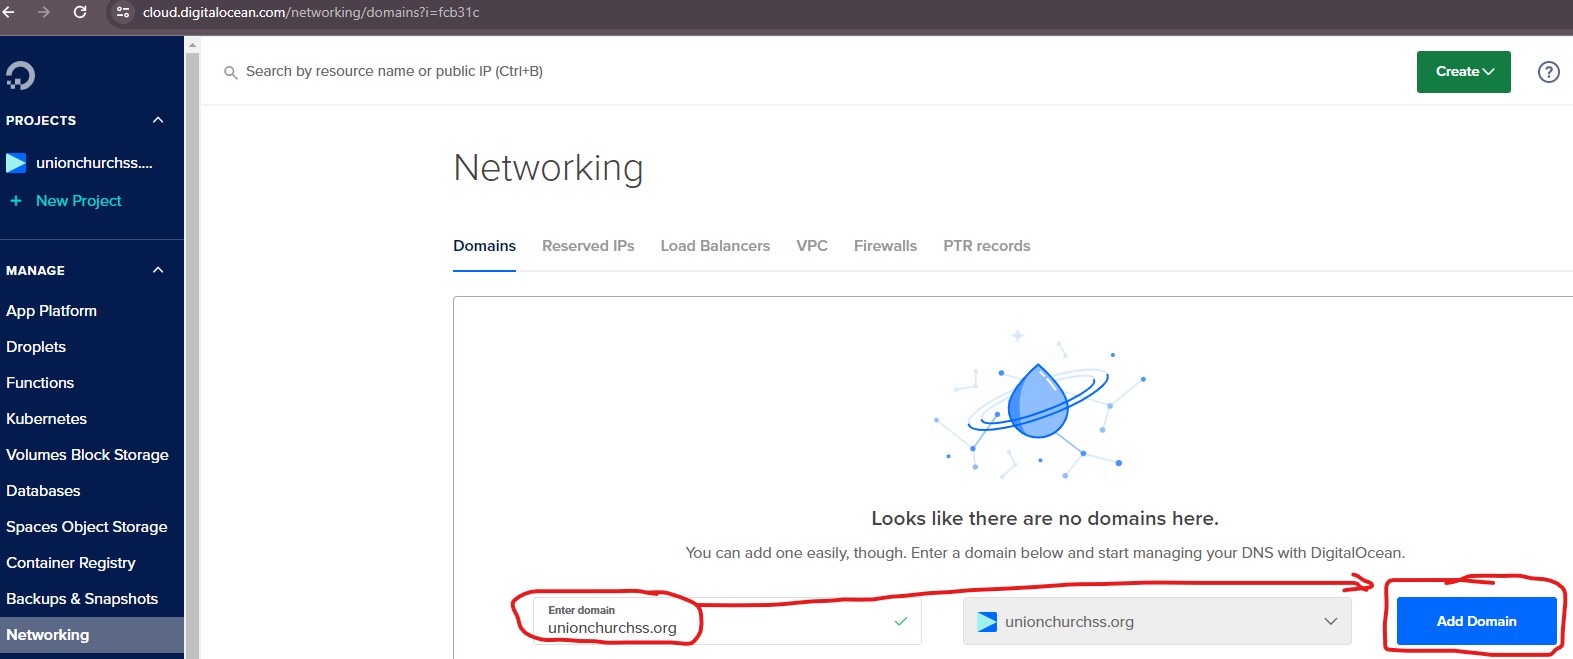
I clicked Add Domain to register unionchurchss.org as one of my domains in the DigitalOcean Networking section:
The following NS records were created:

I did the same for jaimemontoya.org: